
SSO/Microsoft AD
Step-by-step insturctions for connecting your Waydev account using Microsoft Active Directory.
ADFS Configuration
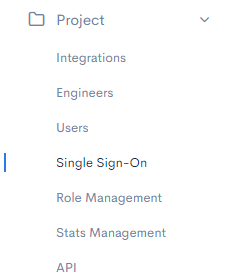
Step 1: Go to your Waydev account and navigate to Project > Single Sign-On
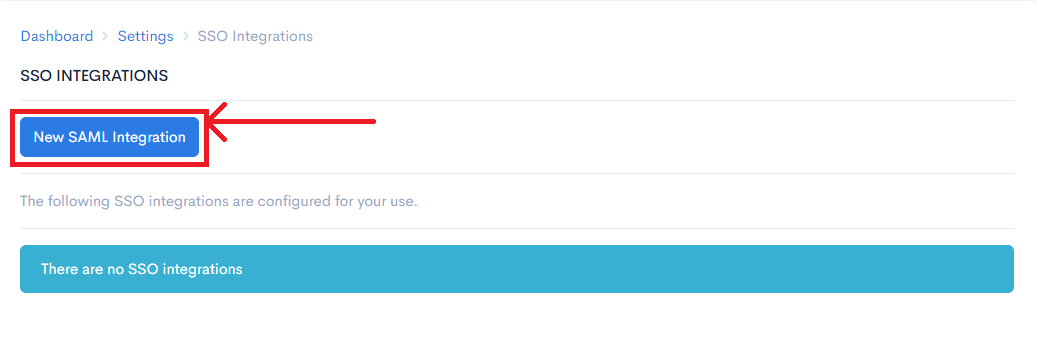
Step 2: Select New SAML Integration
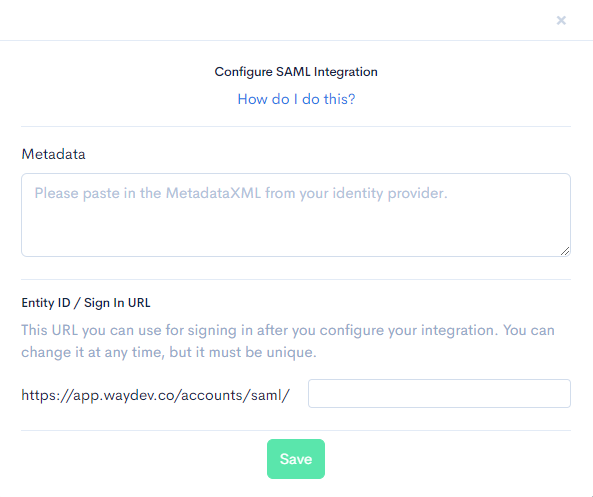
Step 3: You will see the Configure SAML integration modal. The three main pieces of data you will need to input in this modal are:
Metadata ADFS has a metadata URL (generally formatted as: https://<base_url>/FederationMetadata/2007-06/FederationMetadata.xml). Copy/paste the raw XML into this field.
Login URL This is the Entity ID which also doubles as your login URL, you can use your company name or division or team of the company in the field, whatever is most relevant. Make note of this URL as it will be re-used in ADFS.
We only support IdP-Initiated SAML requests.
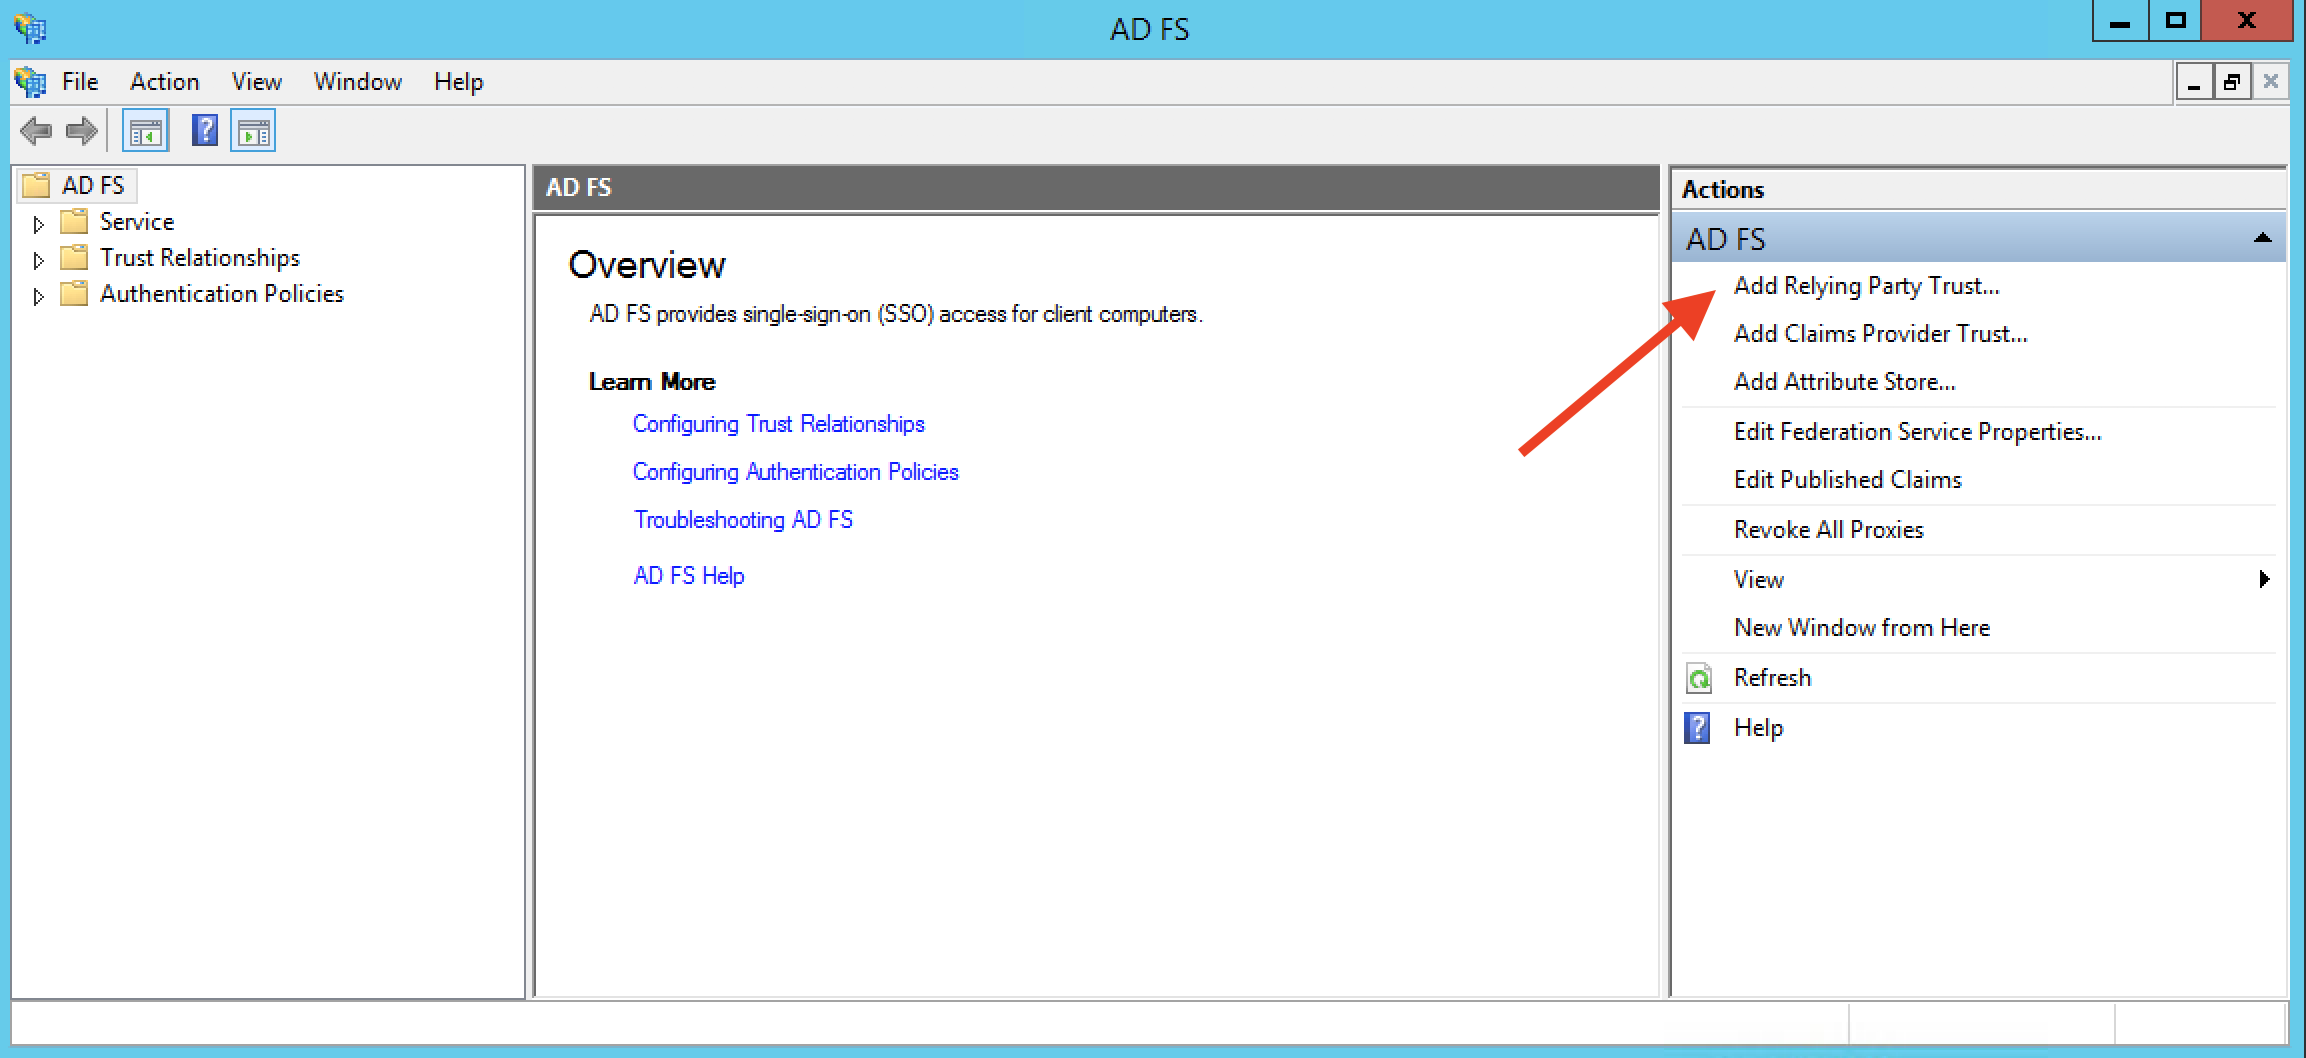
Step 4: Open up the ADFS Management screen (generally located under Server Manager > Tools > ADFS Management) and select "Add Relying Party Trust..." from the right-hand Actions menu
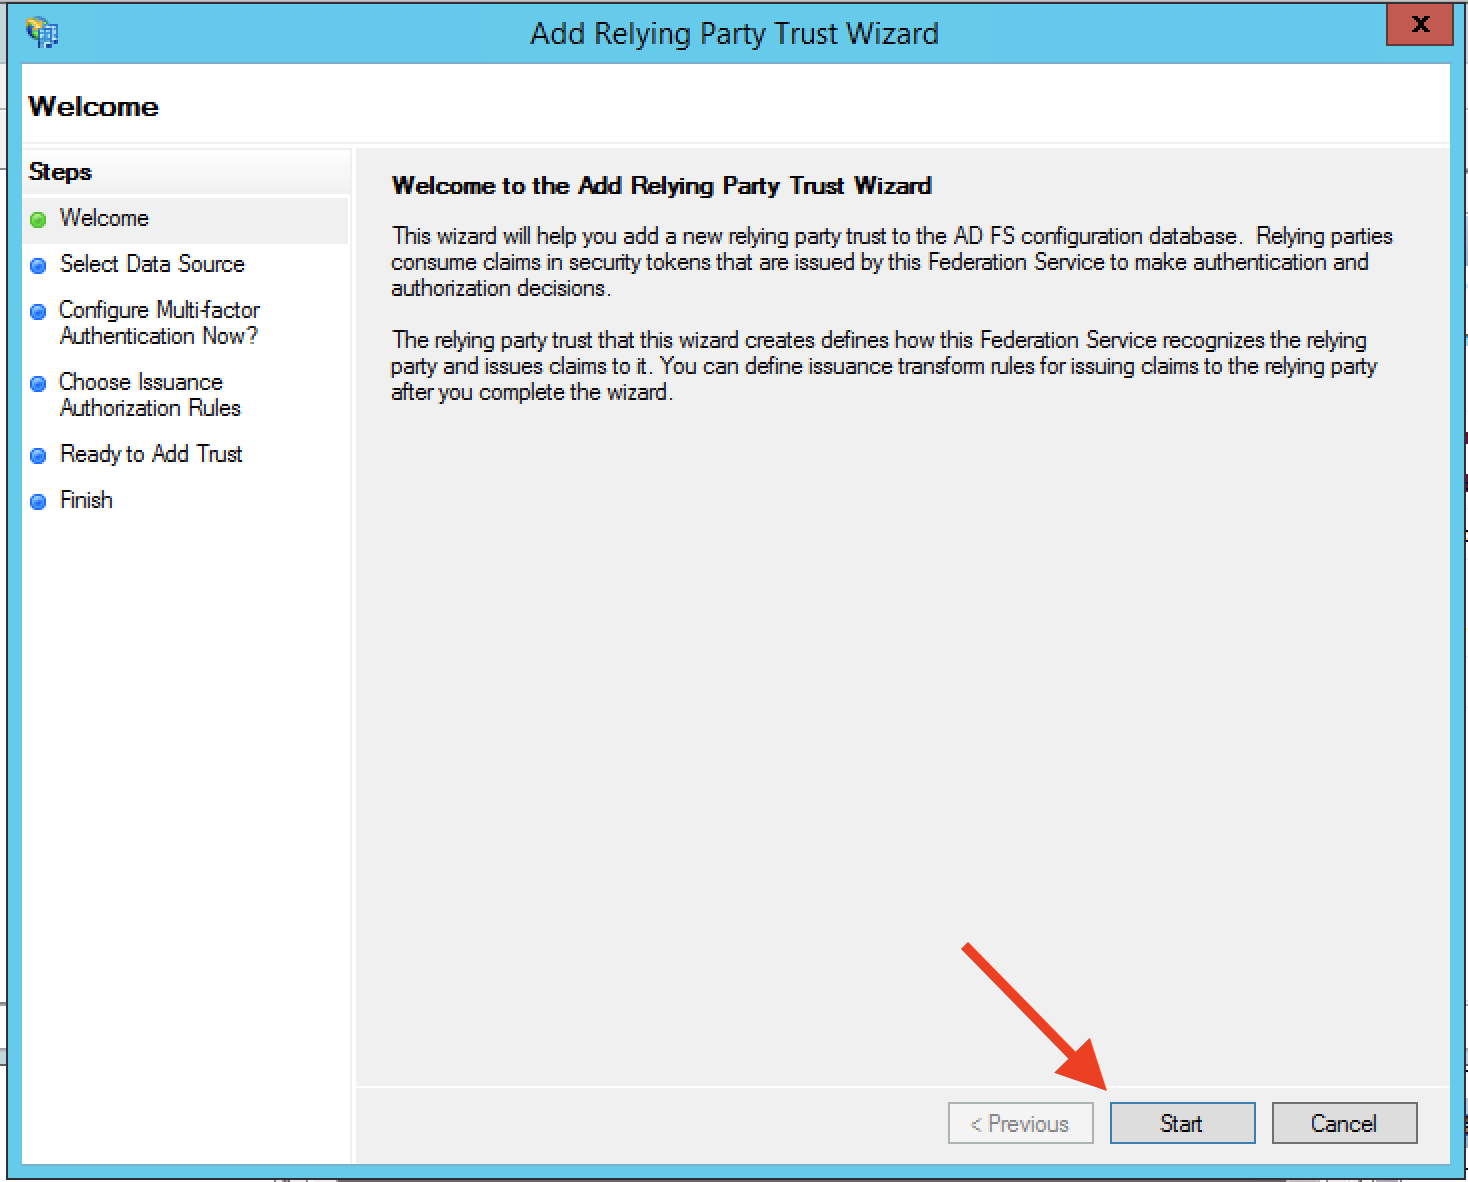
Step 5: This will start the Add Relying Party Trust Wizard. Click Start on this screen.
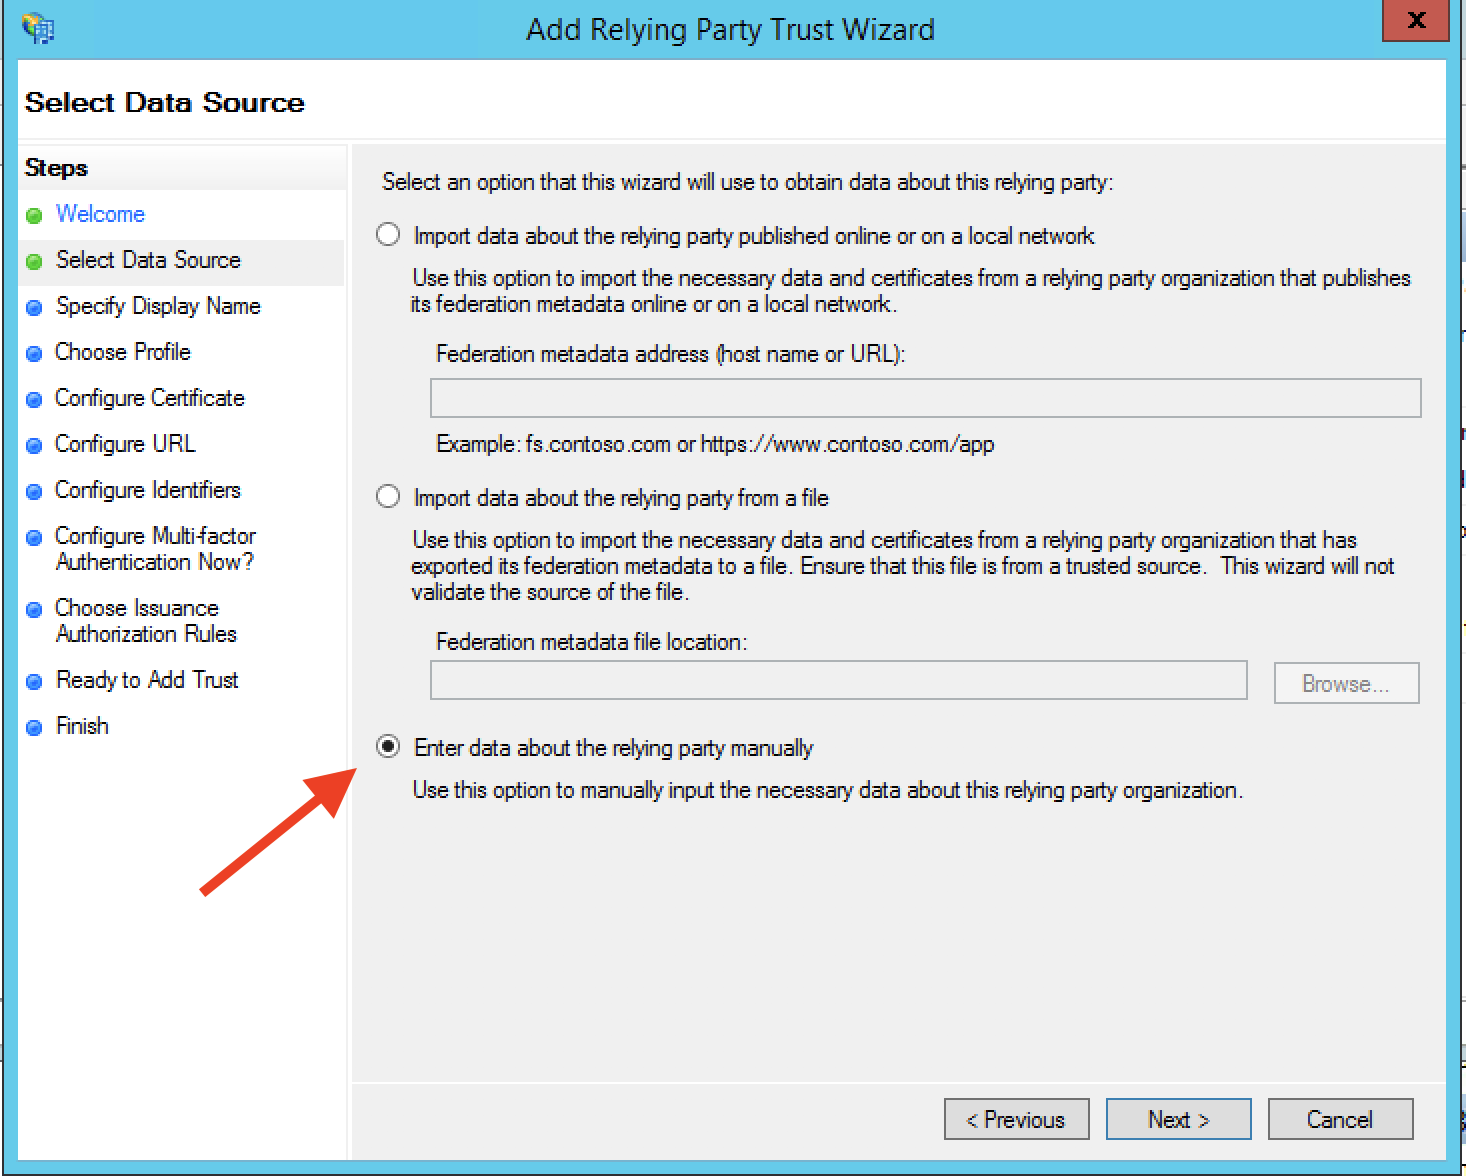
Step 6: On the Select Data Source step, choose "Enter data about the relying party manually" and click Next.
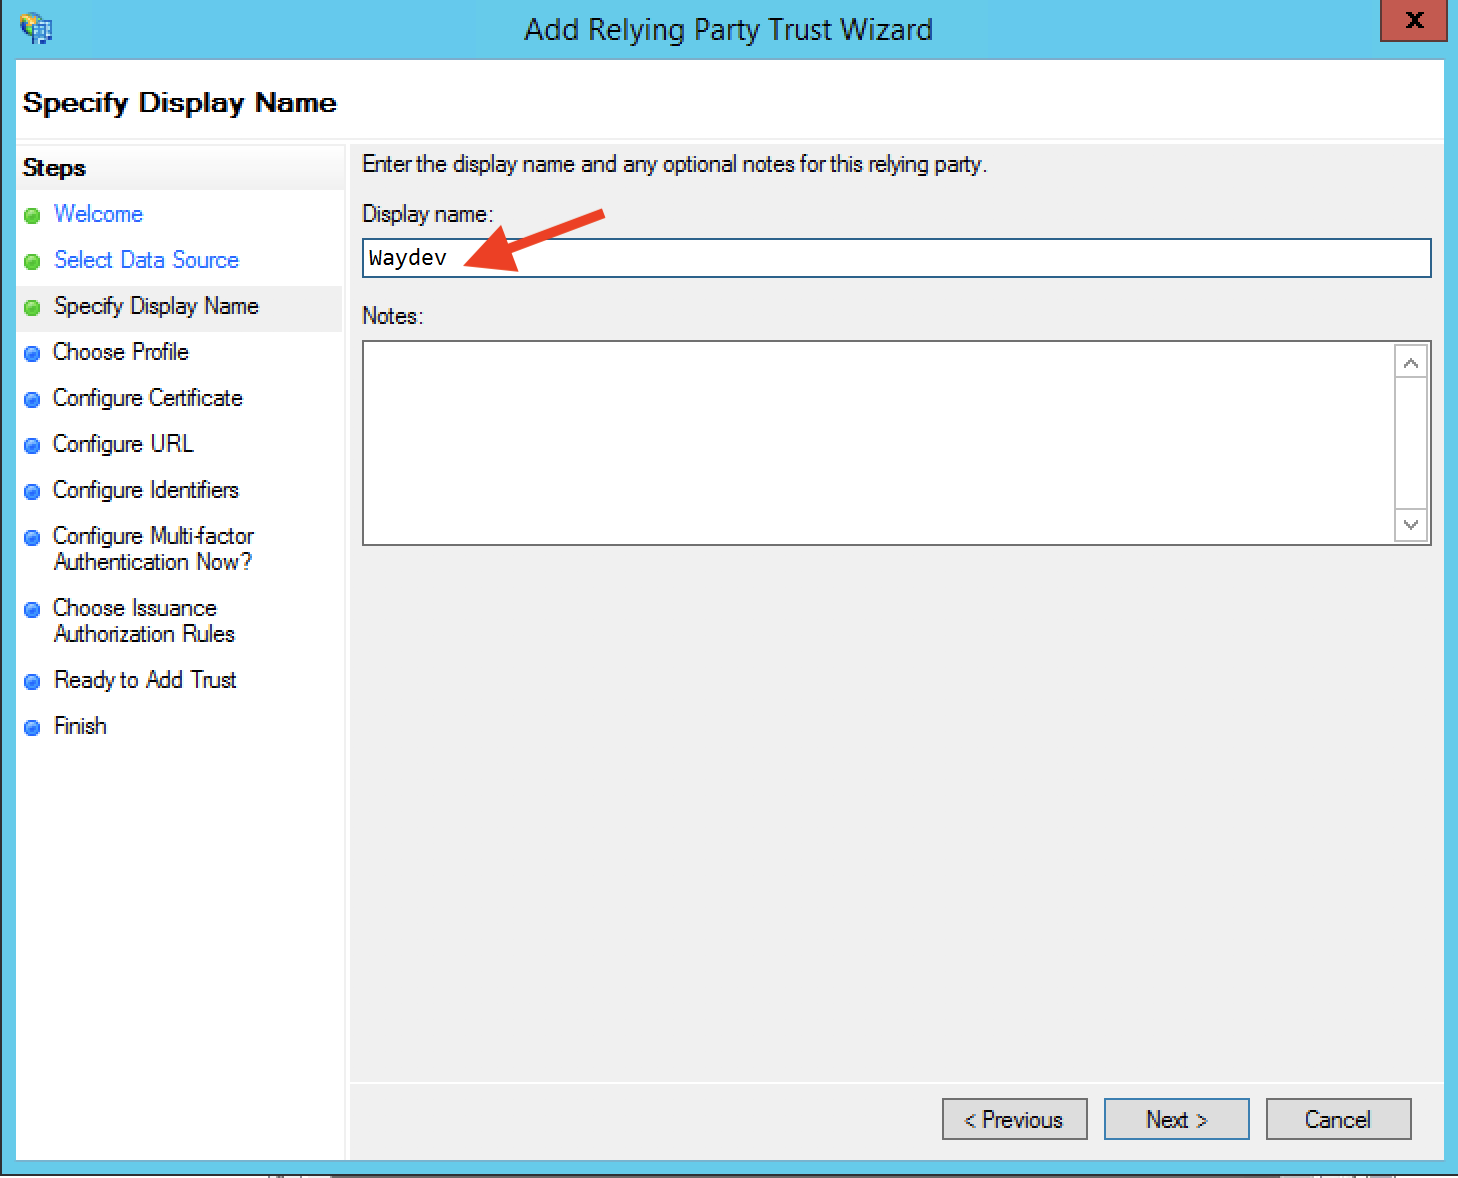
Step 7: Input an appropriate Display Name on the next screen and select Next.
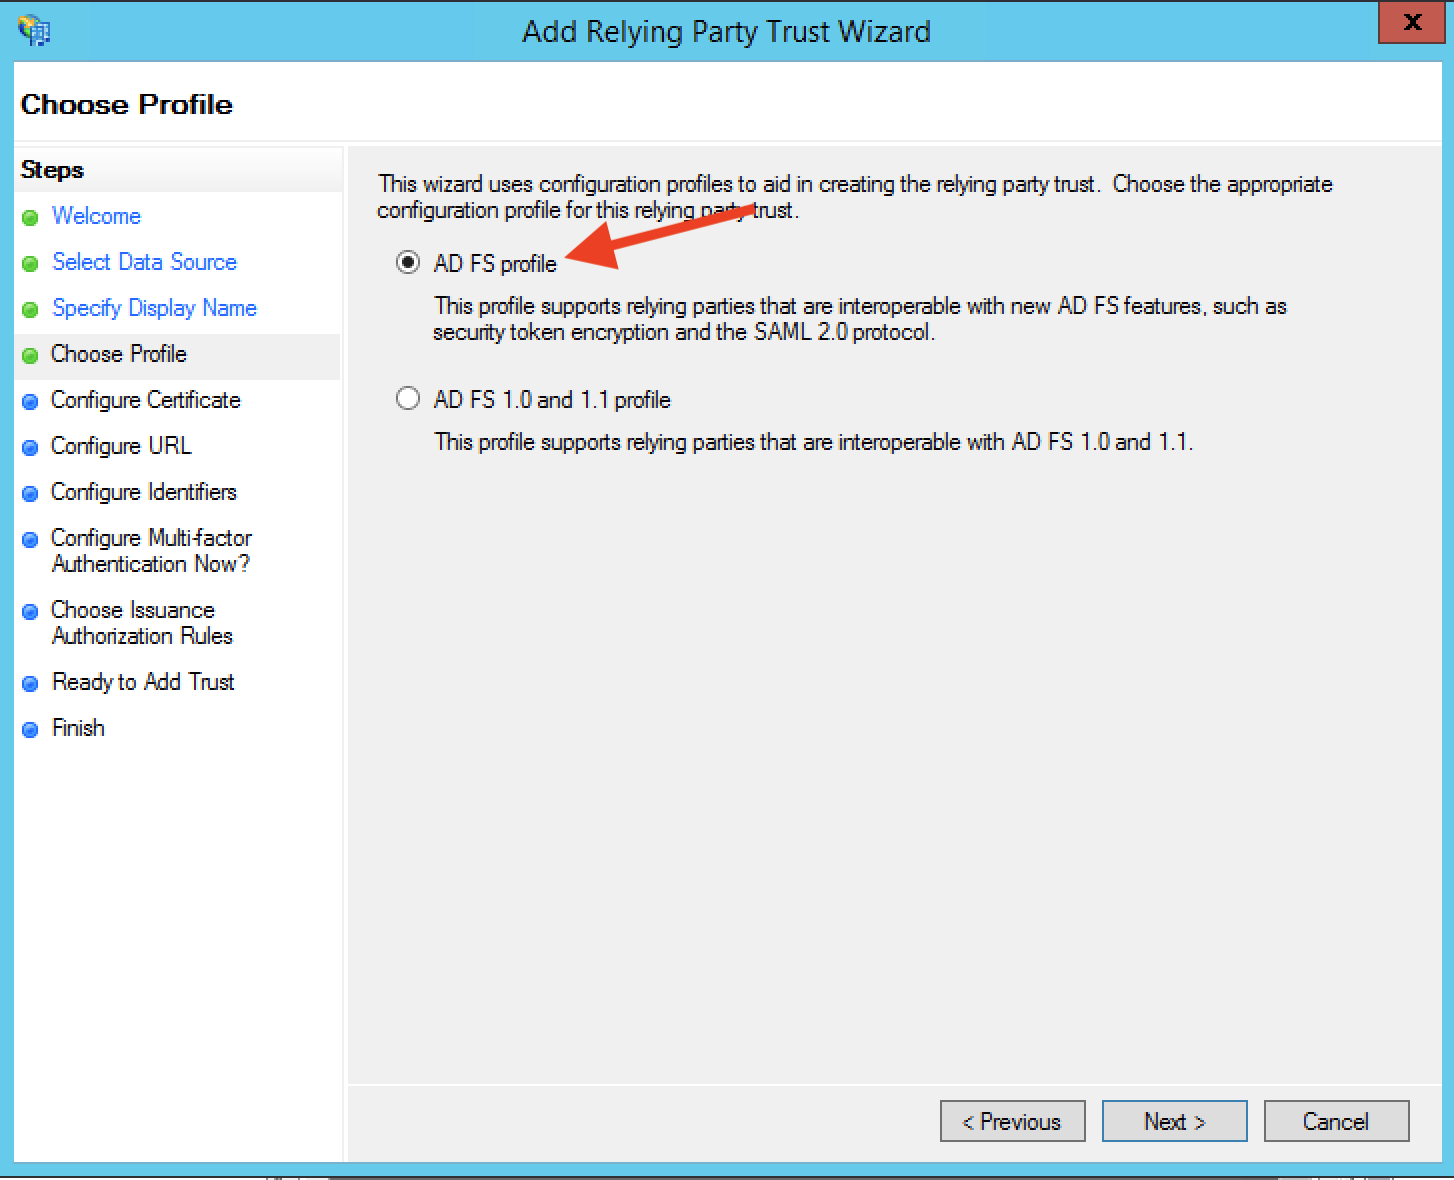
Step 8: Select the AD FS profile and select Next.
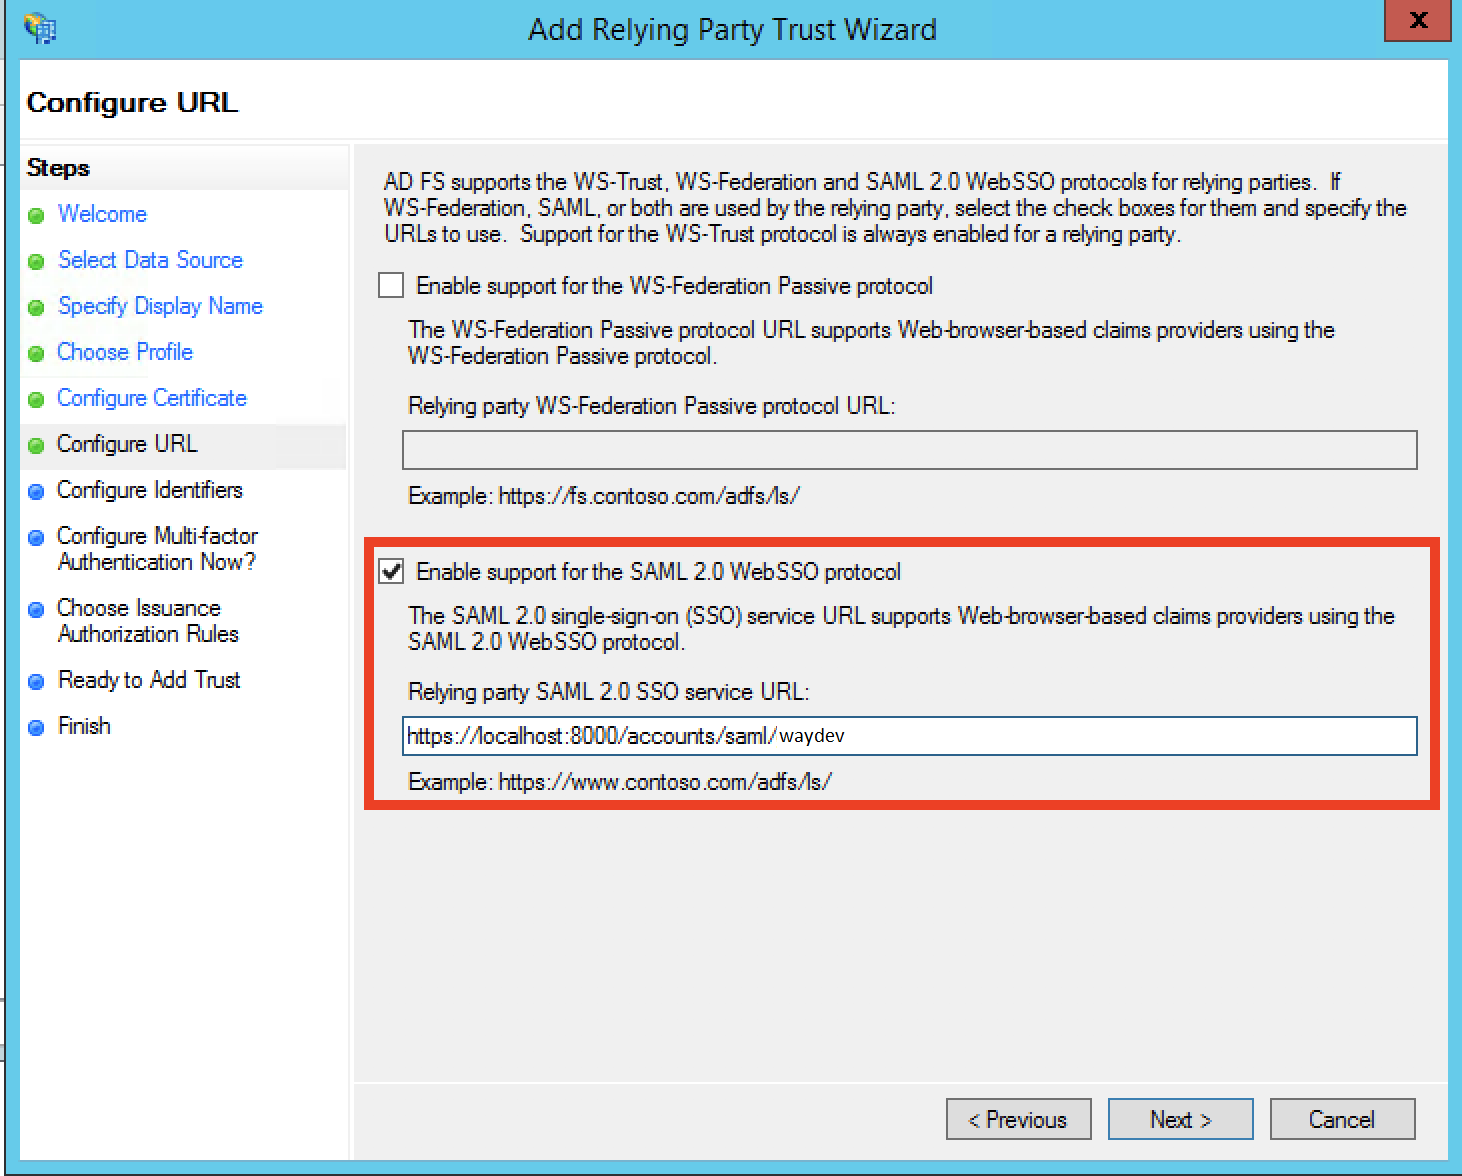
Step 9: For the Configure URL step, select "Enable support for the SAML 2.0 WebSSO protocol". Recall the Login URL we input in the Waydev SSO screen. Enter this URL as the relying party service URL and click Next.
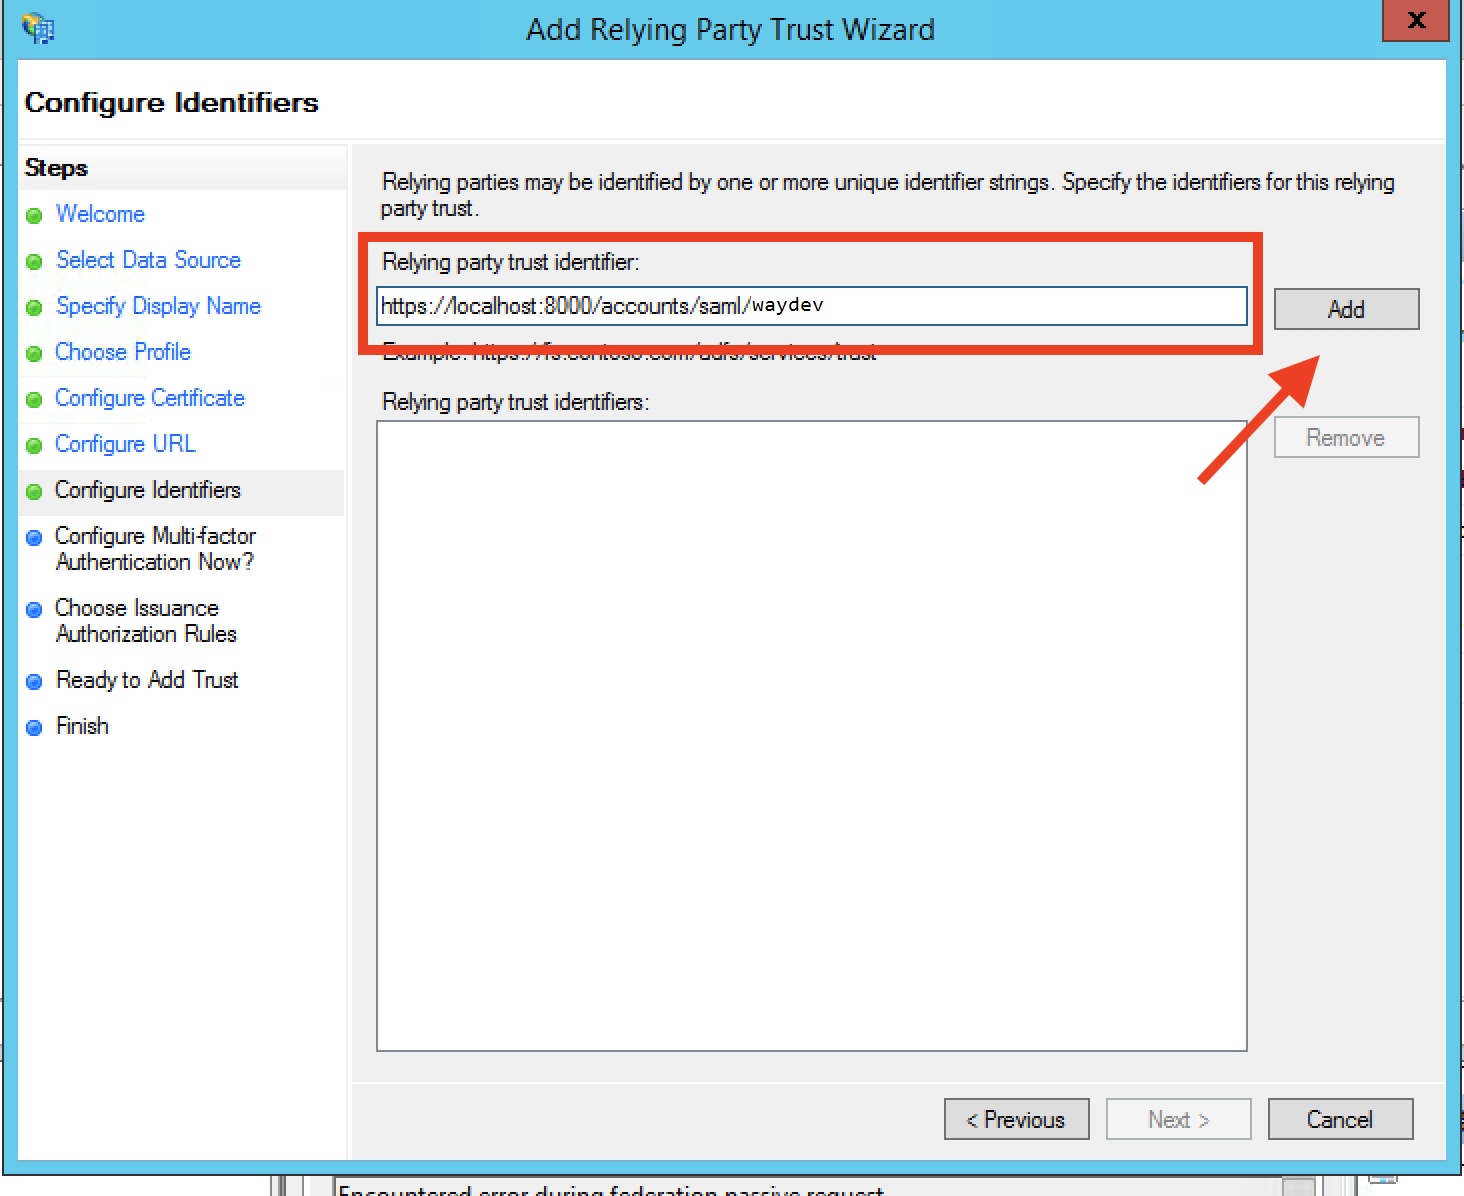
Step 10: For the Relying party trust identifier, we will re-use our same Login URL / Entity ID from the previous screen. Paste that URL into the textbox, select Add, and then Next.
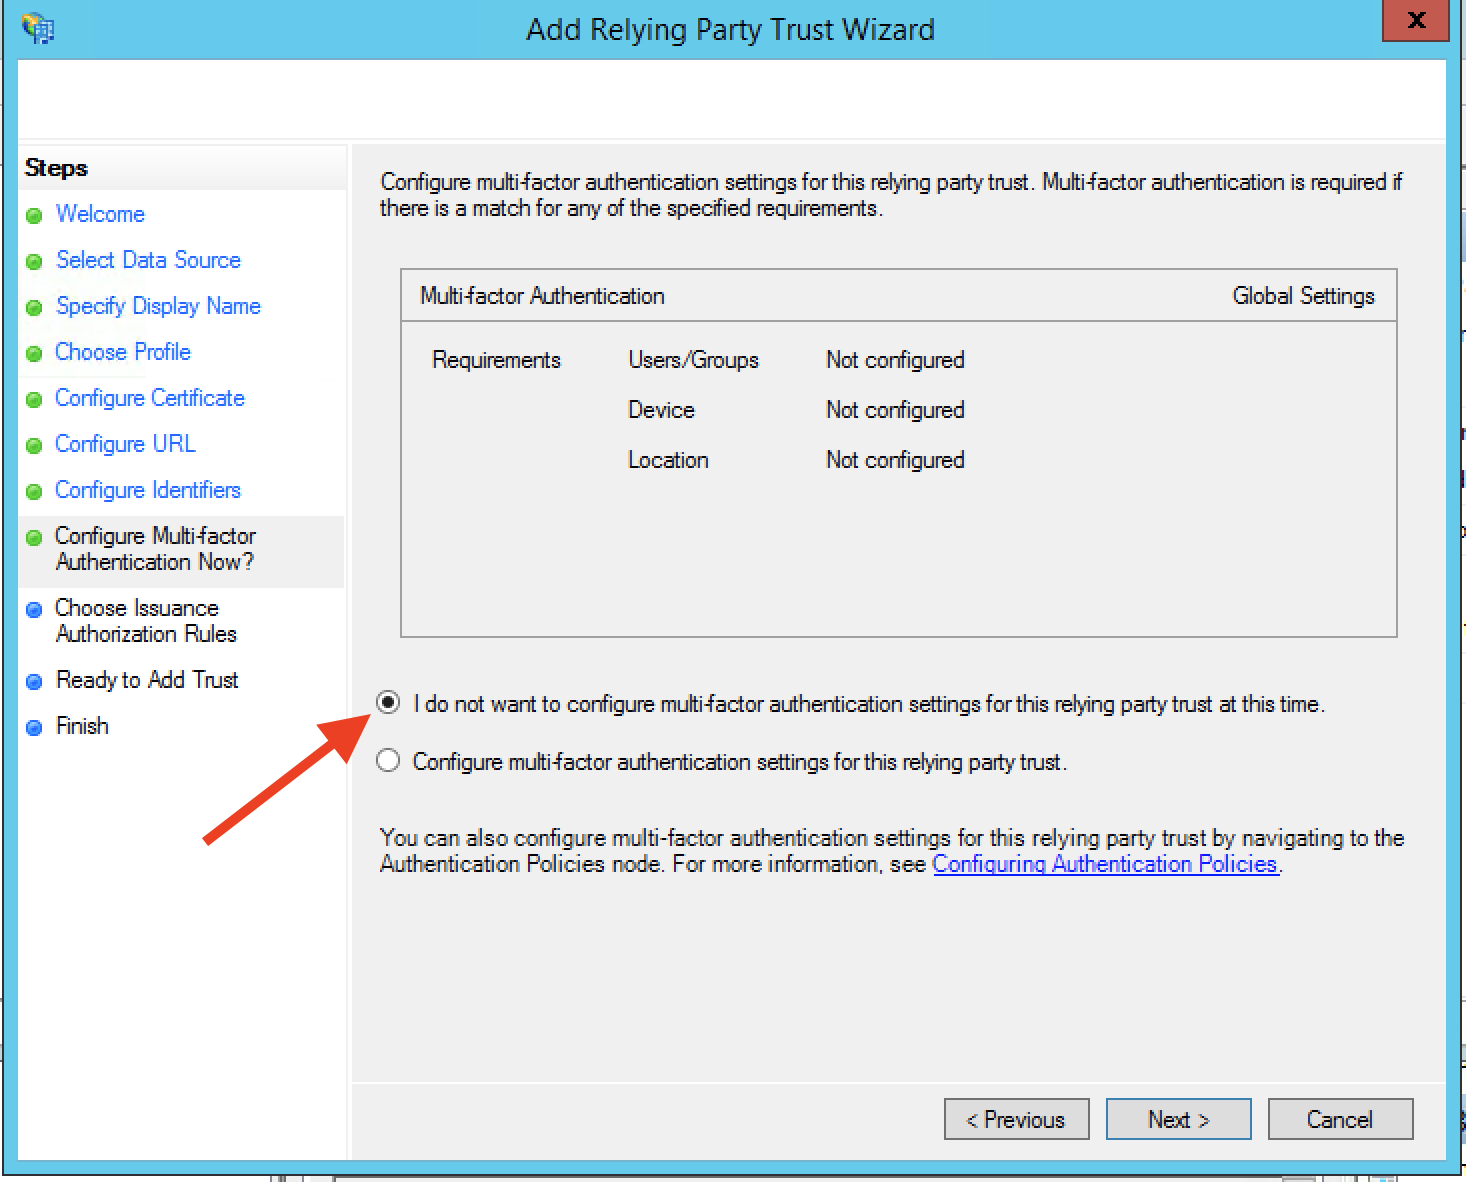
Step 11: We won't configure multi-factor authentication at this time, leave the default and click Next.
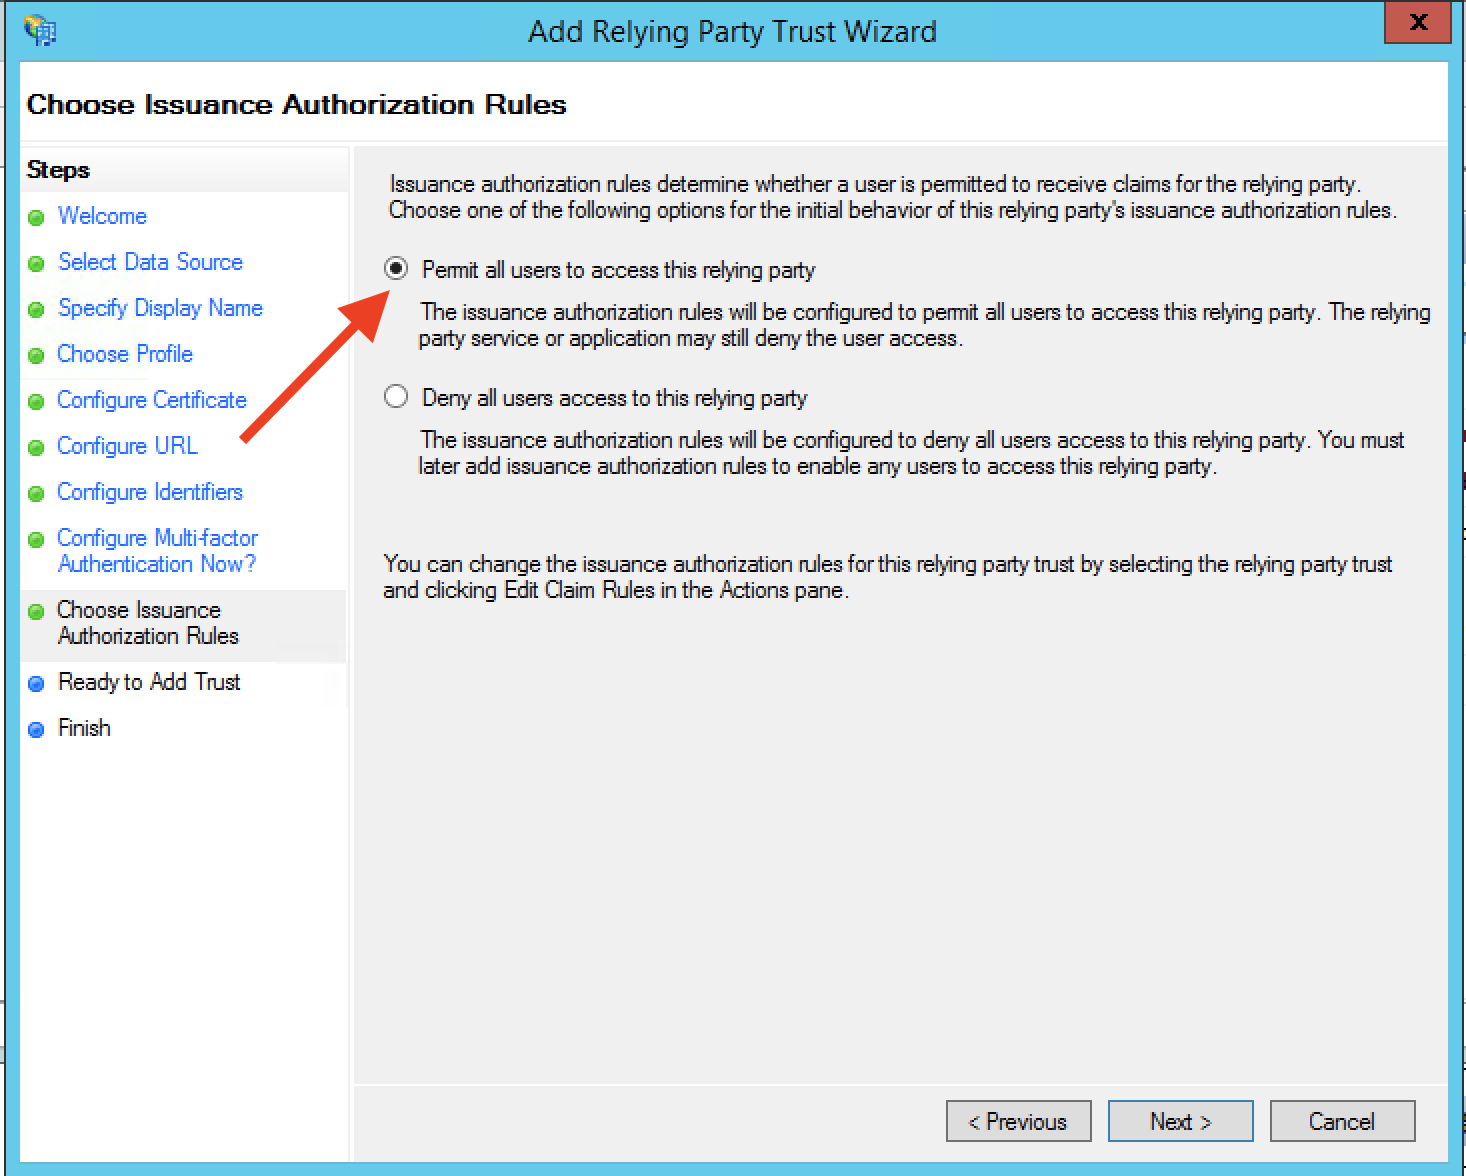
Step 12: For authorization, leave the default to permit all users to access the app (we will configure roles to limit permissions in a later screen) and select Next.
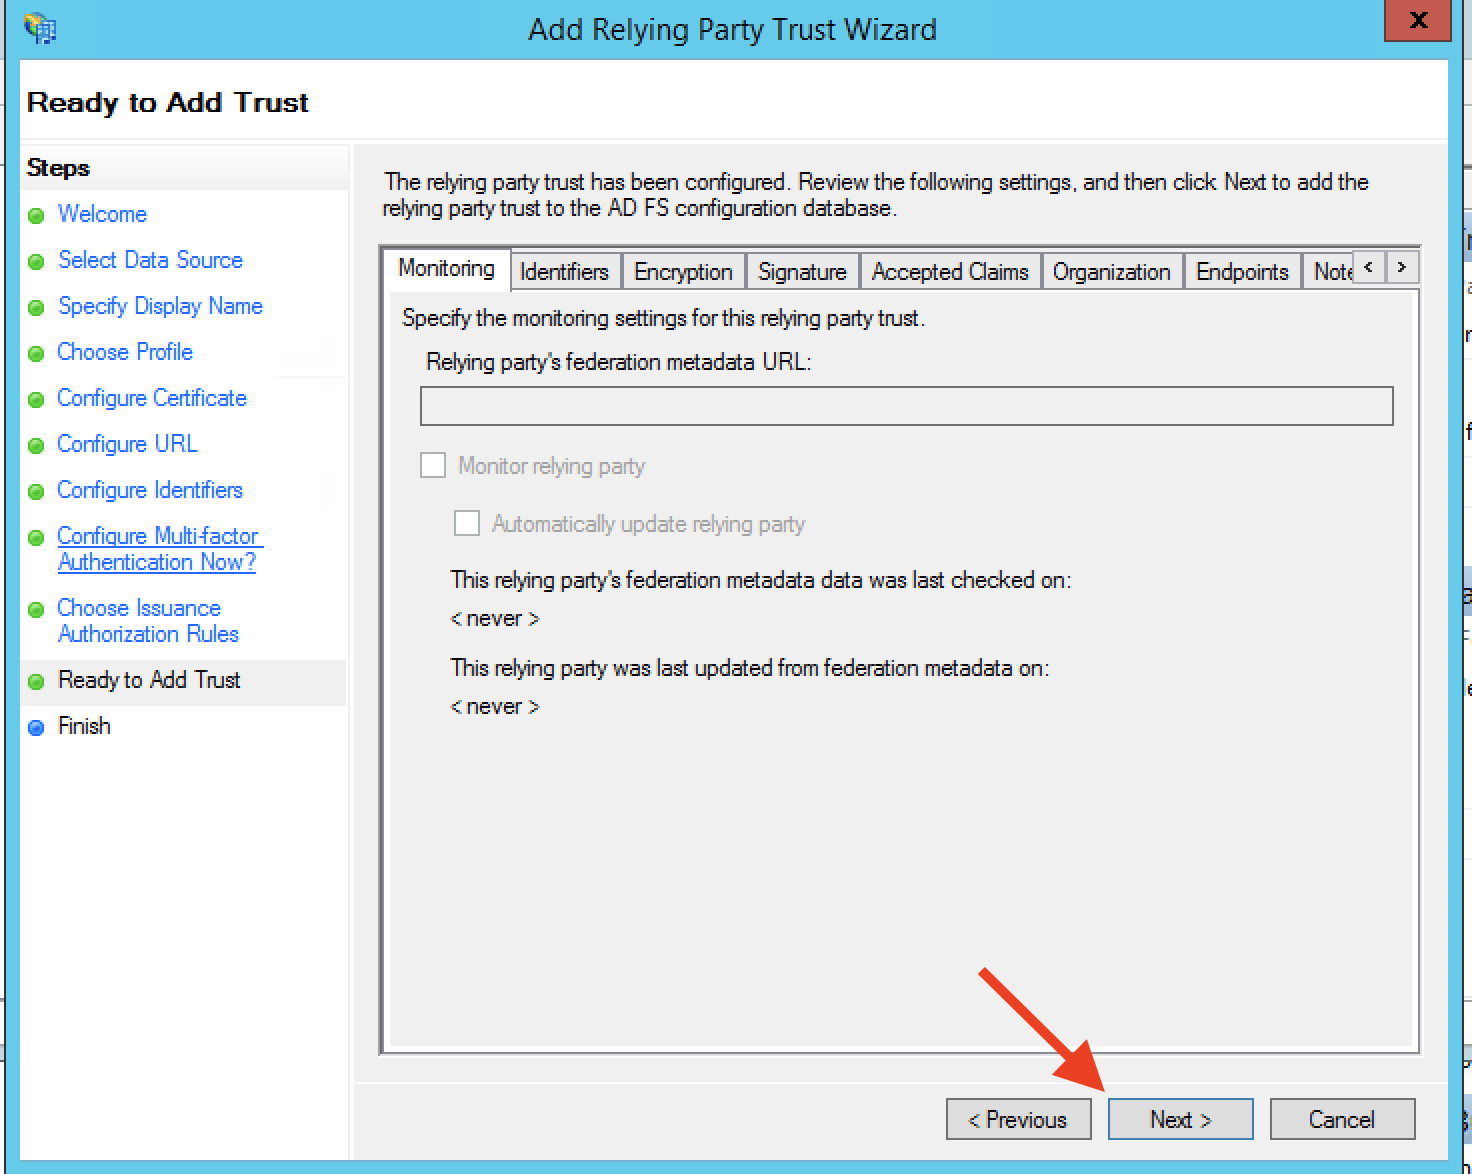
Step 13: After reviewing your settings, click Next.
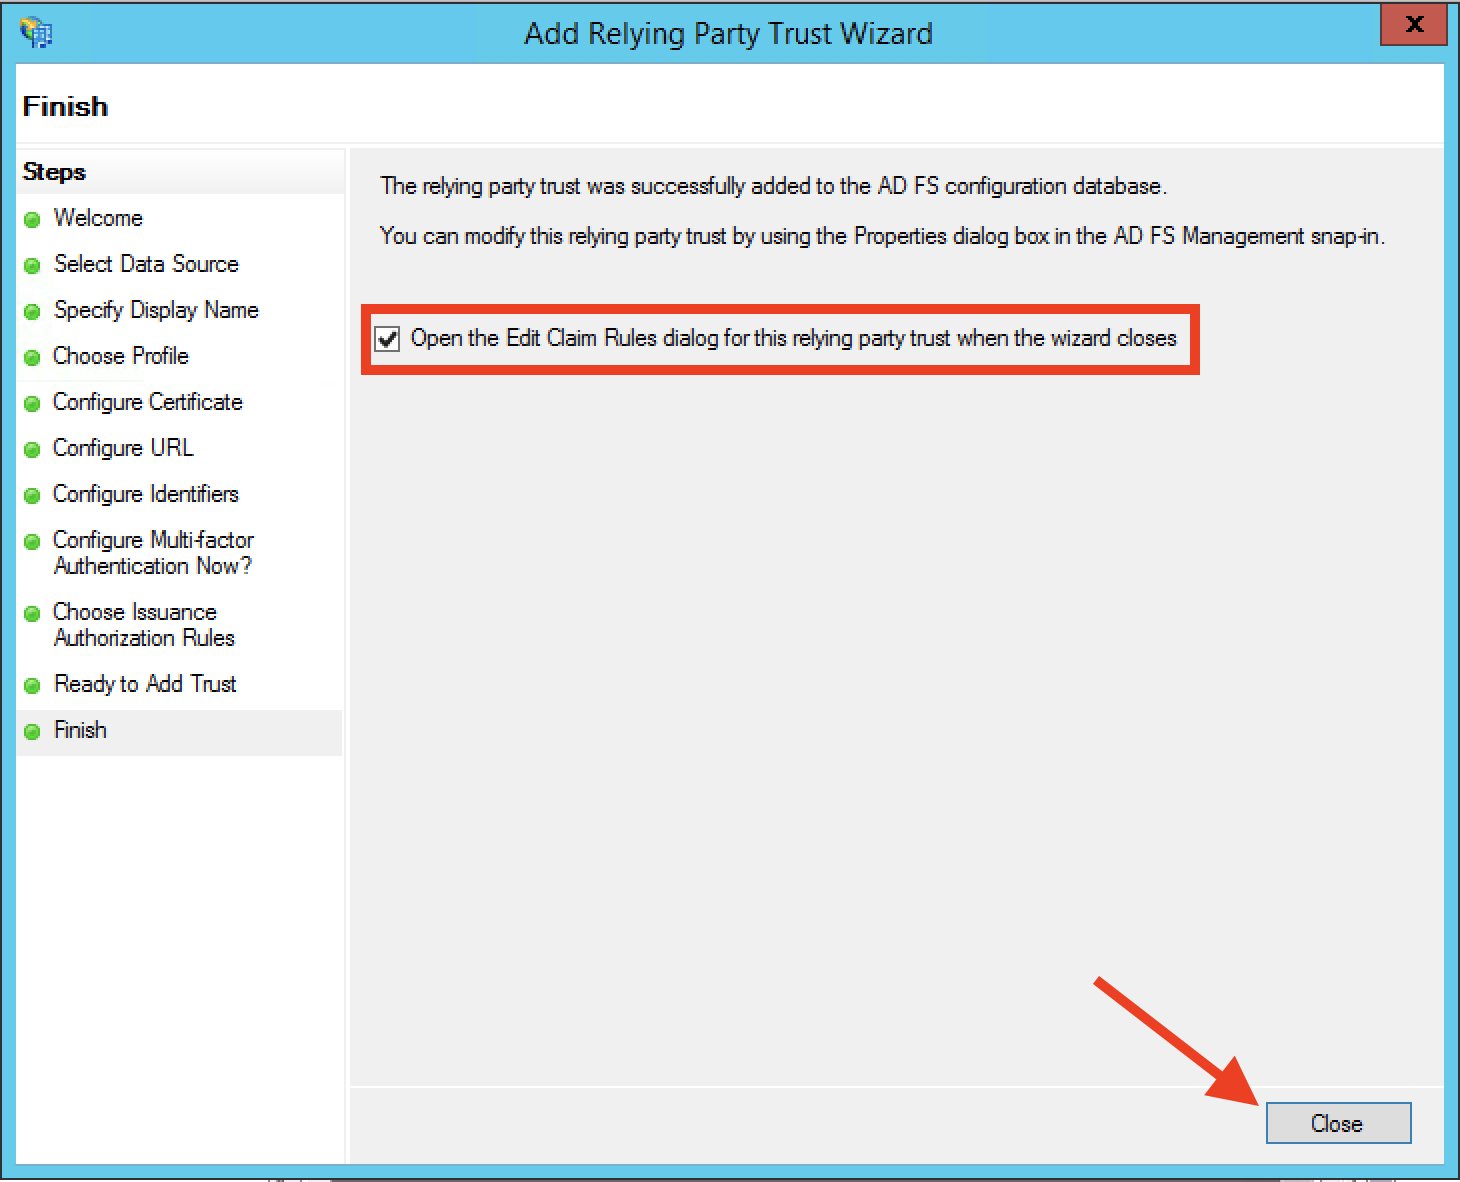
Step 14: Finally, select the Open the Edit Claim Rules dialog and click Close to finish the wizard.
Step 15: At this point, the relying party should be successfully created, and now we need to map attributes (called Claim Rules in ADFS) accordingly. The dialog should have been opened for us from the previous step and you should see a dialog similar to this:
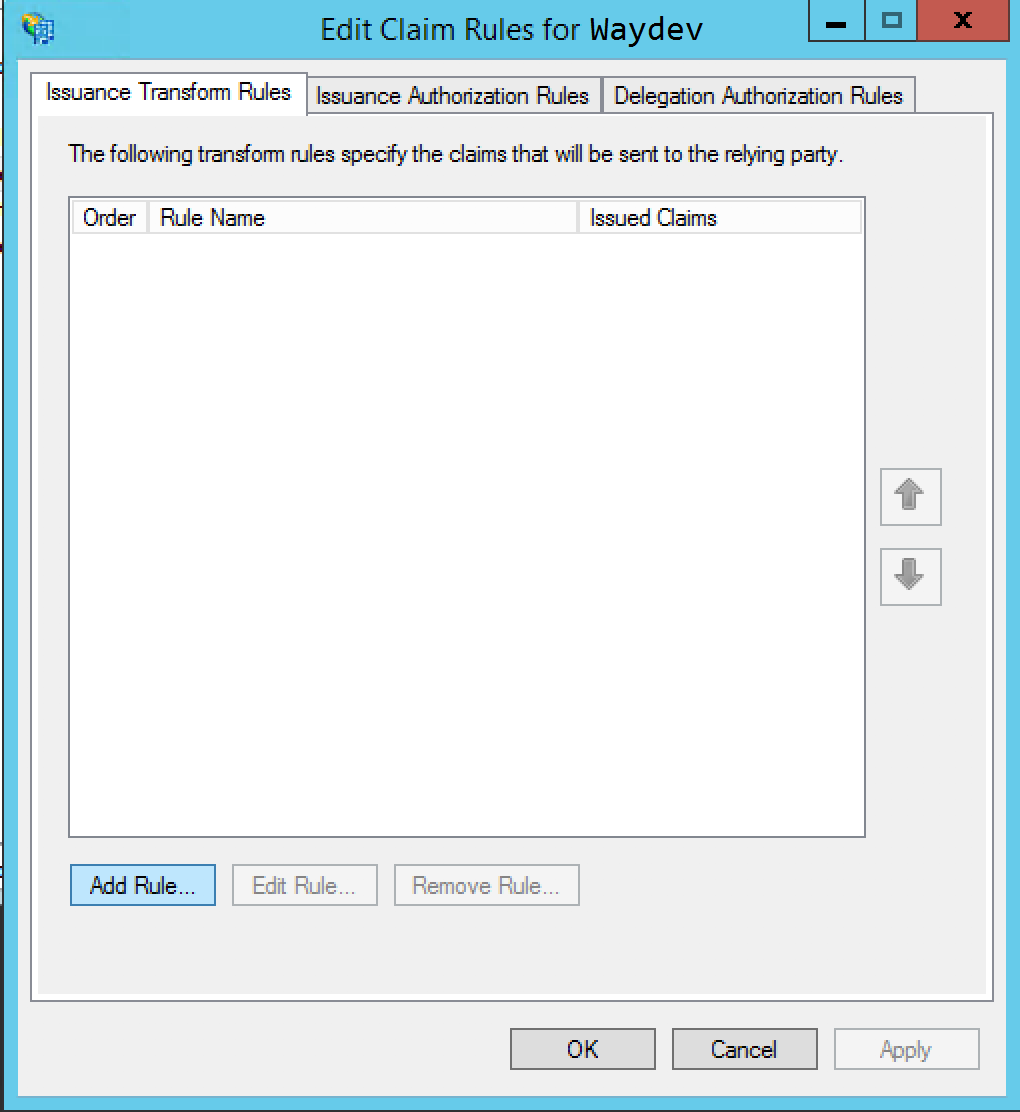
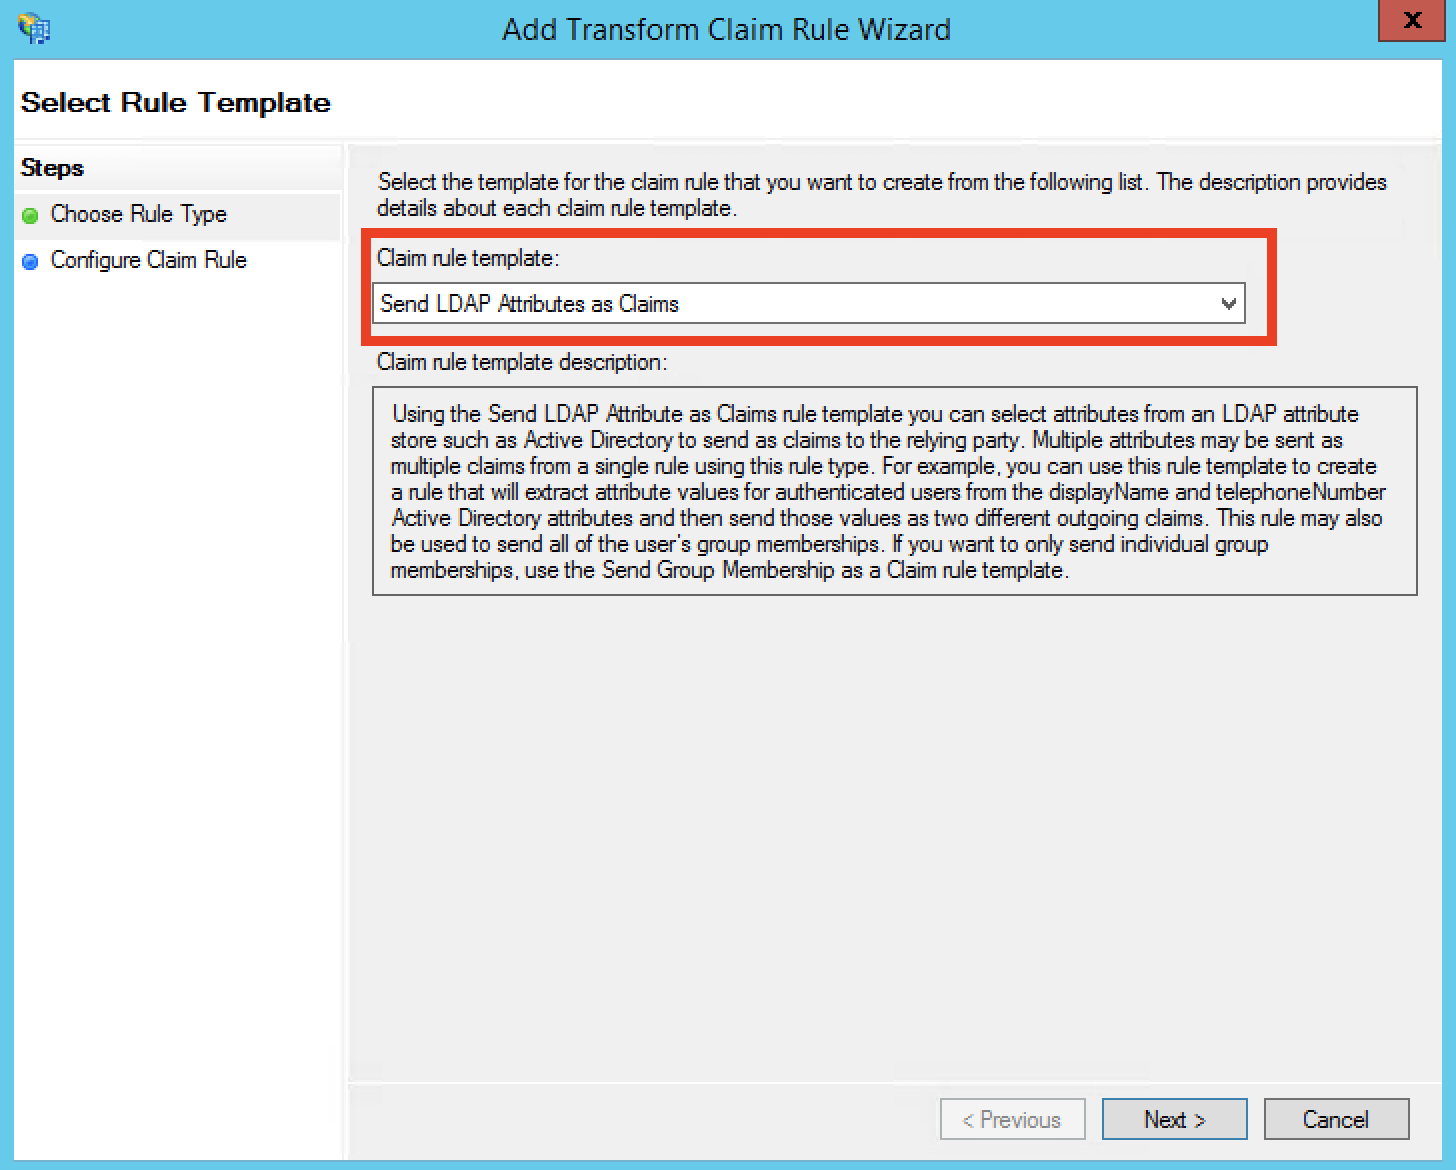
Step 16: Select Add Rule... and choose the Send LDAP Attributes as Claims option and click Next.
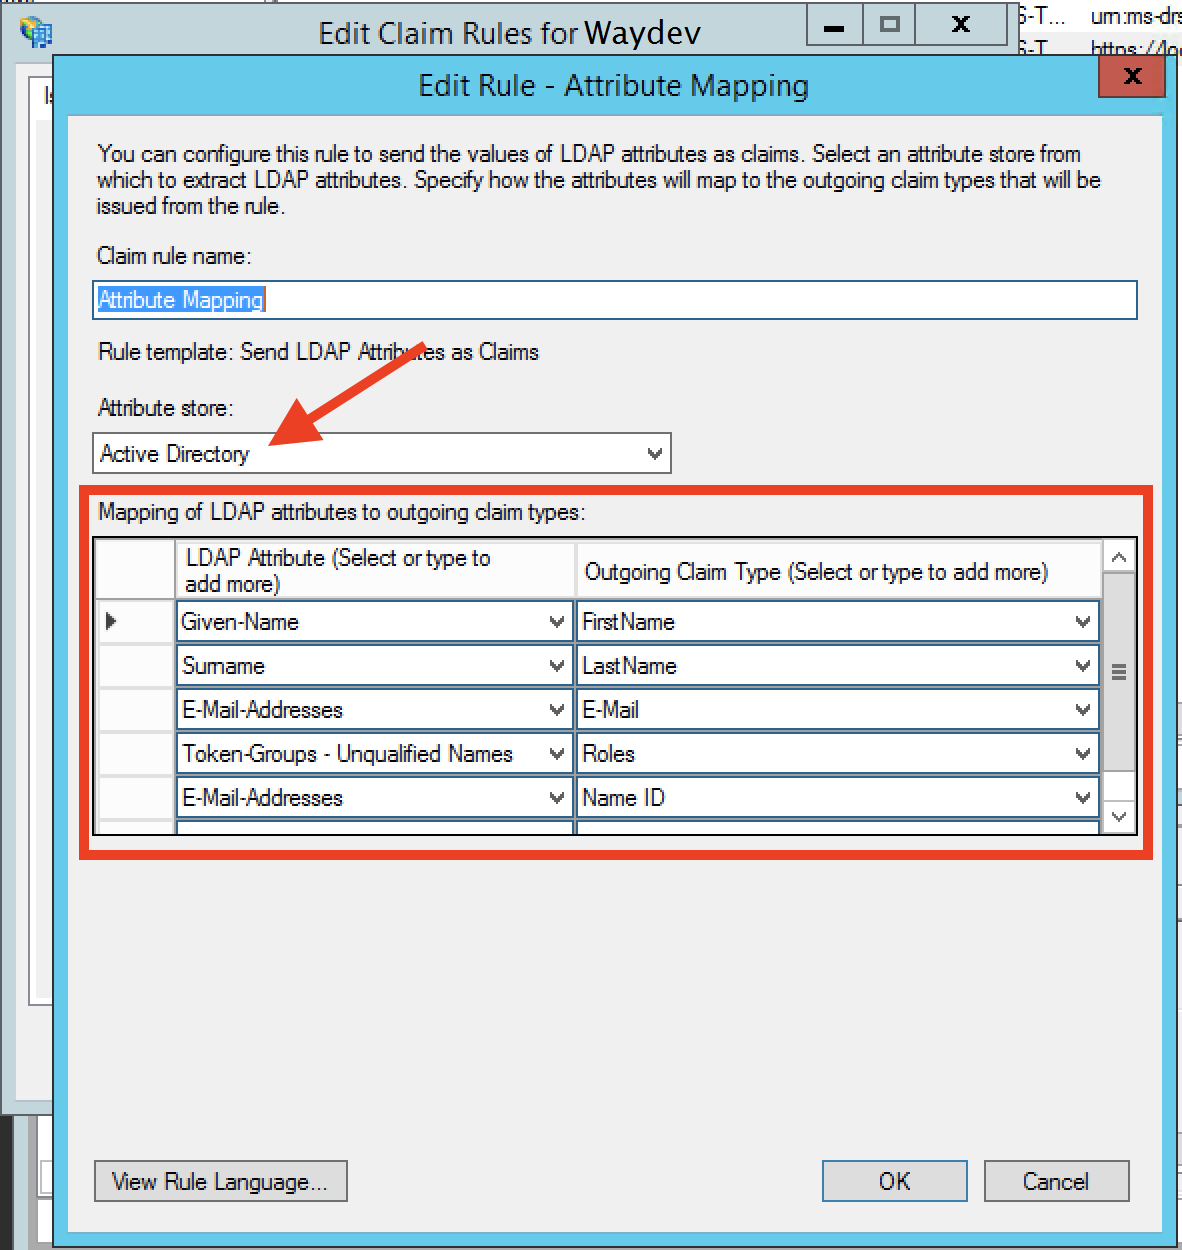
Step 17: We will now map all the Active Directory attributes out to our SAML attributes. Recall the Waydev SSO modal fields previously entered (Note: case sensitivity matters!).
Map the Active Directory "LDAP Attribute" Given-Name, Surname, E-Mail-Addresses and Token-Groups - Unqualified Names, and E-Mail-Addresses fields to the "Outgoing Claim Type" FirstName, LastName, E-Mail, Roles and Name ID, respectively.
Step 18: Users should now be able to successfully login. If users see nothing upon initial login, then it is likely none of the users roles mapped properly to a role in Waydev.
Updated 7 months ago