

Users
Users
The Users page allows you to manage user access across your Waydev workspace. All existing users are listed in a table with the following columns:
- Name / Email — The full name and email address of the user.
- Logins (12 mo) — The number of times the user has logged in over the past 12 months.
- Access — Whether the user is Active or Inactive in the workspace.
- Roles — The user's role in the workspace (e.g. Workspace admin, Contributor).
- Team — The team the user belongs to.
- Accounts — The connected provider accounts linked to this user, shown as integration icons. Additional accounts beyond the visible ones are indicated by a +N label.
- Last login — The date and time of the user's most recent login.
- Created at — The date and time the user was added to the workspace.
- Actions — Options to edit or remove the user via the ··· menu.
To add a new user, click + Add user in the top-right corner. You can search for users by name or email using the search bar, filter the list using the Filter button, or adjust the visible columns using the Columns button. The table is paginated and shows 10 items per page by default.

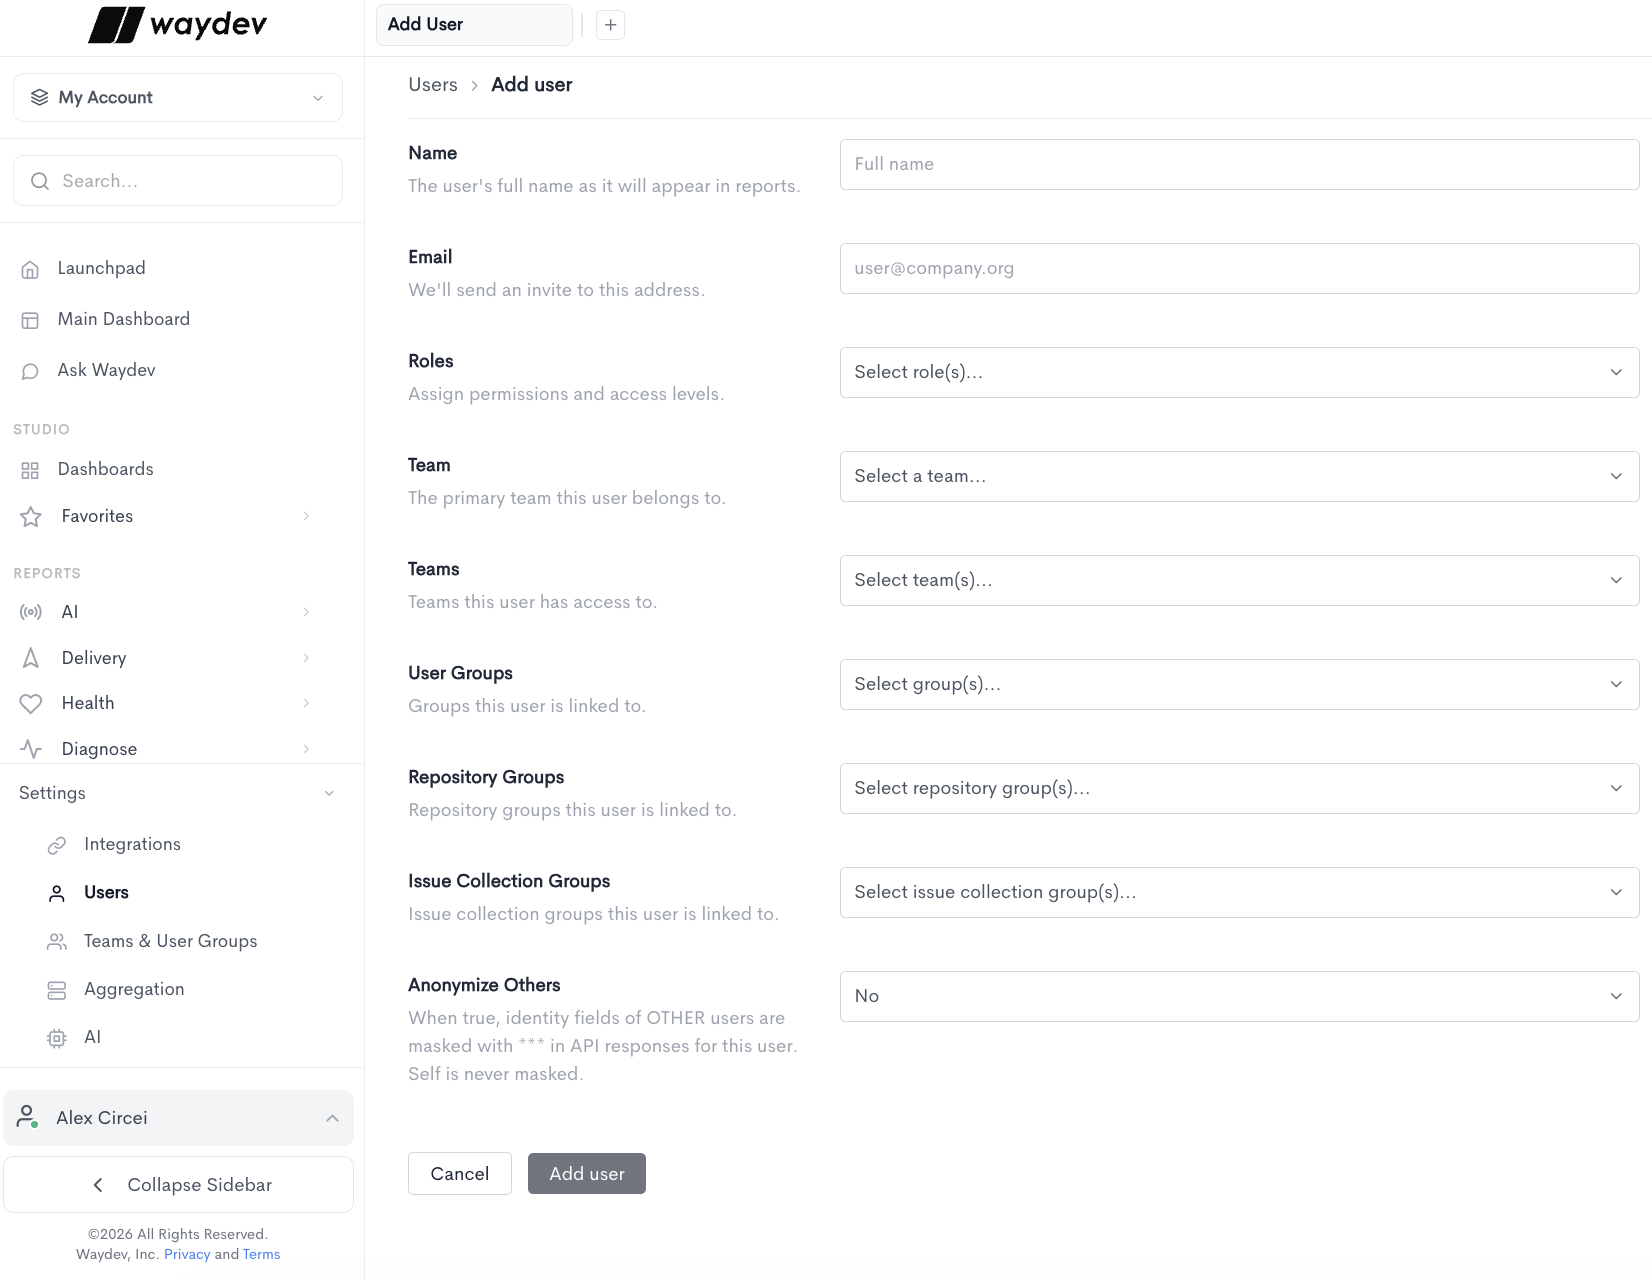
Adding a user
When adding a new user, fill in the following fields:
- Name - The user's full name as it will appear in reports.
- Email - The email address the invite will be sent to.
- Roles - Select one or more roles to assign permissions and access levels.
- Team - The primary team this user belongs to.
- Teams - Additional teams this user has access to.
- User Groups - Groups this user is linked to.
- Repository Groups - Repository groups this user should have access to.
- Issue Collection Groups - Issue collection groups this user should have access to.
- Anonymize Others - When set to Yes, identity fields of other users are masked with *** in API responses returned for this user. The user's own identity is never masked.
Once all fields are filled in, click Add user to send the invitation. Click Cancel to discard the changes and return to the Users list.
User Details
Clicking Details in the Actions menu opens the user's detail page, which is organized into four tabs: Overview, Settings, Attributes, and Activity.
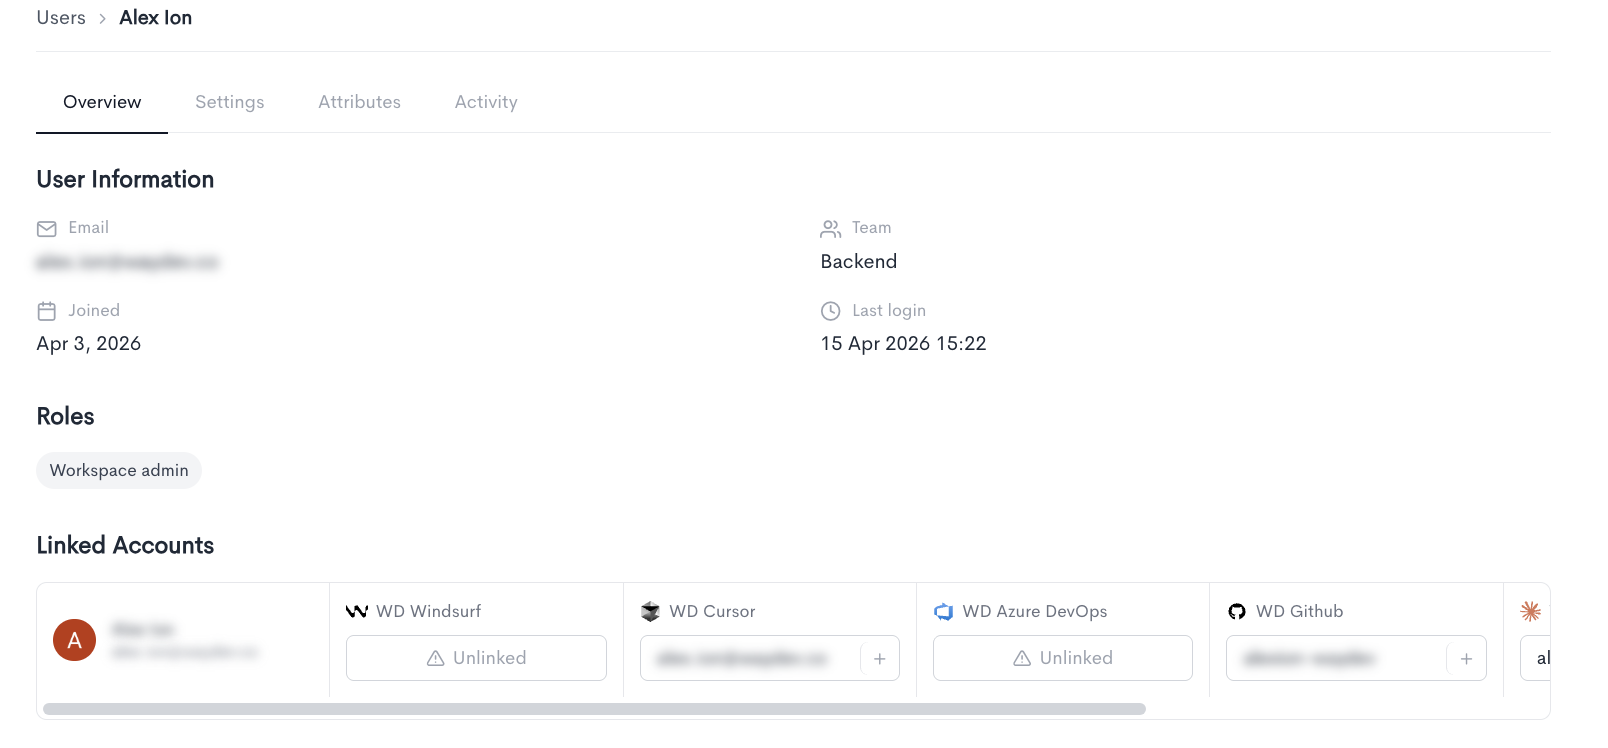
Overview
The Overview tab displays the following information:
User Information — Key details about the user's account:
- Email — The email address associated with the user's account.
- Team — The primary team the user belongs to.
- Joined — The date the user was added to the workspace.
- Last login — The date and time of the user's most recent login.
Roles — The roles currently assigned to the user (e.g. Workspace admin, Contributor).
Linked Accounts — The external provider accounts linked to this user, showing the integration name and the associated account identifier for each (e.g. Claude Code, Cursor, Jira).
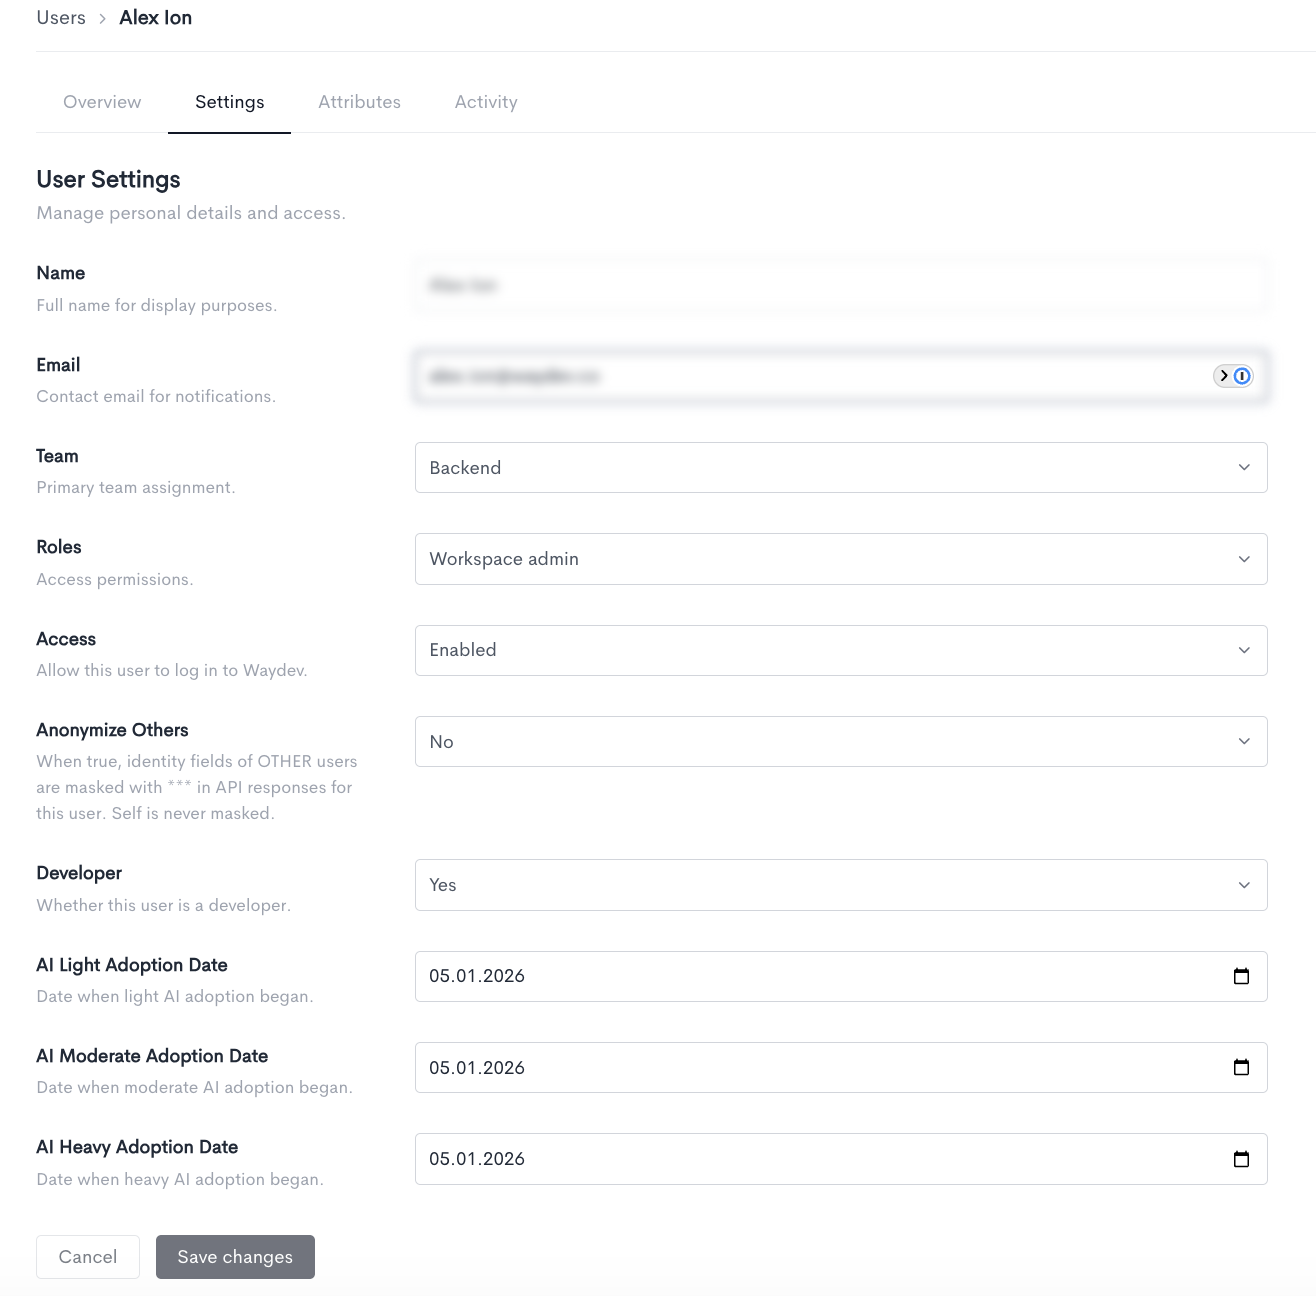
Settings
The Settings tab allows you to manage a user's personal details and access. The following fields can be updated:
- Name — The user's full name as it appears in reports and across the platform.
- Email — The contact email address used for notifications.
- Team — The user's primary team assignment. You can reassign the user to a different team using the dropdown.
- Roles — The user's access permissions. You can update the role using the dropdown (e.g. Workspace admin, Contributor).
- Access — Controls whether the user can log in to Waydev. Set to Enabled to allow access or Disabled to revoke it.
- Anonymize Others — When set to Yes, identity fields of other users are masked with
***in API responses for this user. The user's own identity is never masked. - Developer — Indicates whether this user is classified as a developer. This affects how the user is counted in developer-based metrics.
- AI Light Adoption Date — The date when the user's light AI adoption began.
- AI Moderate Adoption Date — The date when the user's moderate AI adoption began.
- AI Heavy Adoption Date — The date when the user's heavy AI adoption began.
Once all changes are made, click Save changes to apply them. Click Cancel to discard any changes and return to the Overview tab.
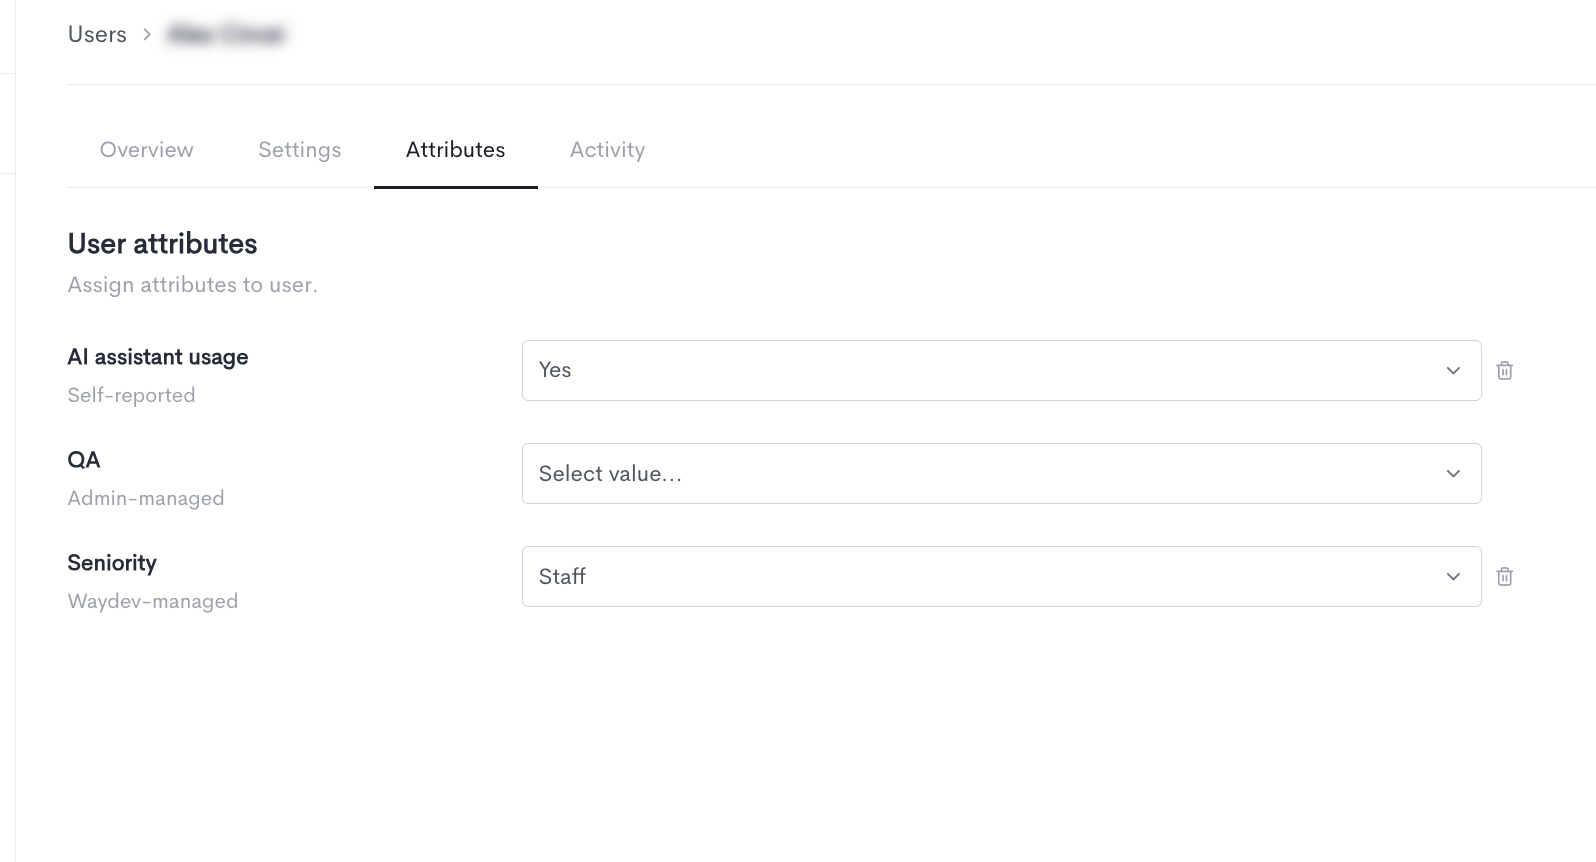
Attributes
To learn more about this, please go to User Attributes.
The Attributes tab allows you to assign attributes to a user. Attributes provide additional context about a user and can be used for filtering and segmentation in reports. Each attribute has a management type indicating who controls its value. Below are examples of attributes:
- AI assistant usage (Self-reported) — Indicates whether the user uses an AI coding assistant. The value is reported by the user themselves.
- QA (Admin-managed) — Indicates whether the user is part of the QA function. The value is set and managed by an admin.
- Seniority (Waydev-managed) — Indicates the seniority level of the user (e.g. Staff). The value is automatically managed by Waydev.
Attribute values can be updated using the dropdown next to each attribute. Attributes that are no longer relevant can be removed using the delete icon on the right.
User activity
The Activity tab displays a log of recent actions performed by the user. Each entry includes the following columns:
- Action — The type of action performed, such as Login or Request.
- Info — Additional details about the action. For logins, this includes the session and IP address information. For requests, this shows the HTTP method, endpoint, and response code (e.g.
POST /api/custom/queries/97/run (HTTP 200)). - Time — The date and timestamp of when the action occurred.
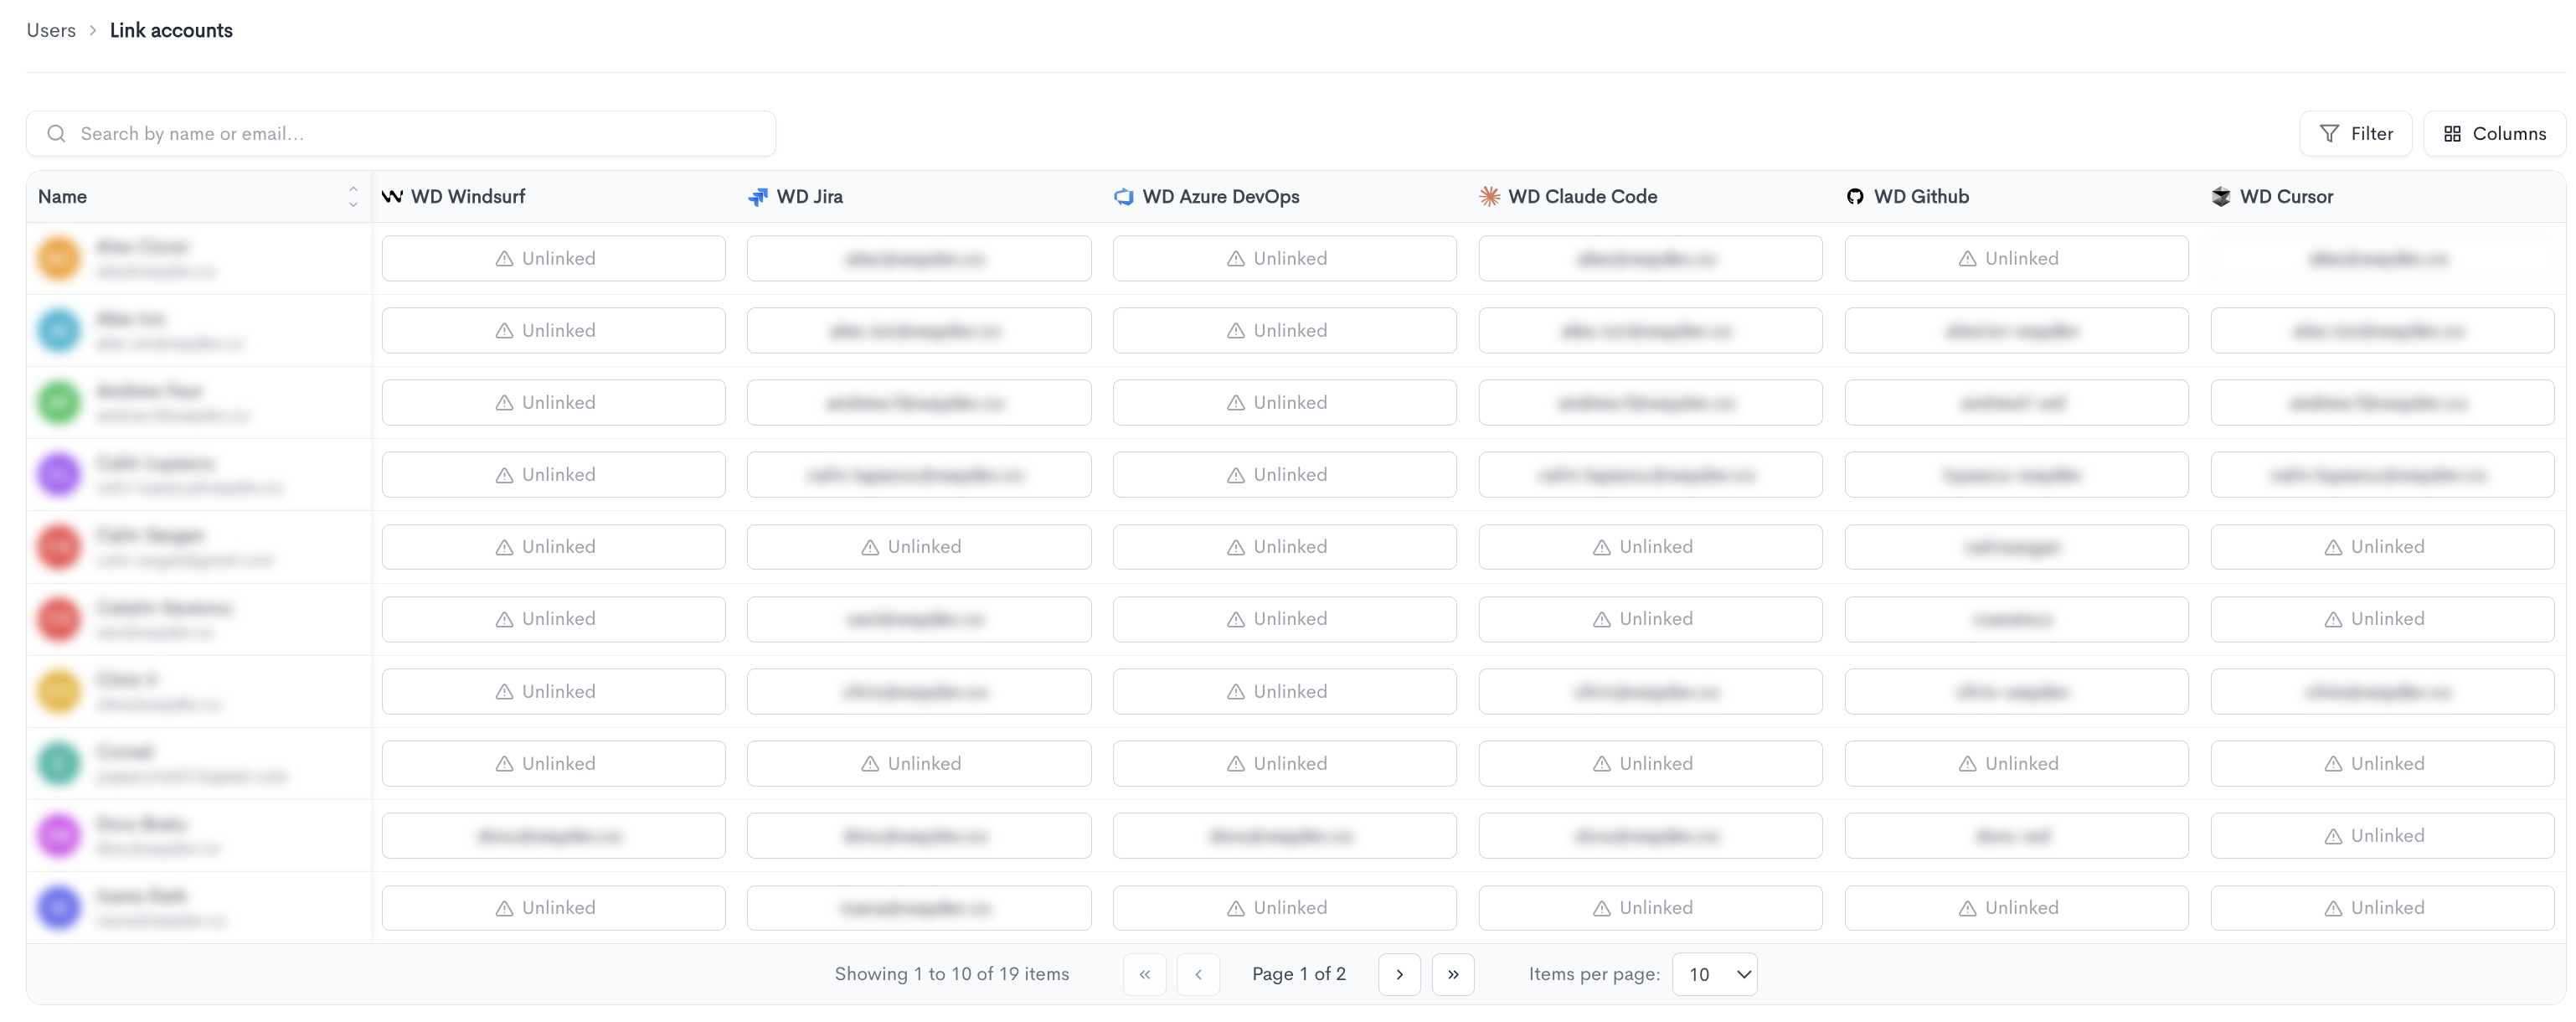
Link user accounts
The Link accounts page allows you to map each Waydev user to their corresponding accounts across all connected integrations. It is accessible from the ··· menu near the + Add Users button.
The page displays a table where each row represents a user and each column represents a connected integration. A linked account shows the user's identifier in that integration (e.g. their email address or username), while an unlinked account is indicated by an Unlinked warning, meaning Waydev cannot attribute activity from that integration to the user.
The table includes the following columns:
- Name - The user's full name and email address in Waydev.
- One column per connected integration (e.g. WD Windsurf, WD Jira, WD Azure DevOps, WD Claude Code, WD Github, WD Cursor), each showing the linked account identifier or an Unlinked status.
You can search for users by name or email using the search bar, filter the list using the Filter button, or adjust the visible columns using the Columns button. The table is paginated and shows 10 items per page by default.
Keeping accounts linked ensures that activity data from each integration is correctly attributed to the right user across all Waydev reports.
A user can have multiple provider identities under the same Waydev profile.

Import users
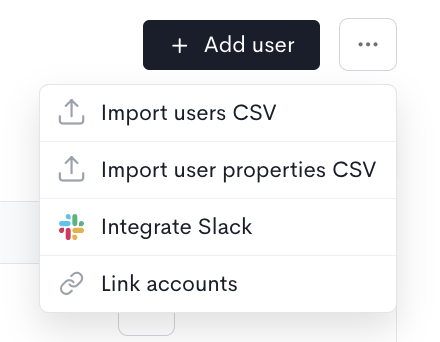
The ··· menu provides additional options:
-
Import users CSV - Bulk import users from a CSV file.
-
Import user properties CSV - Bulk import user property data from a CSV file.
-
Integrate Slack - Connect Slack to sync users from your workspace.
-
Link accounts - Open the Link accounts page to map each Waydev user to their corresponding accounts across connected integrations.
Updated 10 days ago