Bitbucket Server
Bitbucket Server
Below is a step-by-step guide on how to get started with Bitbucket Server. If your repositories are behind a firewall, please whitelist our IPs first:
52.11.246.92
54.184.105.85
44.229.2.220
To use this method to connect to Waydev, you will need to whitelist on port 443 over HTTPS. You also need a public DNS record pointing to the IP address that is being exposed for Waydev analysis. This DNS entry should match the TLS/SSL certificate that the server is utilizing.
BitBucket Server Configuration:
Steps 1-3
- Step 1: On any page of your Bitbucket Server, click the settings icon in the top right.
- Step 2: Next, click “Users” in the left hand menu.
- Step 3: Then, click “Create User” button.

Step 4
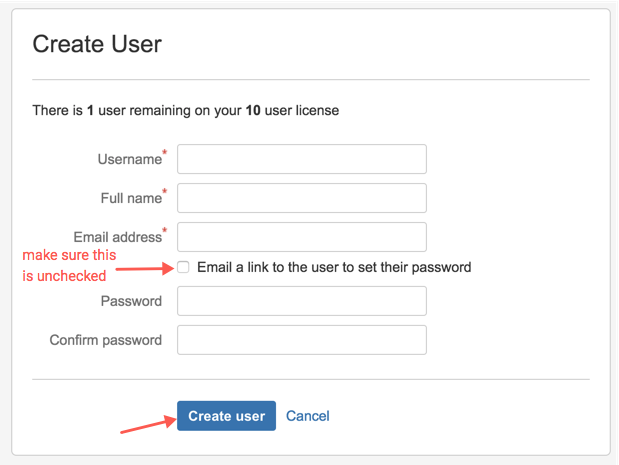
Fill in the form, taking note of the username and password you use. Then, click “Create user”.
Step 5
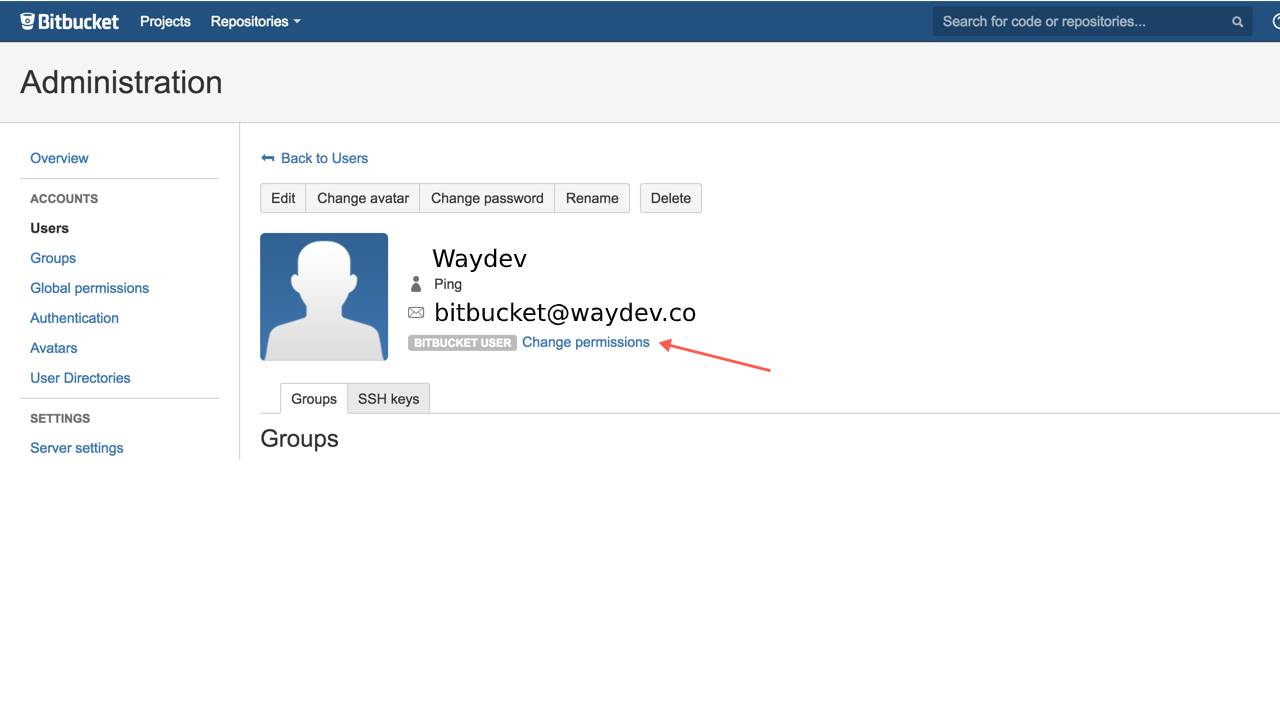
Click “Change Permissions”.
Step 6
Under Global Permissions search for your new Waydev user. Once you see your new user in the results select it and click Add.

Step 7
Click the “Admin” checkbox for the user you just added.

Step 8
On your Waydev Home page go to the left navigation bar. Select Setup -> Integrations.
Step 9
Click on Source Code Management an then on Bitbucket Server.

Step 10
In this next step you can choose one of two ways to connect your Bitbucket Server account. Choose the connection that works best for you.
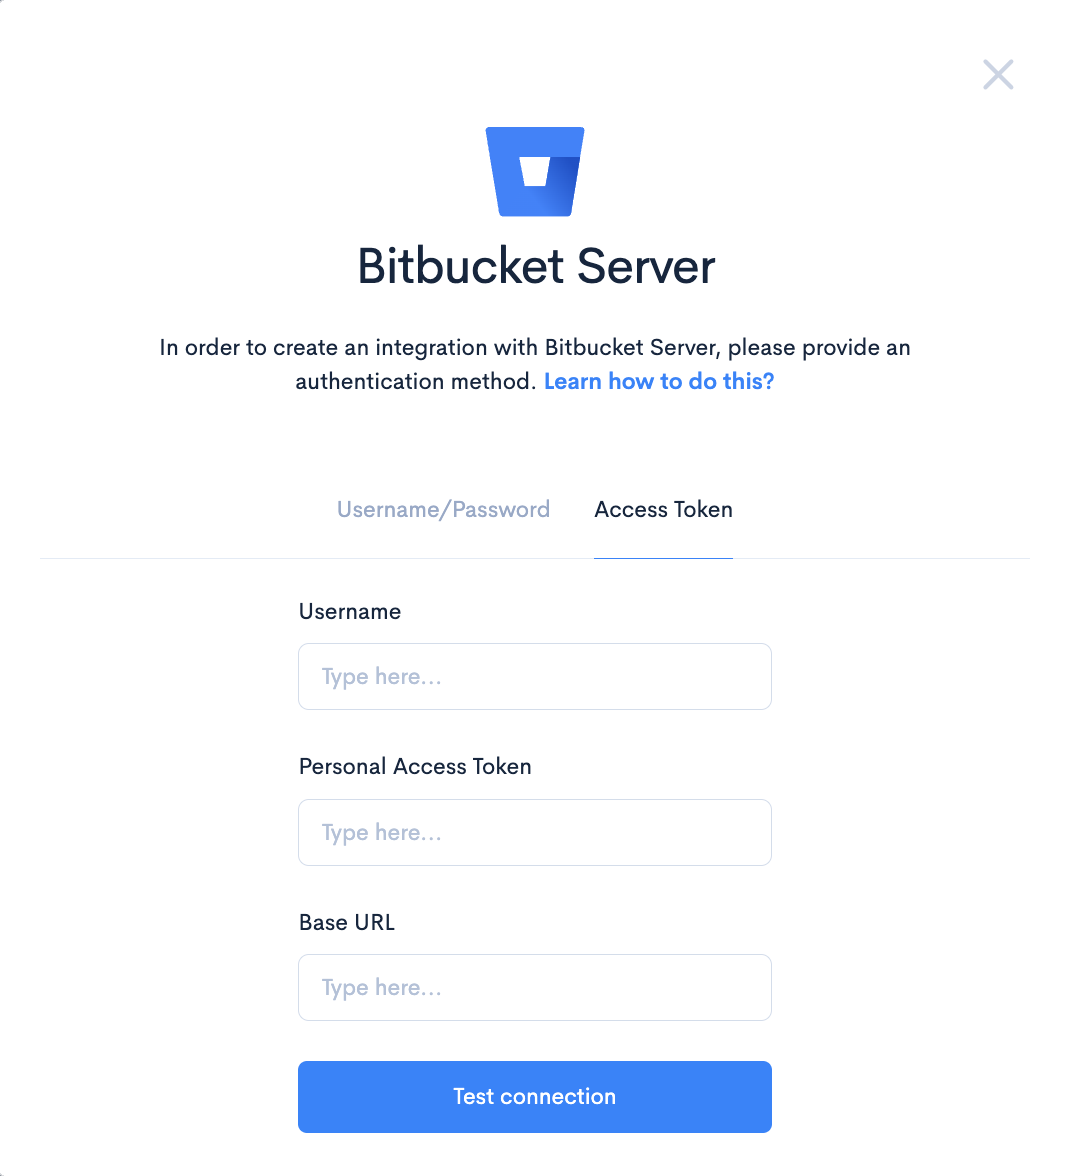
1.) Username/Password - You can connect to your account using your BitBucket credentials under the Username/Password tab. Input your credentials and base URL and click Test connection.
If the connection was successful you will see the following message:
Success! Please refresh the page.
If you receive an error when trying to connect your Bitbucket Server account verify the following and try again:
- user name and/or password are correct
- base URL is correct
If connected behind a firewall verify the following:
- Waydev’s IP addresses are whitelisted on port 443
- A public DNS record is set up and pointing to the exposed IP address for Waydev's use.
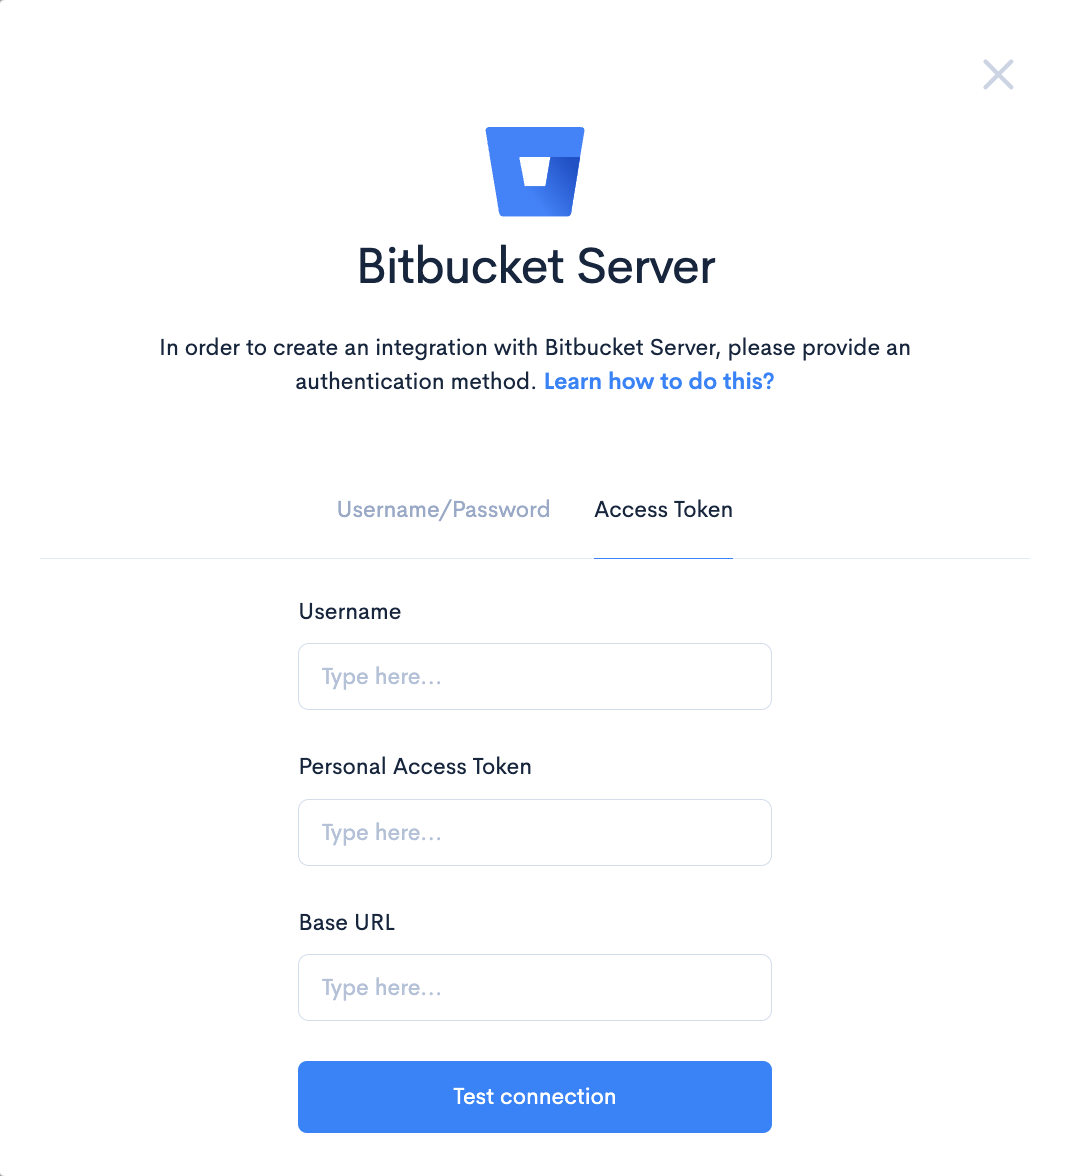
2.) Access Tokens - You can connect via an access token. On the Access Token tab input your access token and click Test connection. For more information on where to create an access token in BitBucket Server see Bitbucket’s support document Personal Access Tokens.
If the connection was successful you will see the following message:
Success! Please refresh the page.
If you receive an error when trying to connect your Bitbucket Server account using an access token verify the access token and base URL and try again.
Steps 11-13
- Step 11: Once you have successfully connected to your Bitbucket Server account, click Connect.
- Step 12: On the next screen you will be selecting the repos you would like to import.
- Step 13: You have successfully created a new Bitbucket Server Integration.
Updated 3 months ago