

SSO/Custom Identity Provider via SAML 2.0
Step-by-step guide to connecting your Waydev account using a Custom Identity Provider via SAML 2.0
Each Identity provider (IdP) has its own proprietary setup procedure. Consult your identity provider's single sign-on setup instructions for the exact procedure to follow. The instructions in this section are meant to be used as general guidelines only.
- Step: 1 Navigate to your single sign-on dashboard and create a new SAML 2.0 application, you can name this Waydev, or anything else.
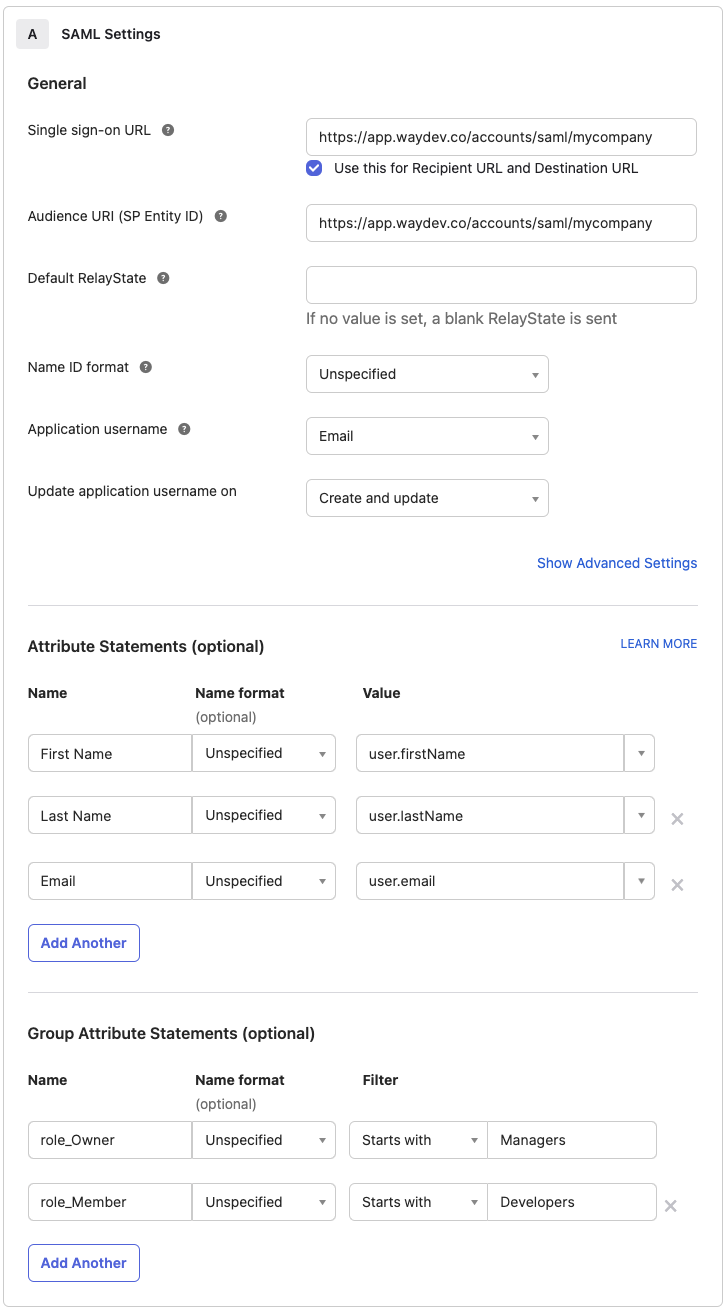
A. Single sign-on URL: This is the full URL from the SSO integration created in the Waydev Operational Users Menu, as indicated in steps 4-8 below: https://app.waydev.co/accounts/saml/mycompany
B. Audience URI (SP Entity ID): This is the same URL as in step A, above.
C. Application Username: In Waydev this is the email ID of the user.
D. Attribute Statements These fields are case-sensitive and need to be mapped as follows:
| Name | Value |
|---|---|
| FirstName | user.firstName |
| LastName | user.lastName |
| user.email |
E. Group Attribute Statements Group Attribute Statements, map your current roles from your custom identity provider to their respective role in Waydev. "Owners" and "Members" are roles created by default for your organization, but you can go into Waydev with your initial/setup account and create any roles and associated permissions you'd like.
These fields are case-sensitive and need to be mapped as follows:
| Name | Filter (If Applicable) | Value |
|---|---|---|
| role_[ROLE_NAME] | Starts with | [ROLE_NAME] |
For the default "Owners" and "Members" roles the following Group Attribute Statements would be necessary.
| Name | Filter | Value |
|---|---|---|
| role_Owner | Starts with | Owner |
| role_Member | Starts with | Member |
The end result for this step should be similar to this:
- Step: 2 Finish creating the application and assign users as per your Custom Identity Providers instructions.
- Step: 3 Once you've setup your new SAML 2.0 application you should be provided with SAML setup instructions which contain the metadata XML
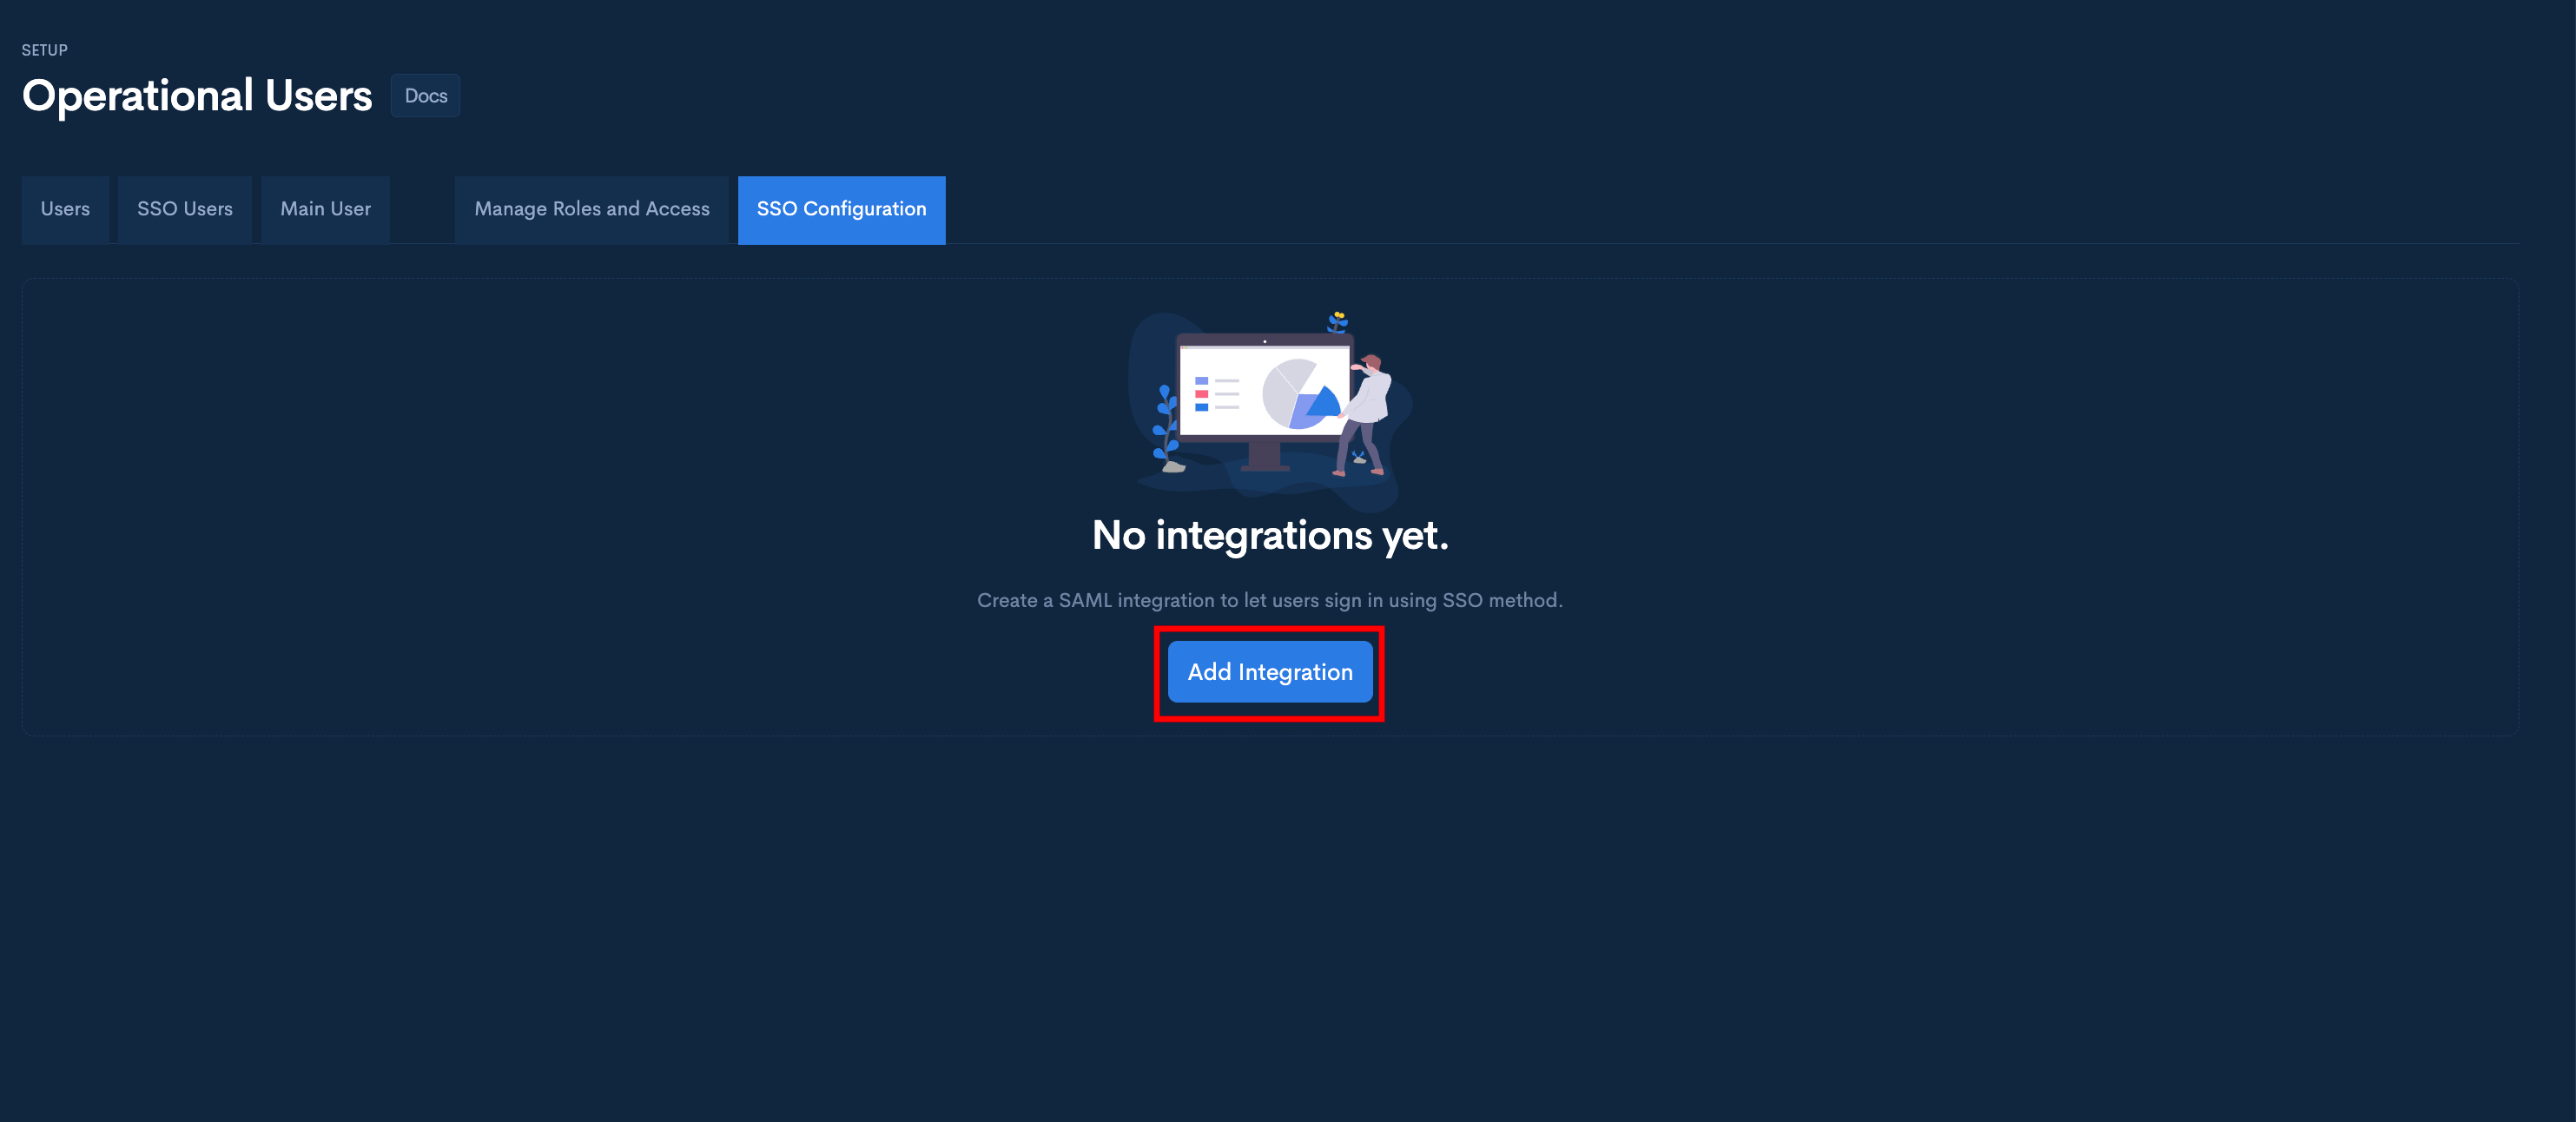
- Step : 4 Open your Waydev App, and select Setup -> Operational Users -> SSO Configuration

- Step : 5 Click the "Add Integration" button.
- Step: 6 In the Configure SAML integration modal, fill in the “Login URL” field with your organization name. This is the URL you will use for logging in after you configure your integration. You can use your organization name or something else. It just needs to be unique. You will use this same URL in your Custom IDP SAML 2.0 application settings.
- Step: 7 Add the metadata XML from your IdP obtained in step 3.

-
Step 8: Once you click Create, your custom IdP Integration is complete in Waydev.
-
Step 9: You will need to go back to your Single Sign-On Dashboard and add users to the Waydev application.
❗️Something went wrong
If you were not able to login to your Waydev account using your SAML URL make sure to review the following configuration steps:
-
Does your sign-on URL match the URL in Waydev? (Step 6)
-
Review your “Attribute Statements” and “Group Attribute Statements”. These fields are case-sensitive and need to be identical to their respective Waydev Role and Custom IdP Group. (Step 1)
If you don't see a user in your single-sign on dashboard that you would like added to Waydev, please reach out to your IT team to have them added.
Updated 10 months ago