GitLab Self-Hosted
GitLab Self-Hosted
Creating a personal access token
If your repos are behind a firewall, please whitelist our IPs.
Our IP's:
52.11.246.92
54.184.105.85
44.229.2.220
You can create as many personal access tokens as you like from your GitLab profile.
- Log in to GitLab.
- In the upper-right corner, click your avatar and select Settings.
- On the User Settings menu, select Access Tokens.
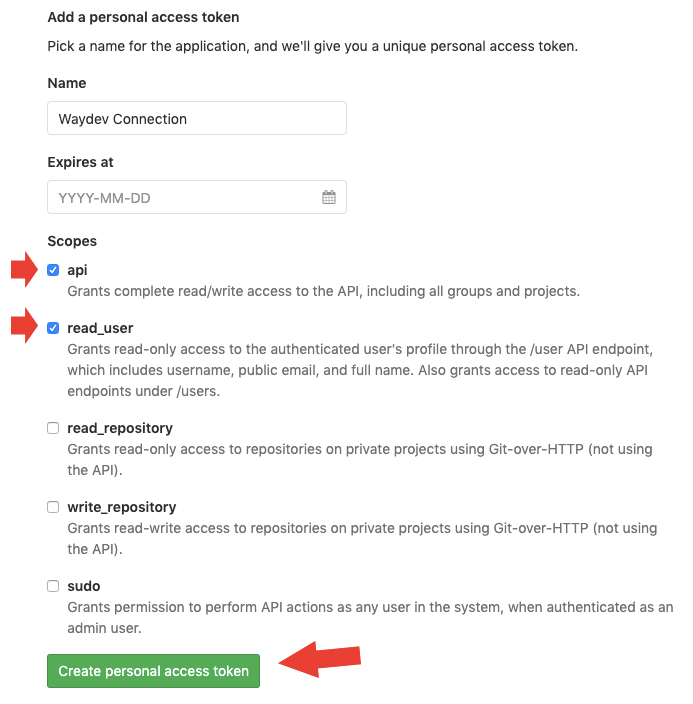
- Choose a name and optional expiry date for the token - Don't set any date.
- Choose the desired scopes - For Waydev we need only api scope and read_user scope..
- Click the Create personal access token button.
- Save the personal access token somewhere safe. Once you leave or refresh the page, you won’t be able to access it again.
Step 1
Create the access token.

Step 2
Copy/Paste your Access token

Step 3
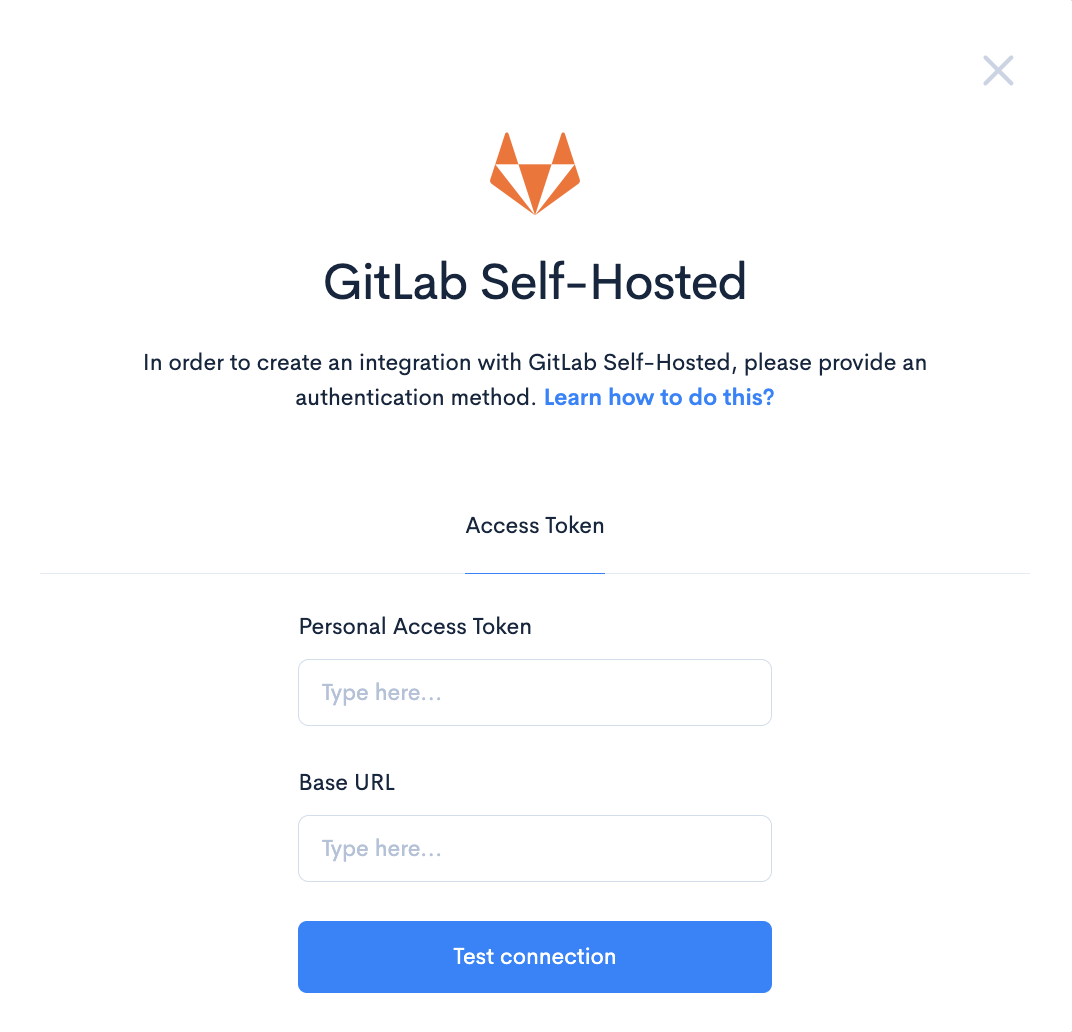
- Go to Waydev, paste the access token and your organization url.

Step 4
Click test connection, if everything works fine you will receive a connect button, just click connect.

Step 5
Your connection succeed, just wait a couple of minutes, and hit refresh.

Step 6
Select the relevant repos for your project, then click the Sync selected button.

You have successfully connected GitLab Self-Hosted!
Updated 3 months ago
What’s Next