Resource Planning
Get a better understanding of how well engineering resources are allocated, visualize financial costs, and have more control over the progress of key initiatives
Gain complete visibility into engineering teams’ work and how that work aligns with the organization’s key business initiatives across the engineering department.
To see data in the Resource Planning report, you need to set up allocation categories. Learn how to do that here.
The Resource Planning Report
The Resource Planning report has four tabs: FTE, Cost, Percentage, and Count.
FTE
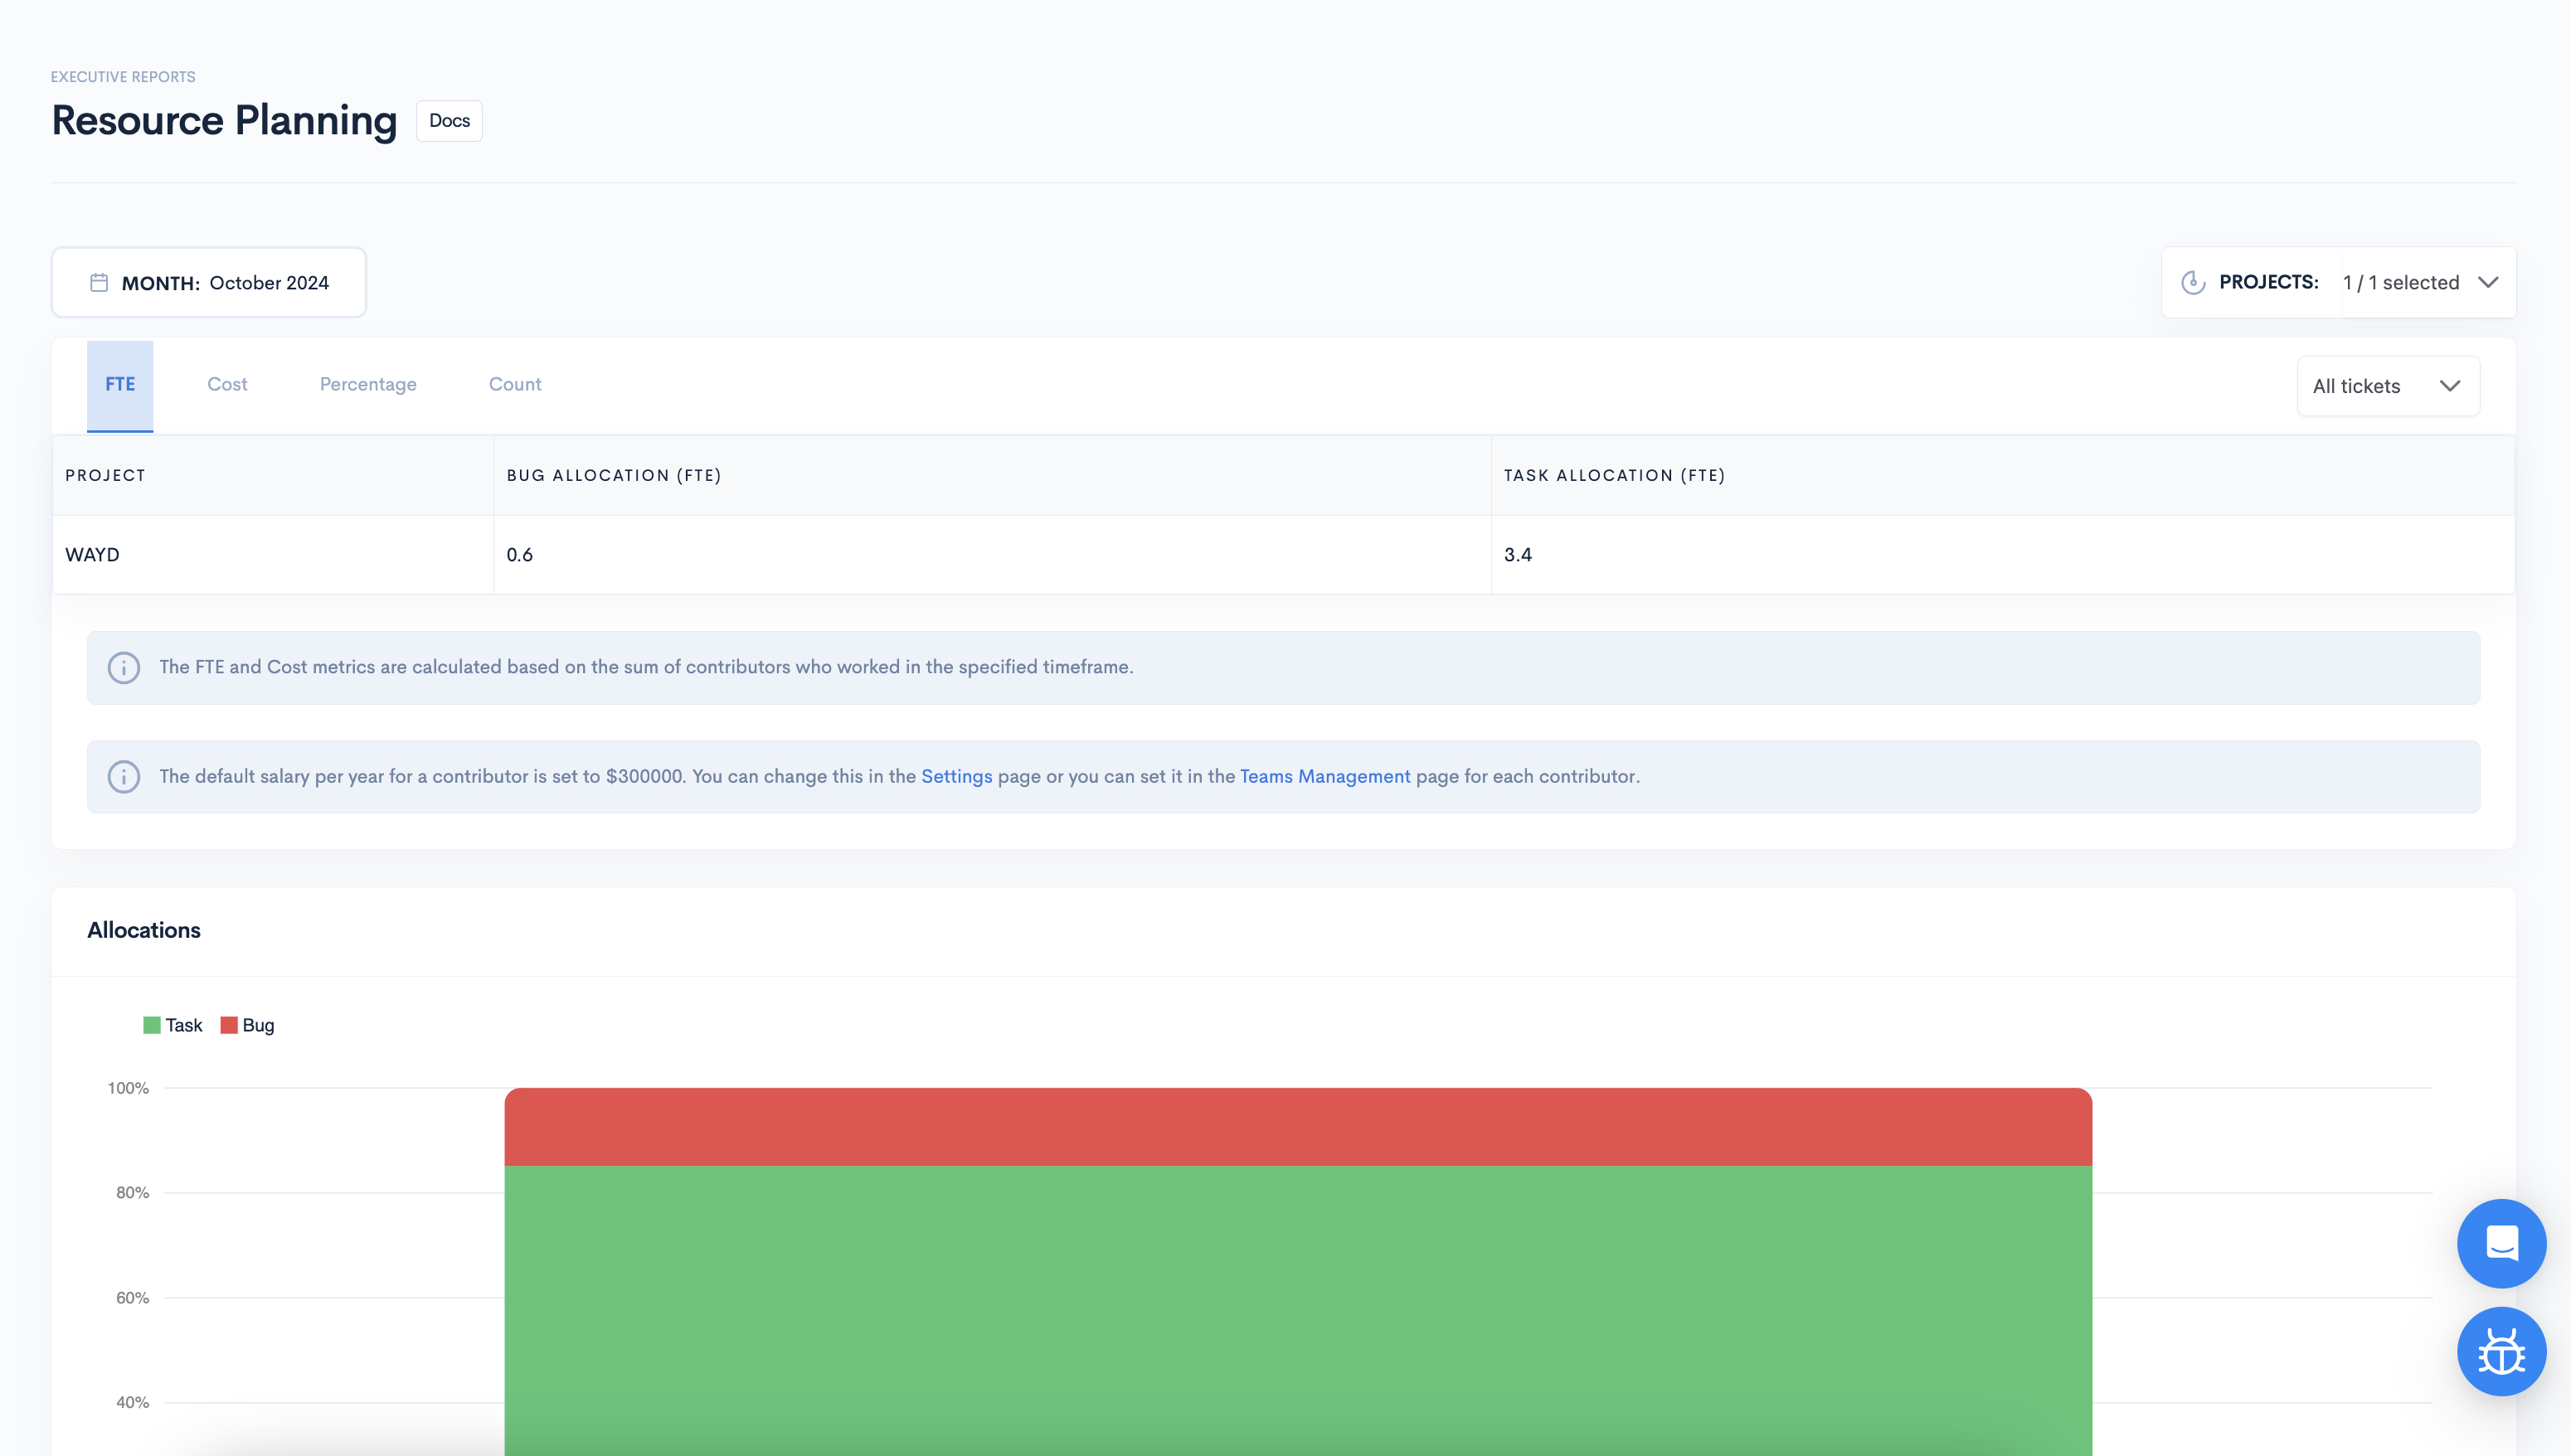
It helps engineering executives understand how well resources are allocated and how to optimize team dynamics to improve software delivery velocity.
FTE, or "Full-Time Equivalent," is a unit that represents the workload of a full-time employee over a specific period. For example, if two employees each work half-time on a project for a month, their combined effort would equal one FTE for that period. This metric helps quantify the total work invested in a project or task by standardizing it against full-time capacity. FTE is calculated by summing the total workdays spent on a project within a given timeframe and dividing by the number of days in that period. When contributors split their time across multiple tasks, Waydev attributes portions of their workday to each issue and aggregates these efforts to determine the total FTE allocated to each task.
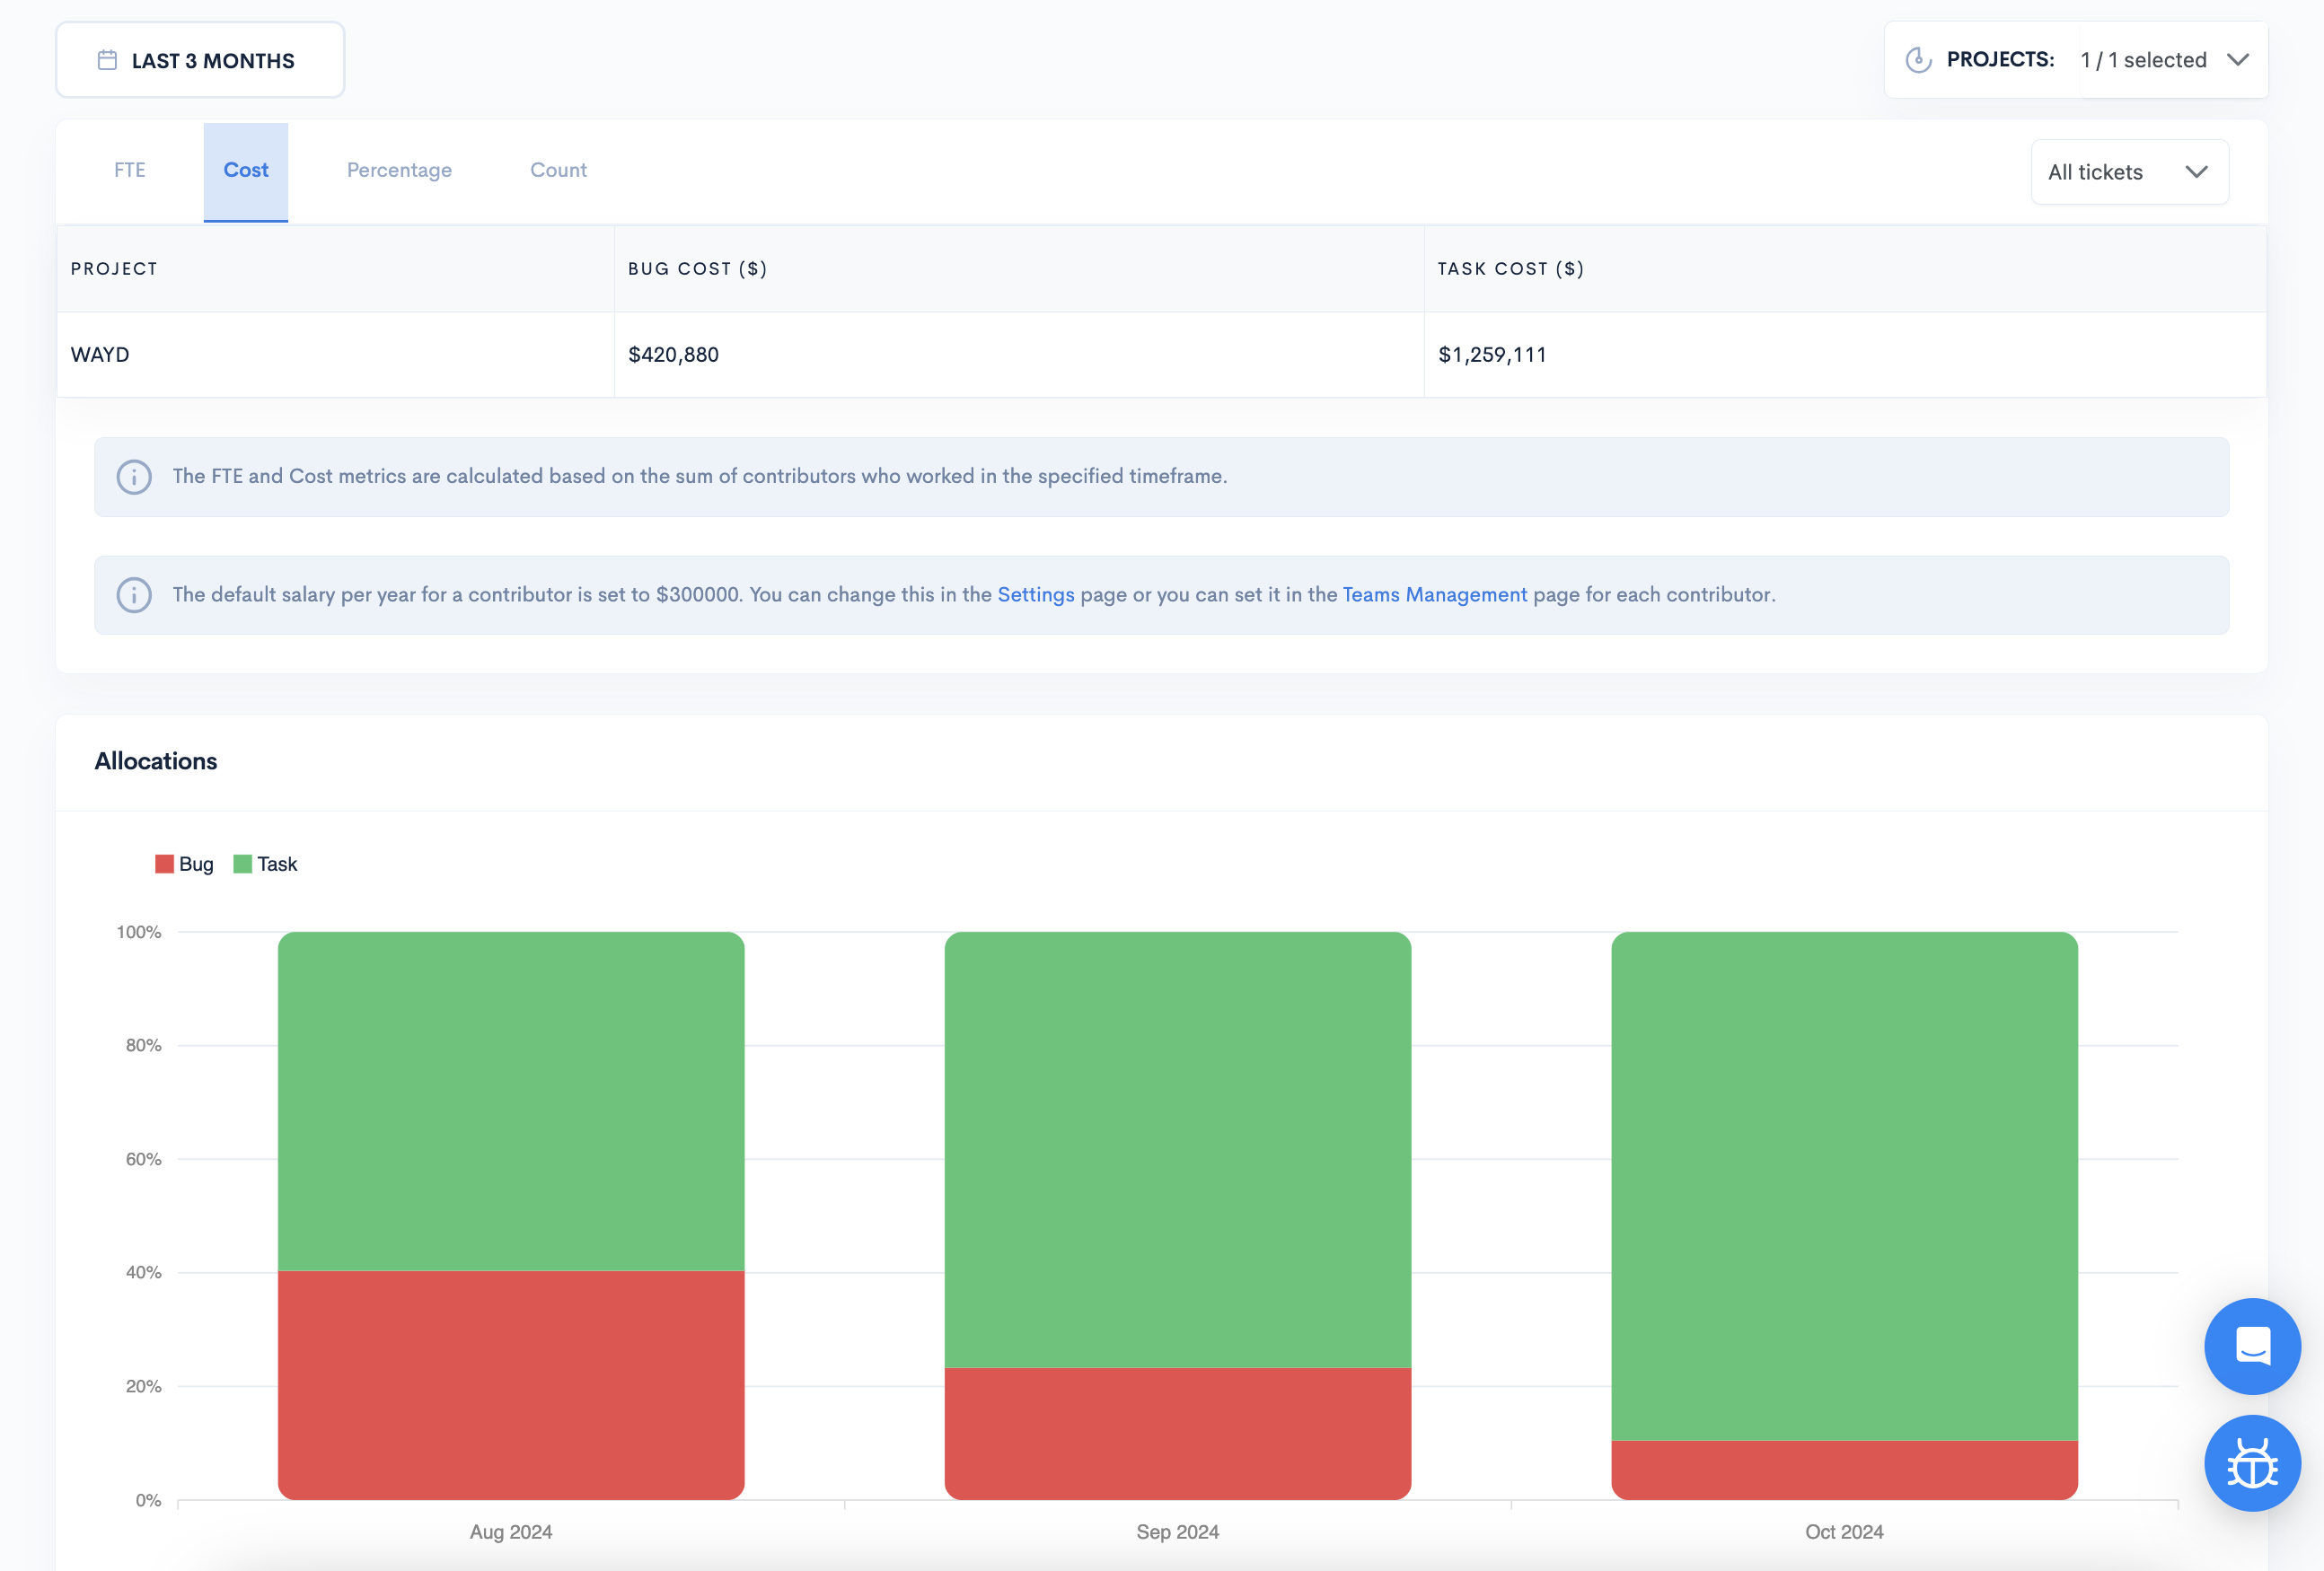
Cost
Here, you will see how much you allocated towards each allocation category. Below, you will see the Allocations graph, which displays the allocated resources in the selected timeframe.
Percentage
Here you have the Percentage representation of your project's tickets.

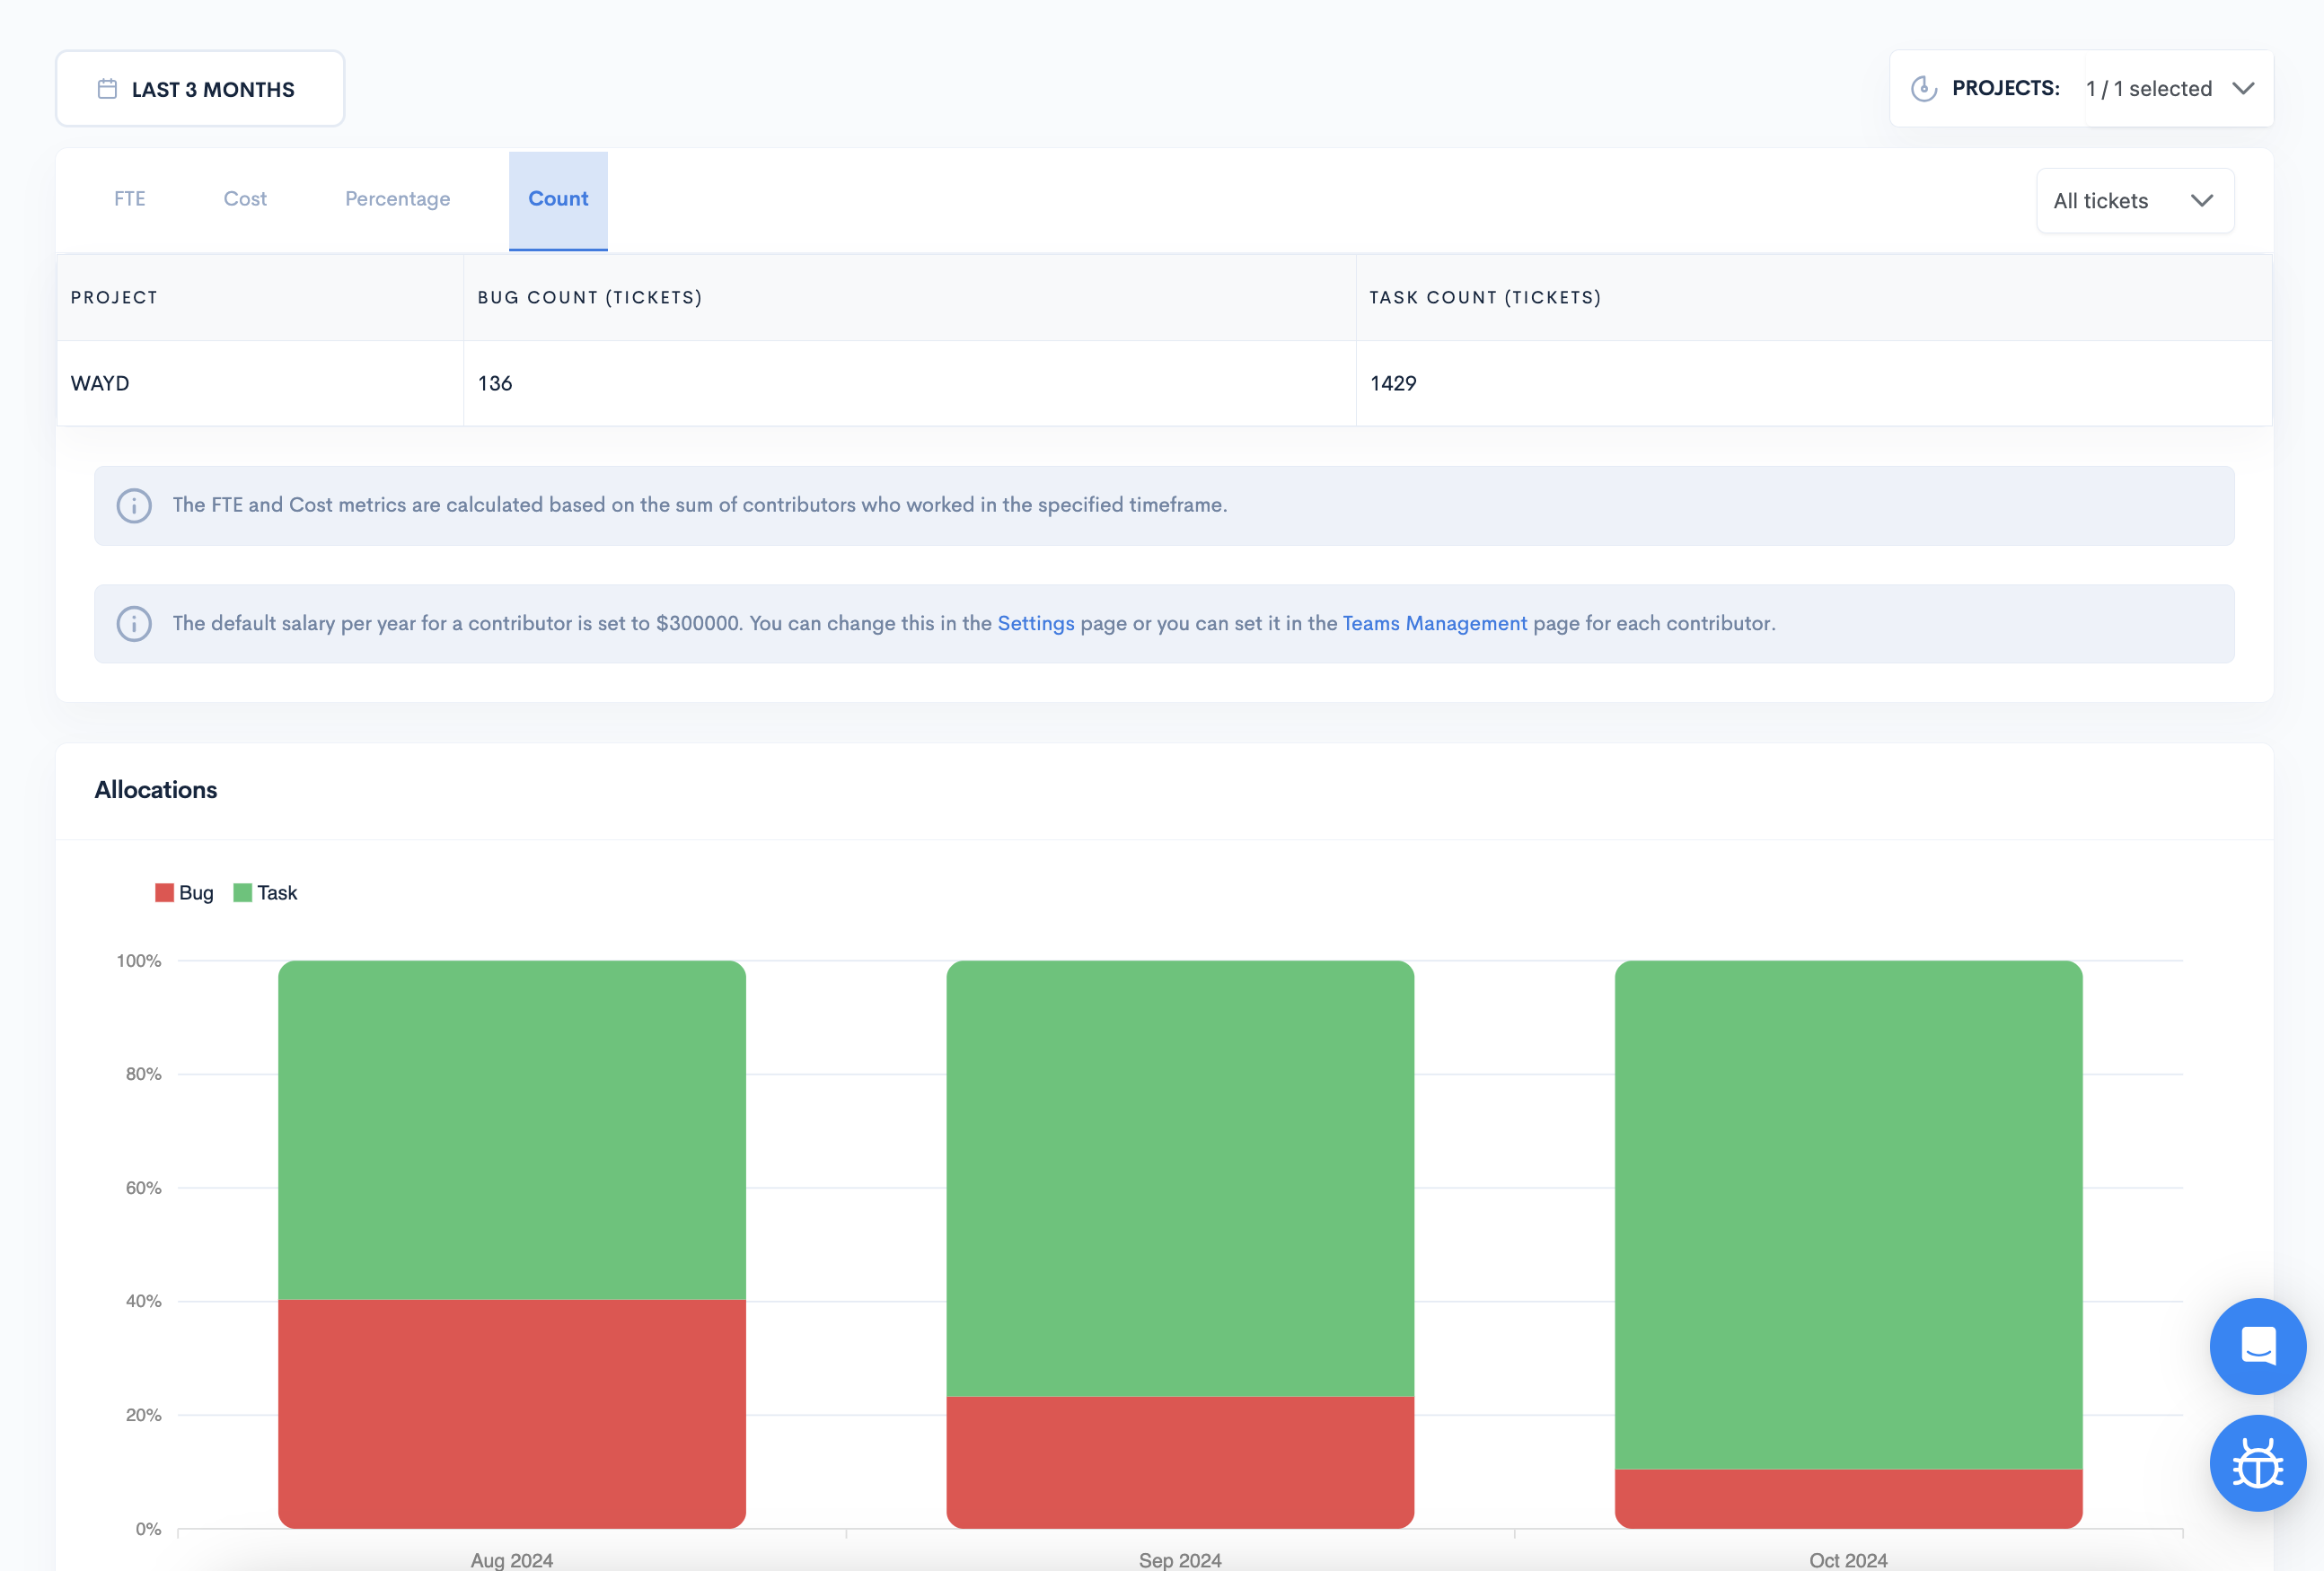
Count
In the Count view, you can see the exact allocation of each ticket type.
Setting up Resource Planning
To visualize the Resource Planning report's data, please ensure you set it up correctly.
To do so, navigate to Settings in the Setup section.
On the Settings page, go to Allocations.
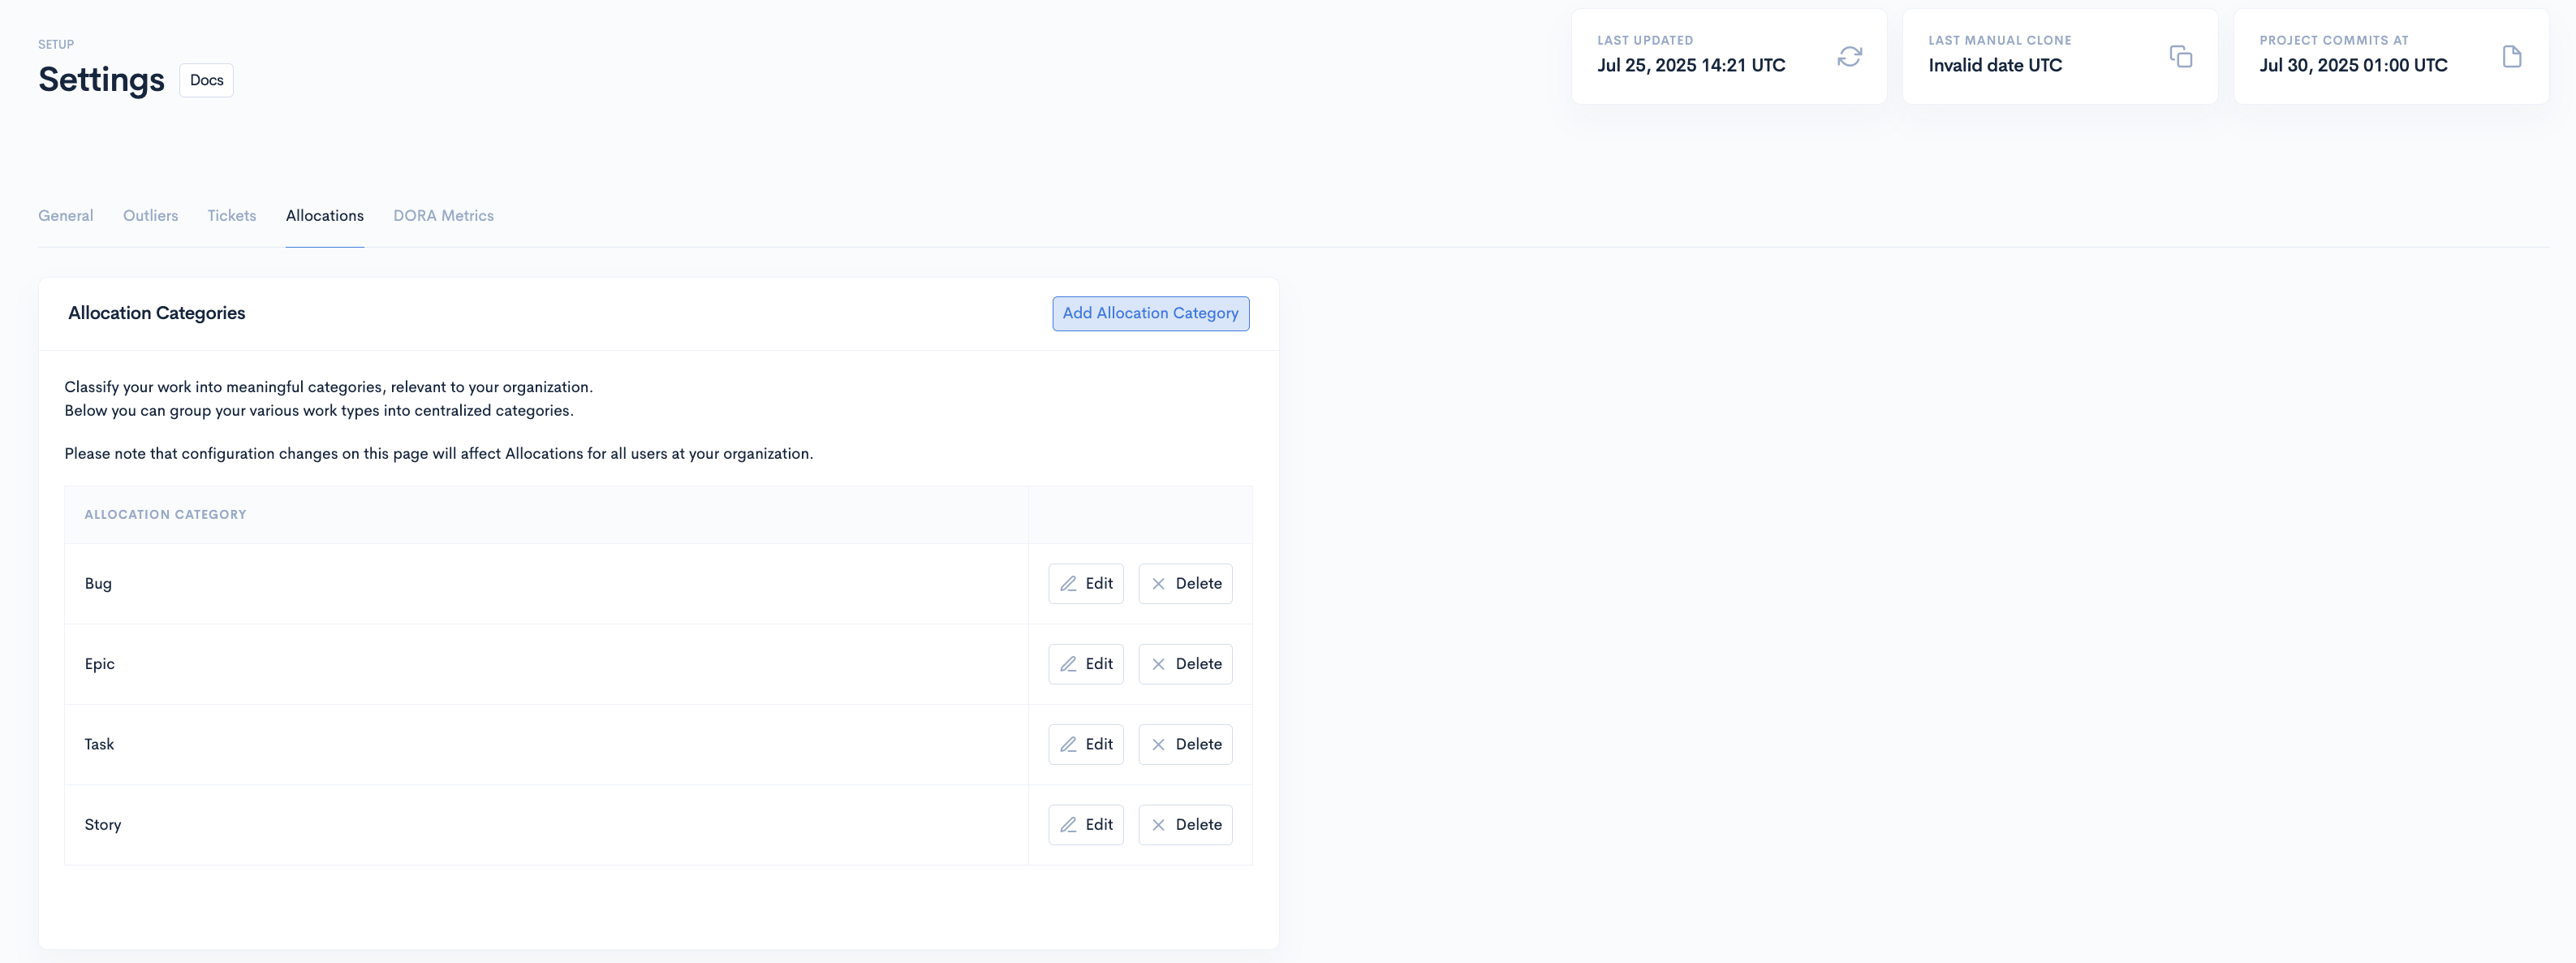
Allocation Categories
Classify your work into categories relevant to your organization. Group your various work types into centralized categories. Please note that configuration changes on this page will affect allocations for all users in your organization.
To add new allocation categories, click "Add Allocation Category."
Here, you must select the work types for the category you want to create, choose the color to represent it, and give it a name. When done, click Add Allocation Category.
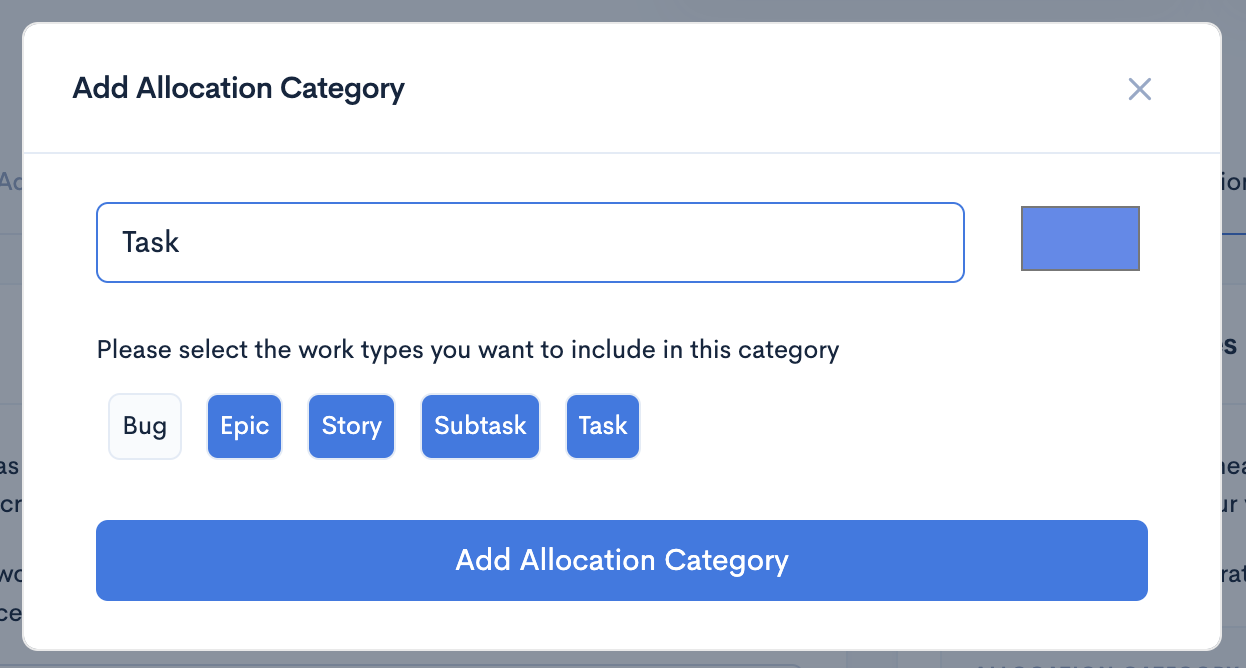
When you choose a specific work type (for example, “Bug”) under the "Bug" Allocation Category, the displayed number represents the total count of that work type across all projects within your account. This means if “Bug” is chosen, and you see "10 work types," it indicates that the “Bug” work type is present 10 times in total across various projects in your account.
Now, this will be represented in your Resource Planning report.
Setting up salaries for team members
Remember that in Waydev, the default salary for engineers is $300,000. You can change this from the Teams Management page in the setup section.
Change the salary individually
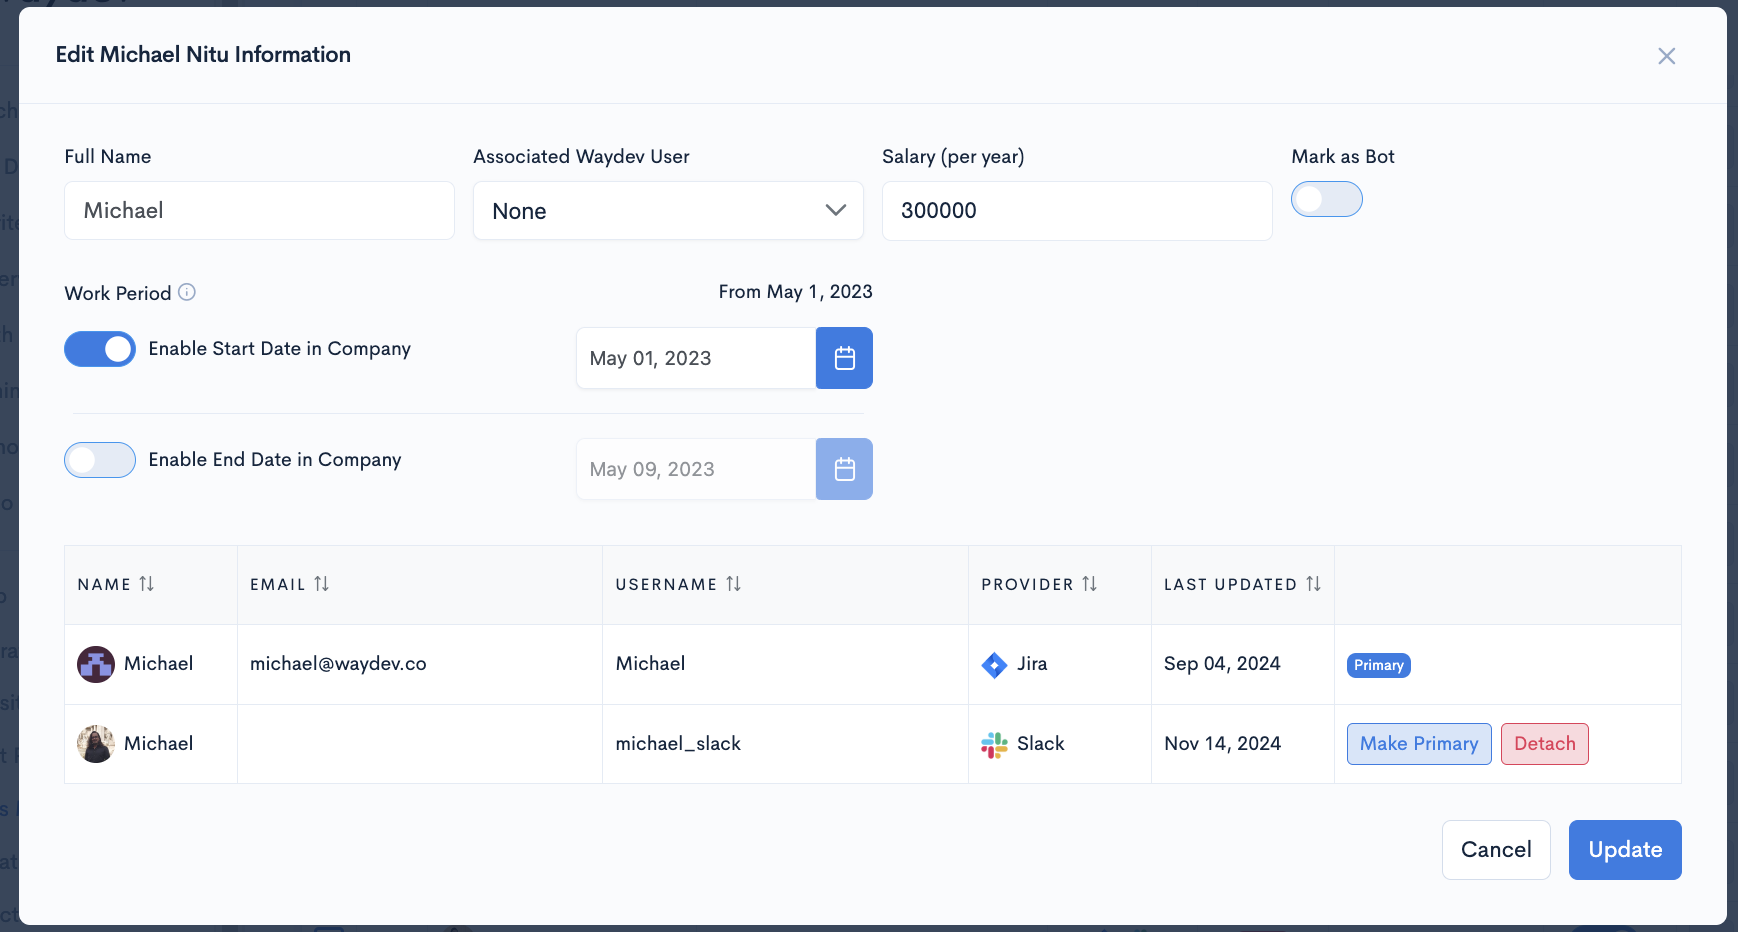
On the Teams Management page, in the contributors view, click the settings button for the contributor whose salary you want to modify.
In the Edit modal, modify the salary (per year) and the Start and End Date (if necessary), then click "Update".
Import Salaries
On the Teams management page, click the Imports button and then select Salaries.
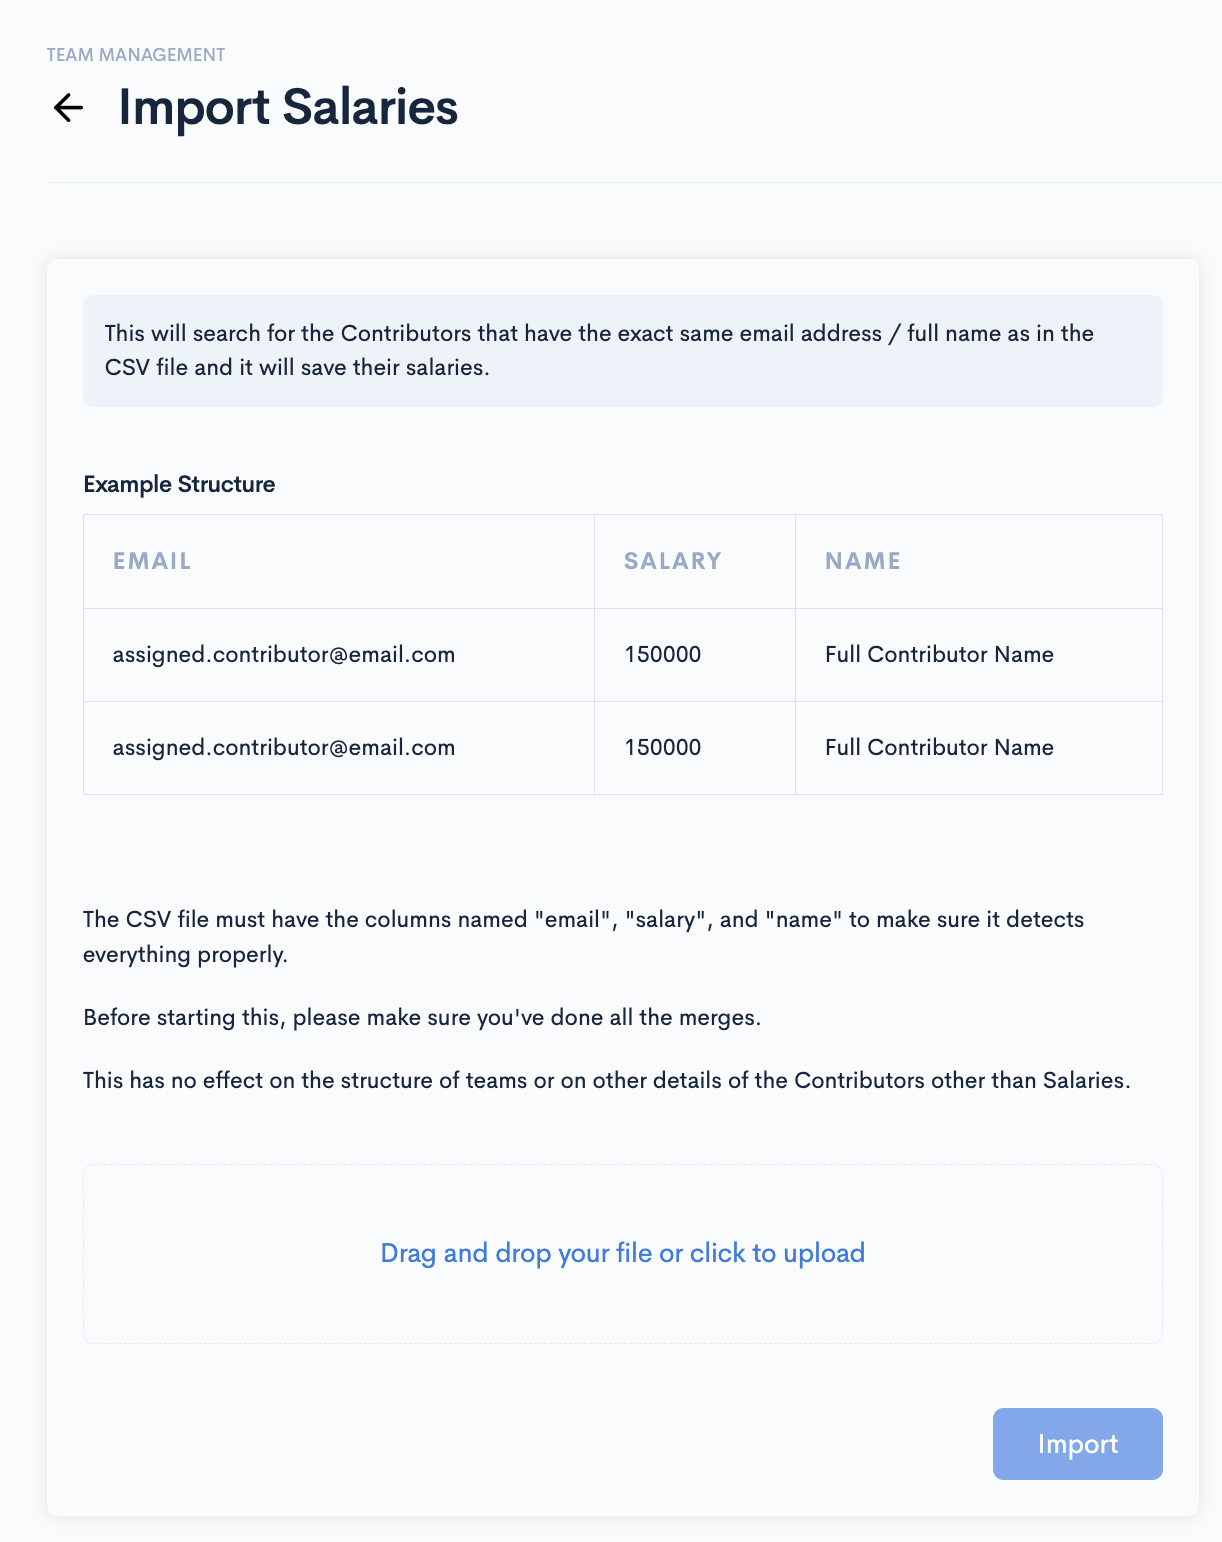
Make sure you respect all requirements to ensure we provide accurate data:
- This will search for Contributors that have the same email address / full name as in the CSV file, and it will save their salaries.
- The CSV file must have the columns named "email" (the email of the Contributor must be assigned to a Contributor in Waydev; not required if name is used, but recommended), "salary" (the salary of the Contributor, as a number without any special characters), and "name" (the full name of the Contributor; must be an exact match of that available in Waydev; not required if email is used, but not recommended) to ensure it detects everything properly.
- Before starting this, please make sure you've done all the merges.
- This has no effect on the structure of teams or other details of the Contributors other than salaries. Please use the specific Import Structure from the same menu for that functionality.
Updated about 2 months ago