

SSO/Google
Step-by-step guide to connecting your Waydev account using Google SSO
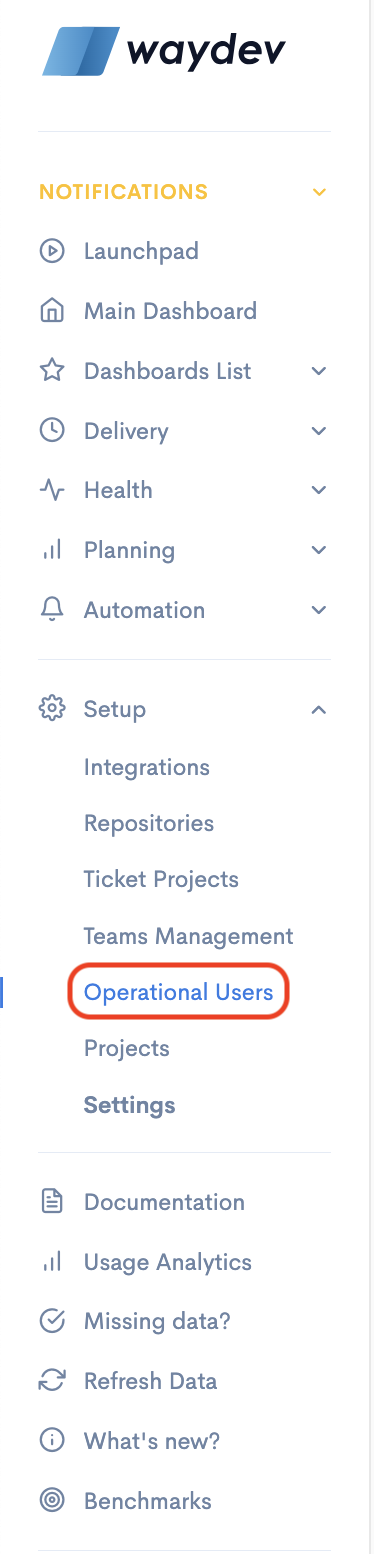
Step 1: Go to your Waydev account and navigate to Setup > Operational Users.
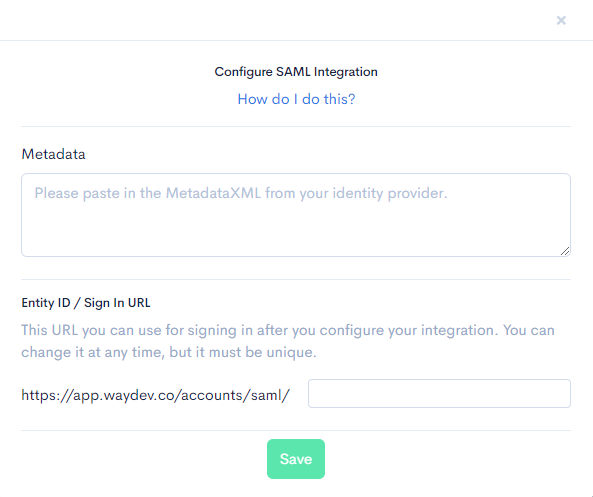
Step 2: Navigate to the SSO Configuration and select New SAML Integration.

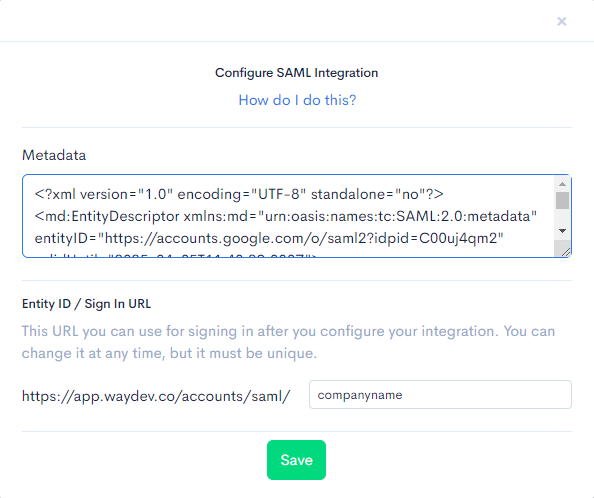
Step 3: In the Configure SAML integration modal, fill out these fields:
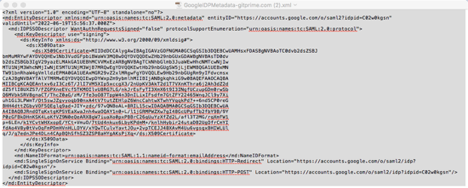
Metadata: to obtain the correct metadata/raw xml for that field we will need to get from Google Admin console
Sign-in URL: this is the entity ID which also doubles as your login URL, you can use your company name or division or team of the company in the field, whatever is most relevant
Fill out the Sign-in URL field and leave this modal & tab open to come back to fill in the Metadata field.
Step 4: In a new tab, sign into Google and go to the Admin console in Google Hub for G-Suite.
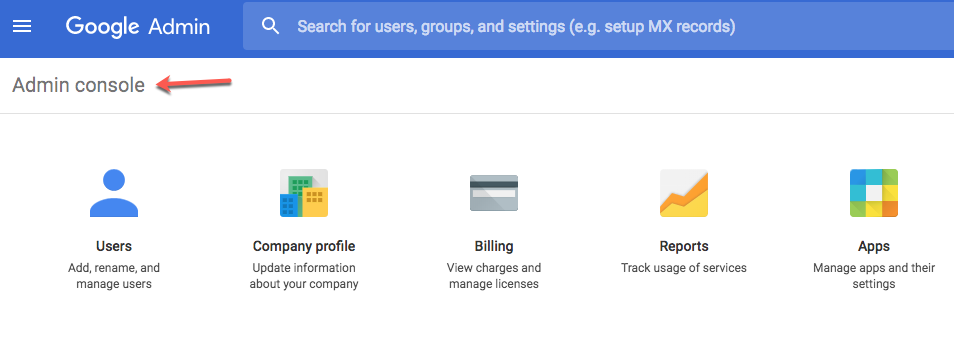
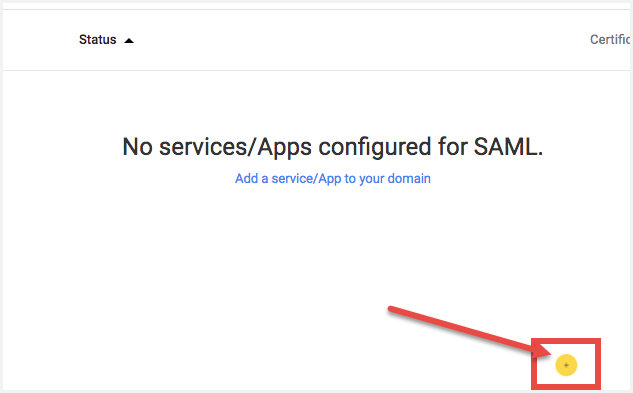
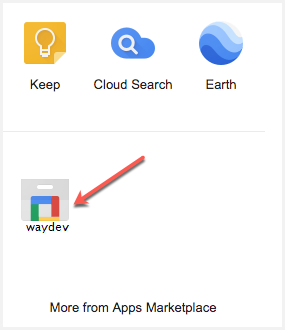
Step 5: Navigate to the Apps section, the SAML apps integration is what we will be installing.
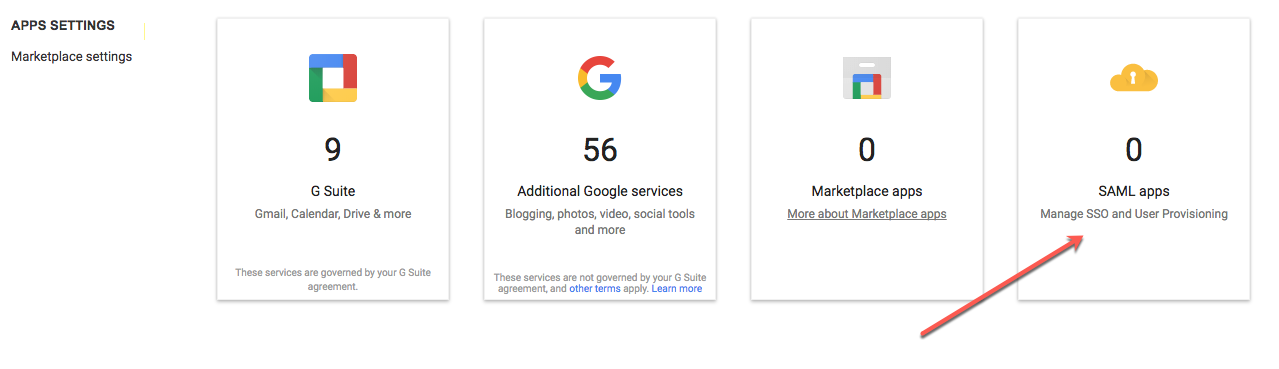
Step 6: Select SAML Apps, then select the plus button located at the bottom right of the page.
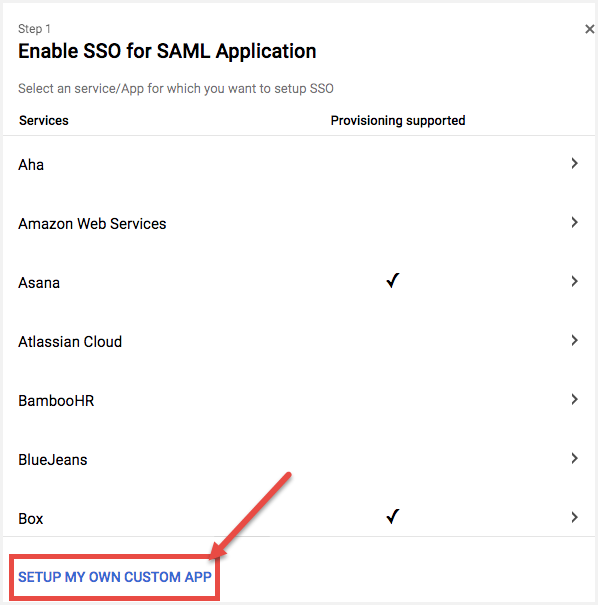
Step 7: In the modal select Setup My Own Custom App.
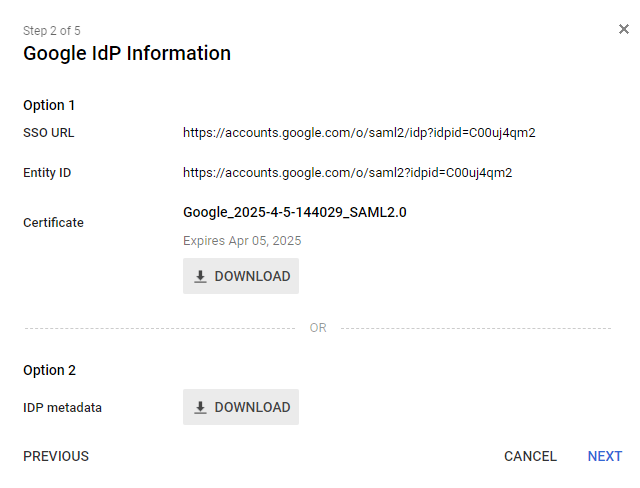
Step 8: In the next modal select Option 2.
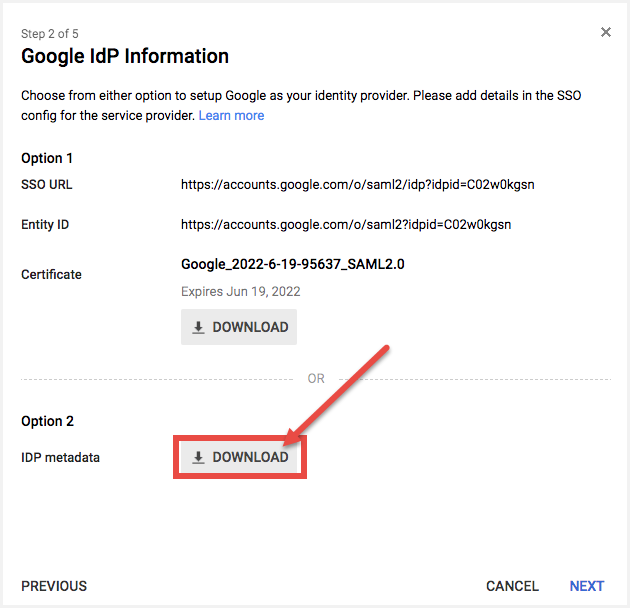
Step 9: This will download the raw XML metadata, copy this data to your clipboard, and leave this tab open.
Step 10: Return to your Waydev tab and paste that raw data into the Metadata field, continue to leave this tab open.
Step 11: Return to the Google Admin page and click Next on the Google IDP Information modal where you left off.
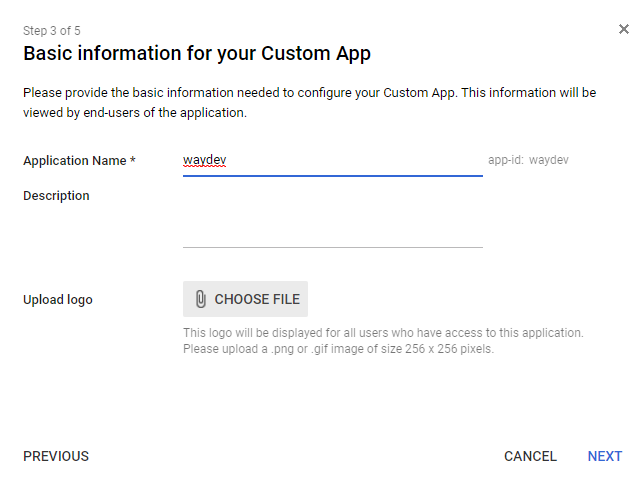
Step 12: In the next modal Basic information for your Custom App add your Application Name. The Description and Logo fields here are optional and you can always come back and add them later. Click Next.
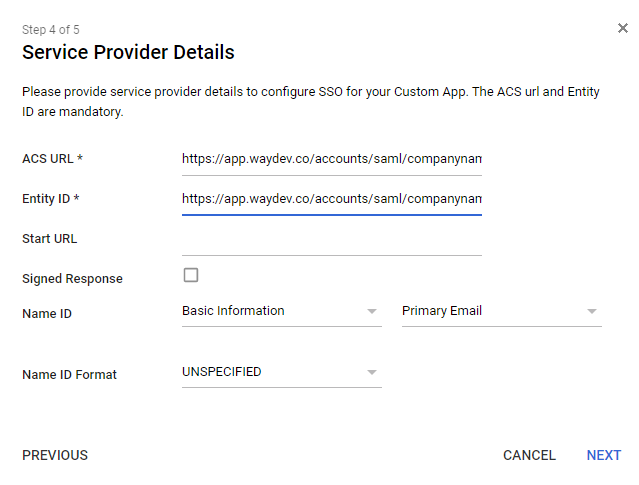
Step 13: Under Service Provider Details, fill out the following fields and click Next.
ACS URL: This is the Login URL you specified in Waydev. Your Entity ID* is the same as the ACS URL.
Step 14: Under Attribute Mapping, you will create 3 attributes. Click Add New Mapping for each of the three attributes.
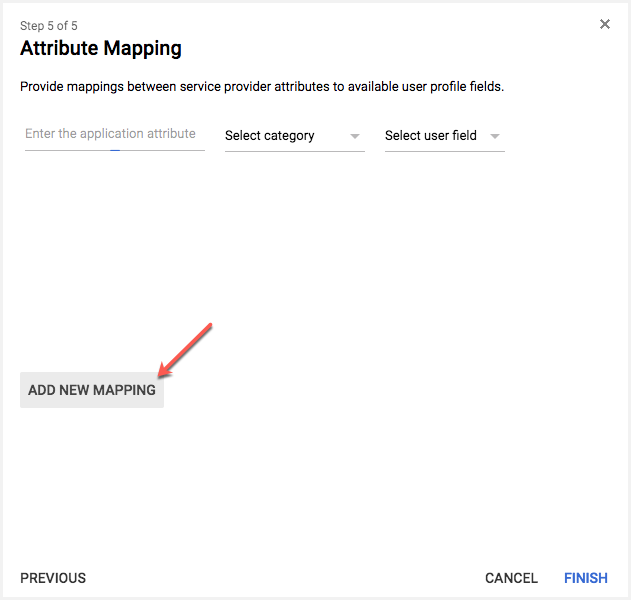
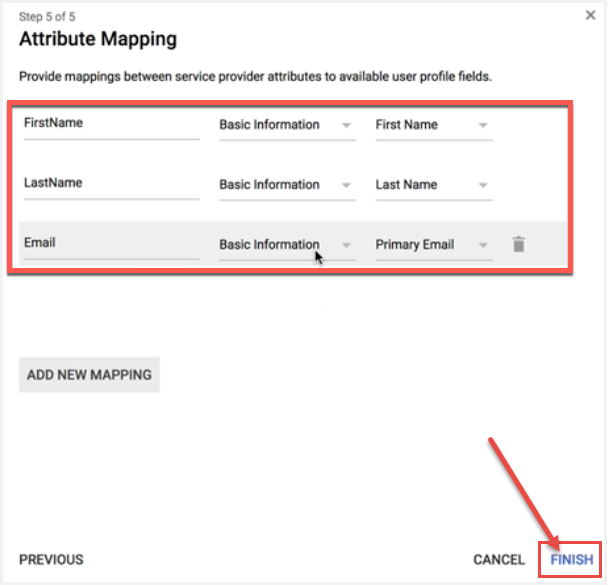
Step 15: Create the following three attributes as pictured in the image below. Click Finish
FirstName - Basic Information - First Name
LastName - Basic Information - Last Name
Email - Basic Information - Primary Email
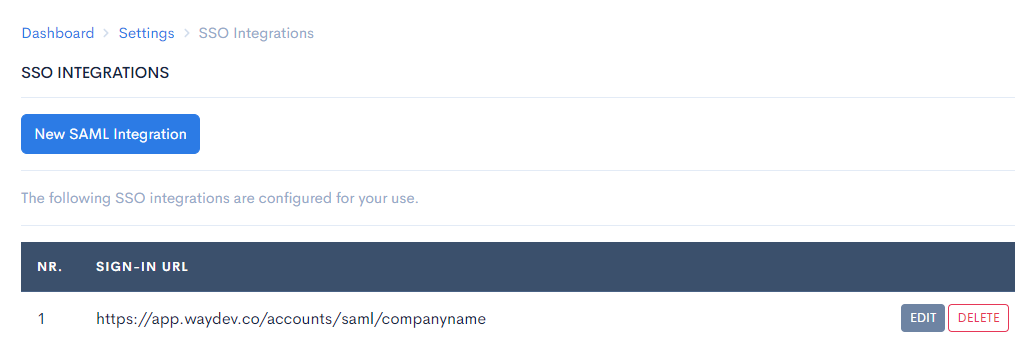
Step 16: Once you click Save it will take you back to the main page and you will see your login URL.
Step 17: Sign out of Waydev and return to the Google Admin console, a pop-up will tell you to configure data at Waydev, which we have done. Click OK.

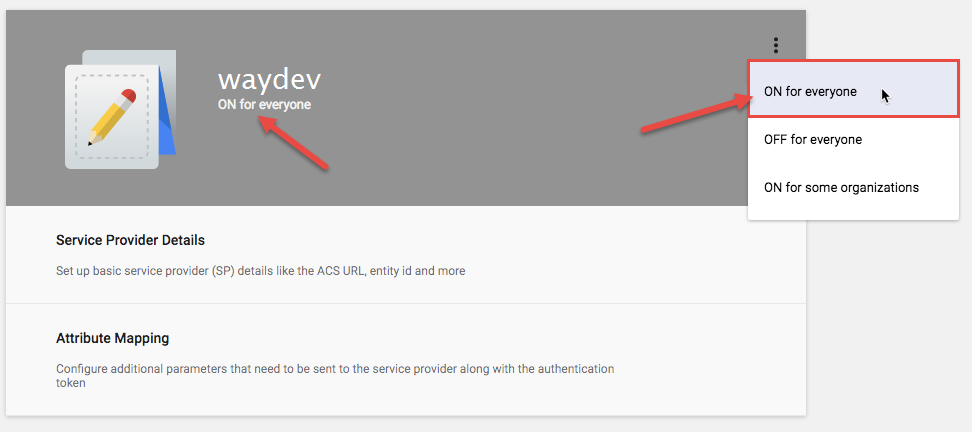
Step 18: A modal will appear. Go to the top right and select ON for everyone. By default, it is pre-set to Off.
Step 19: You have successfully connected Waydev with your Google SAML APPS account. In your Google Apps section, you will find the SSO login that you created. This link will take you to your Waydev App settings.
Something went wrong
Two helpful tips if you are having trouble getting the App to work.
- Clear out your cached files in your browser
- Log out of your Google account and then log back in.
If you have any questions/issues, please reach out to your customer success team.
Updated 10 months ago