SSO/Okta
A step-by-step guide for connecting your Waydev account using Okta.
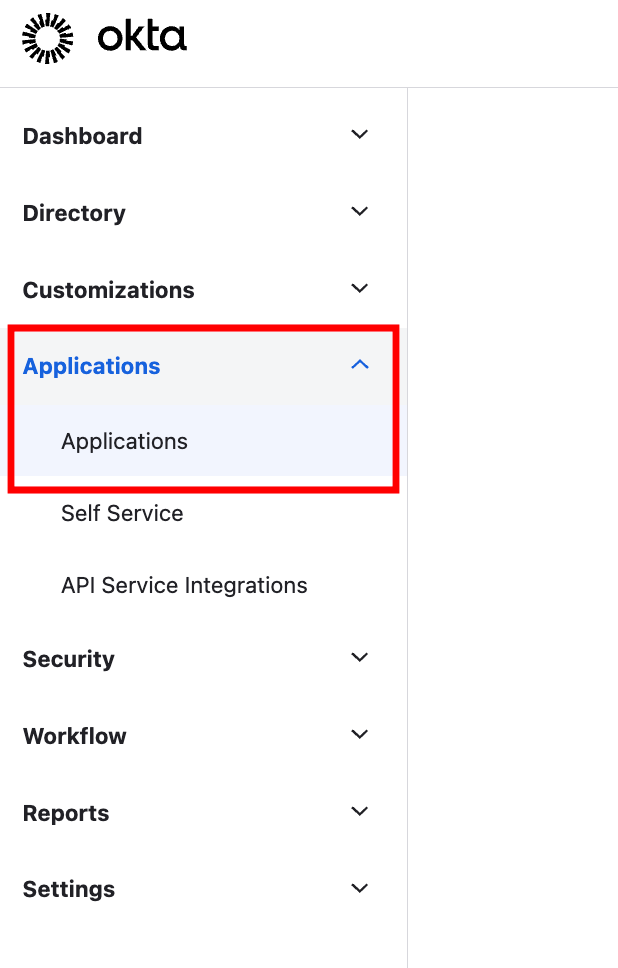
- Step 1: Sign into Okta, navigate to the left side, and click Applications.
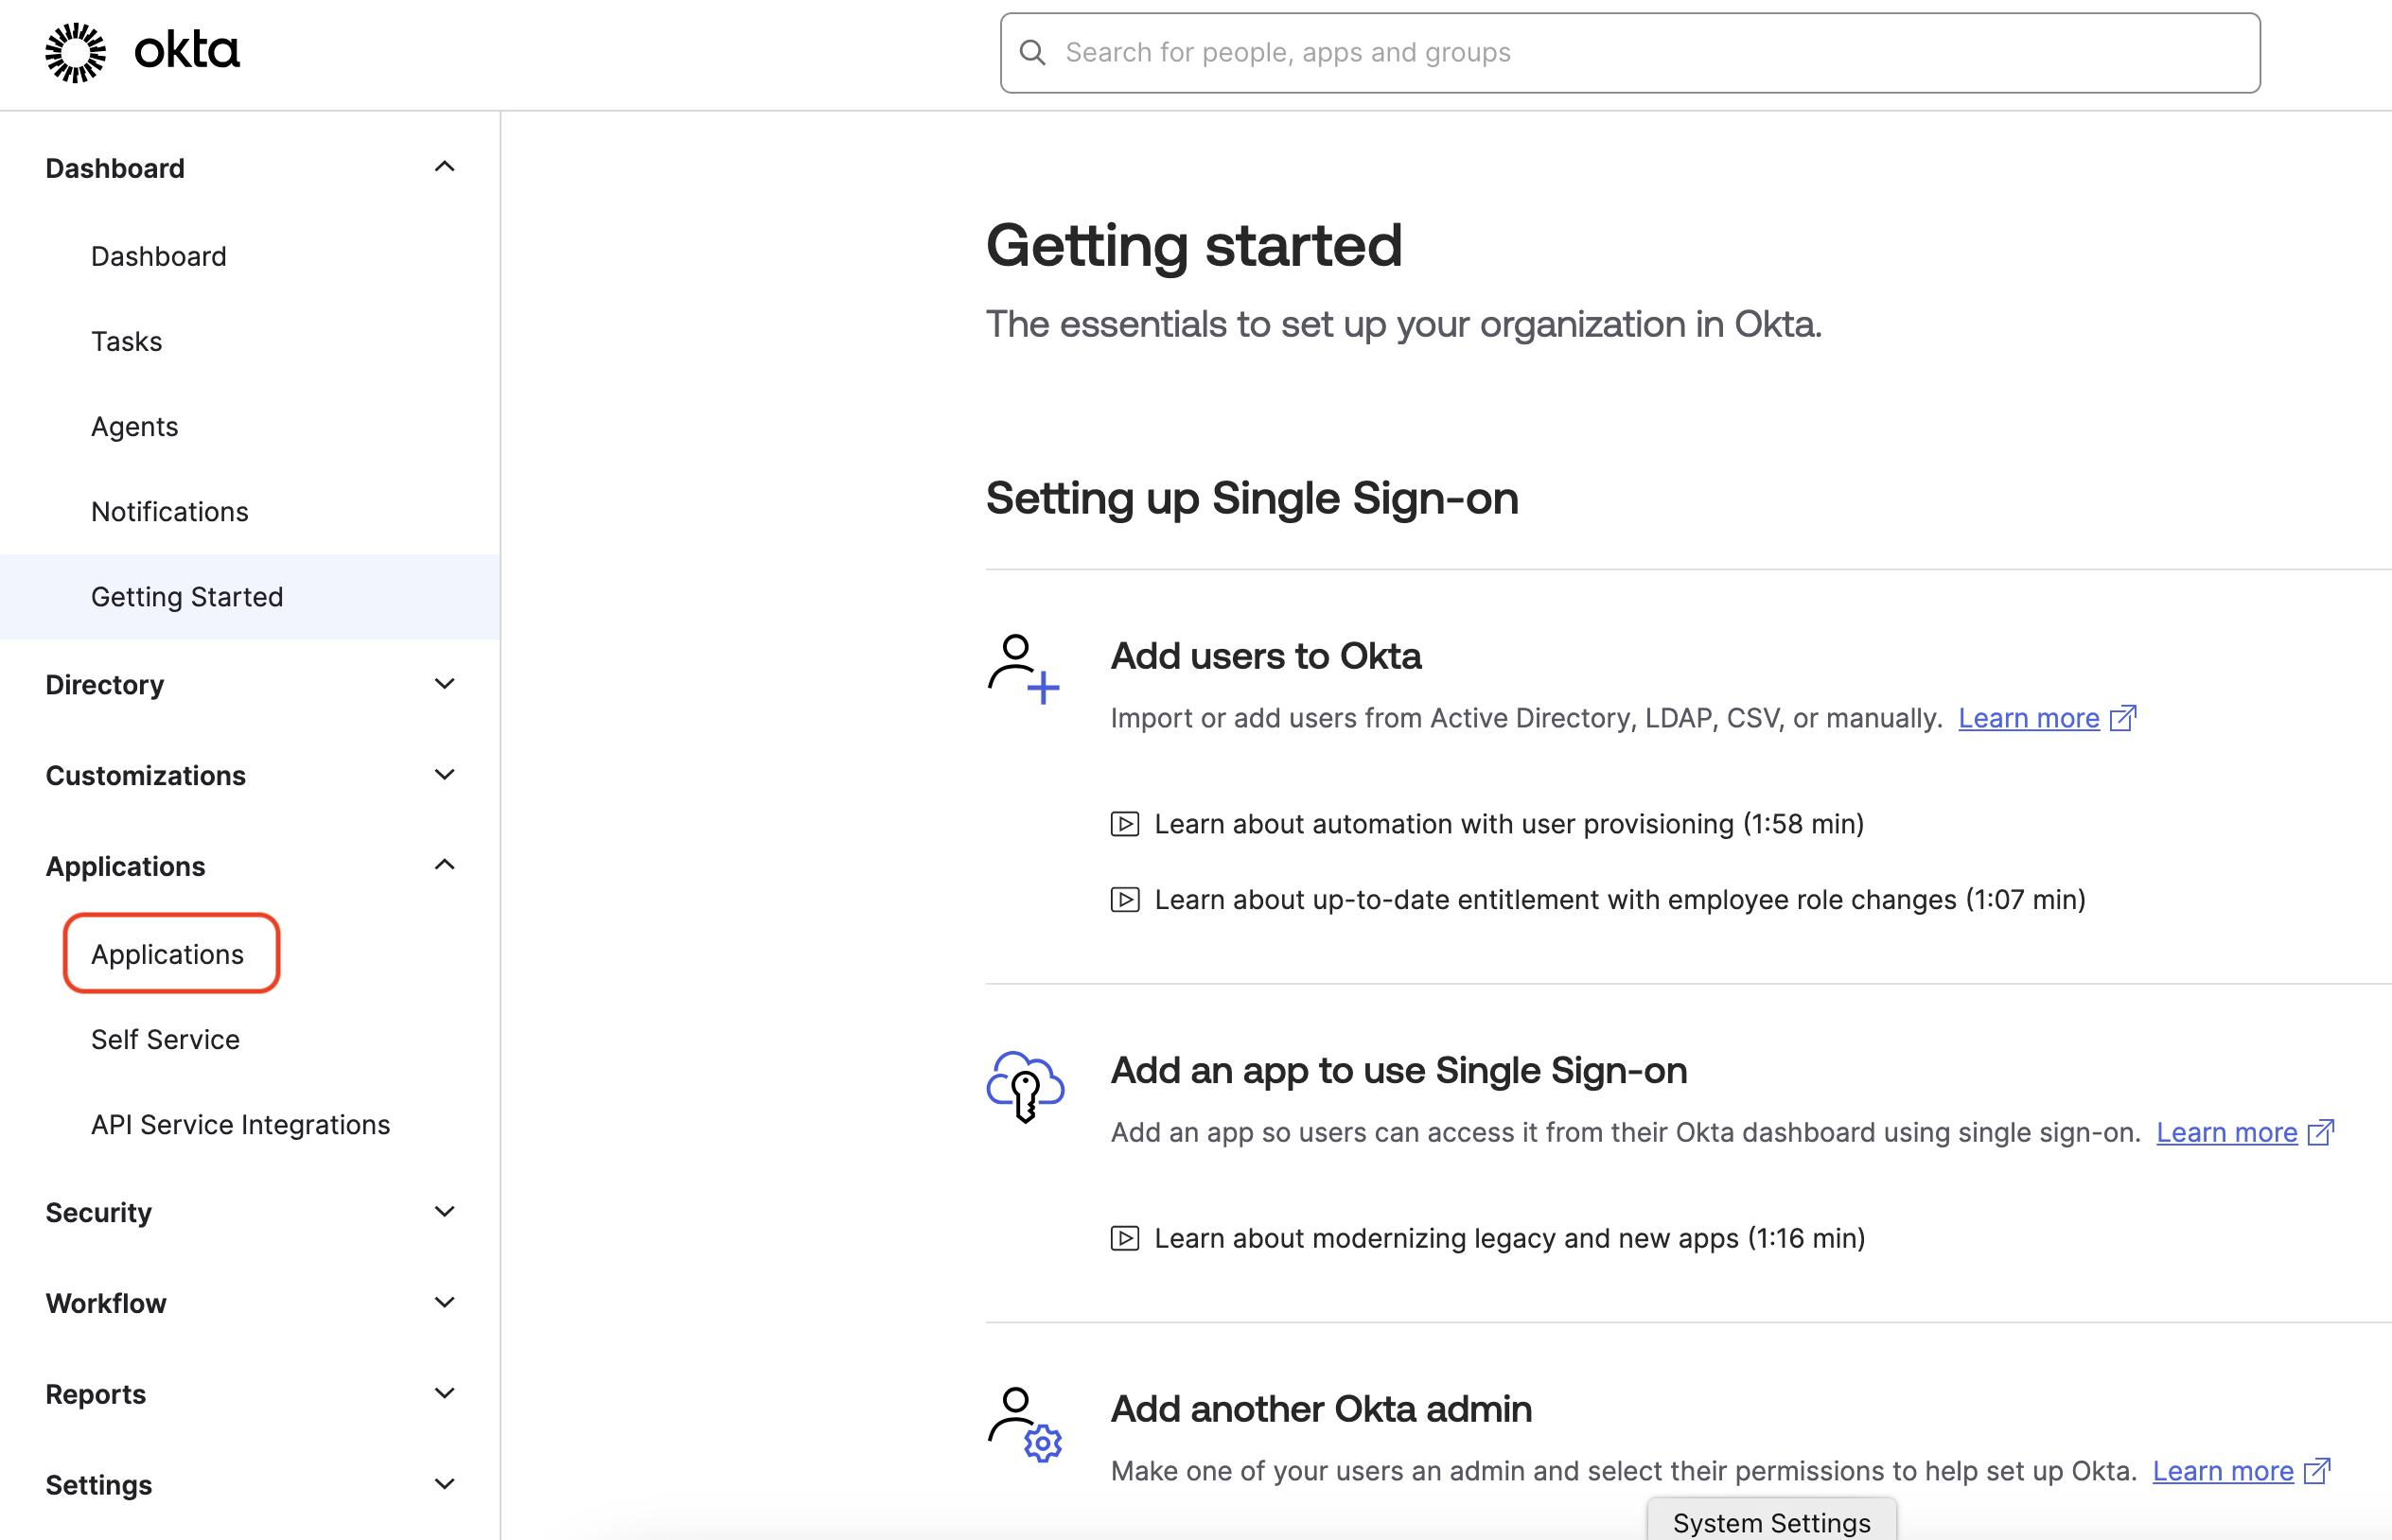
- Step 2: Click Create App Integration.

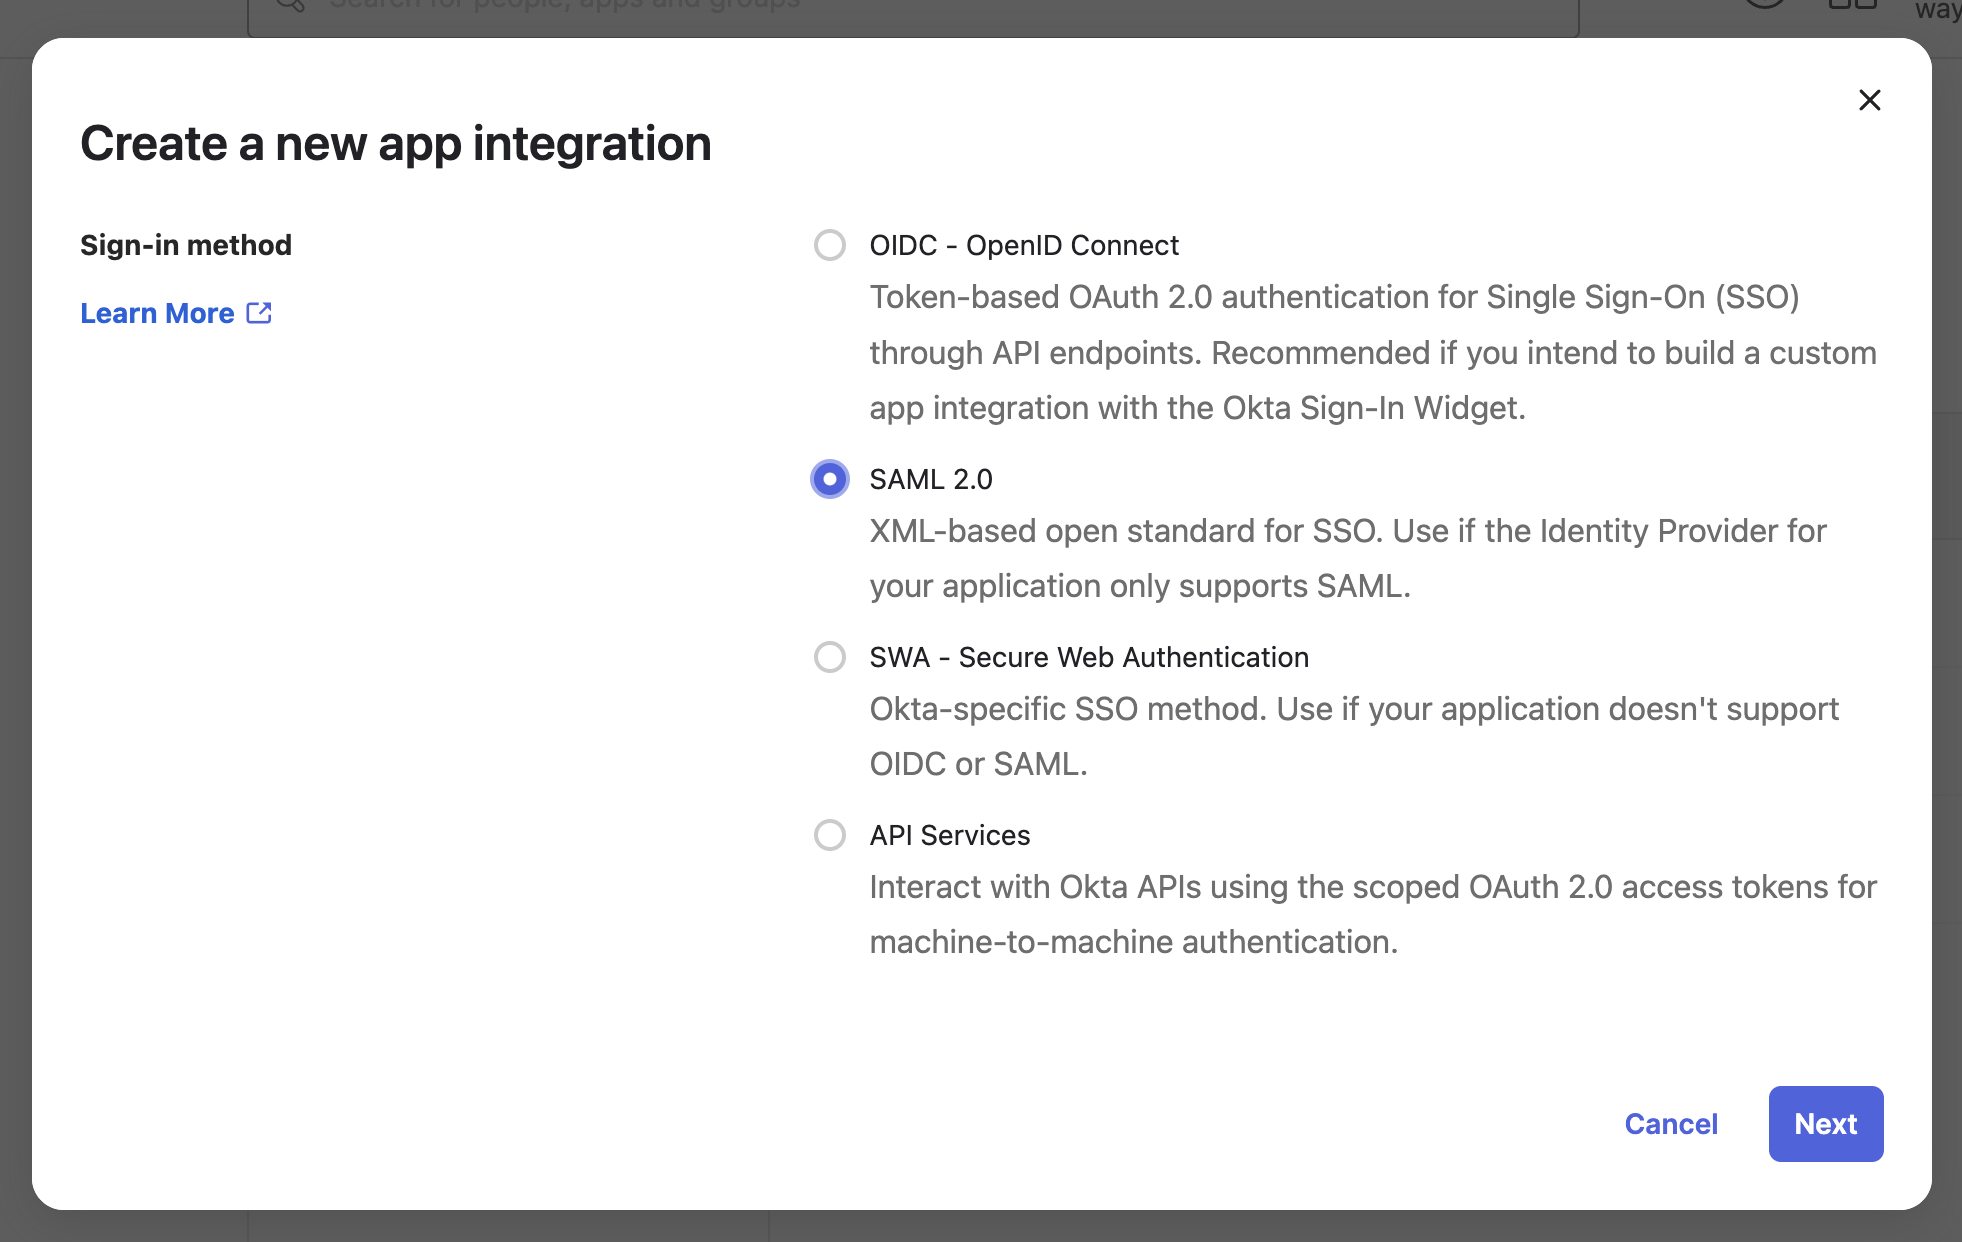
- Step 3: Select SAML 2.0 for Sign on method. Then click Next.
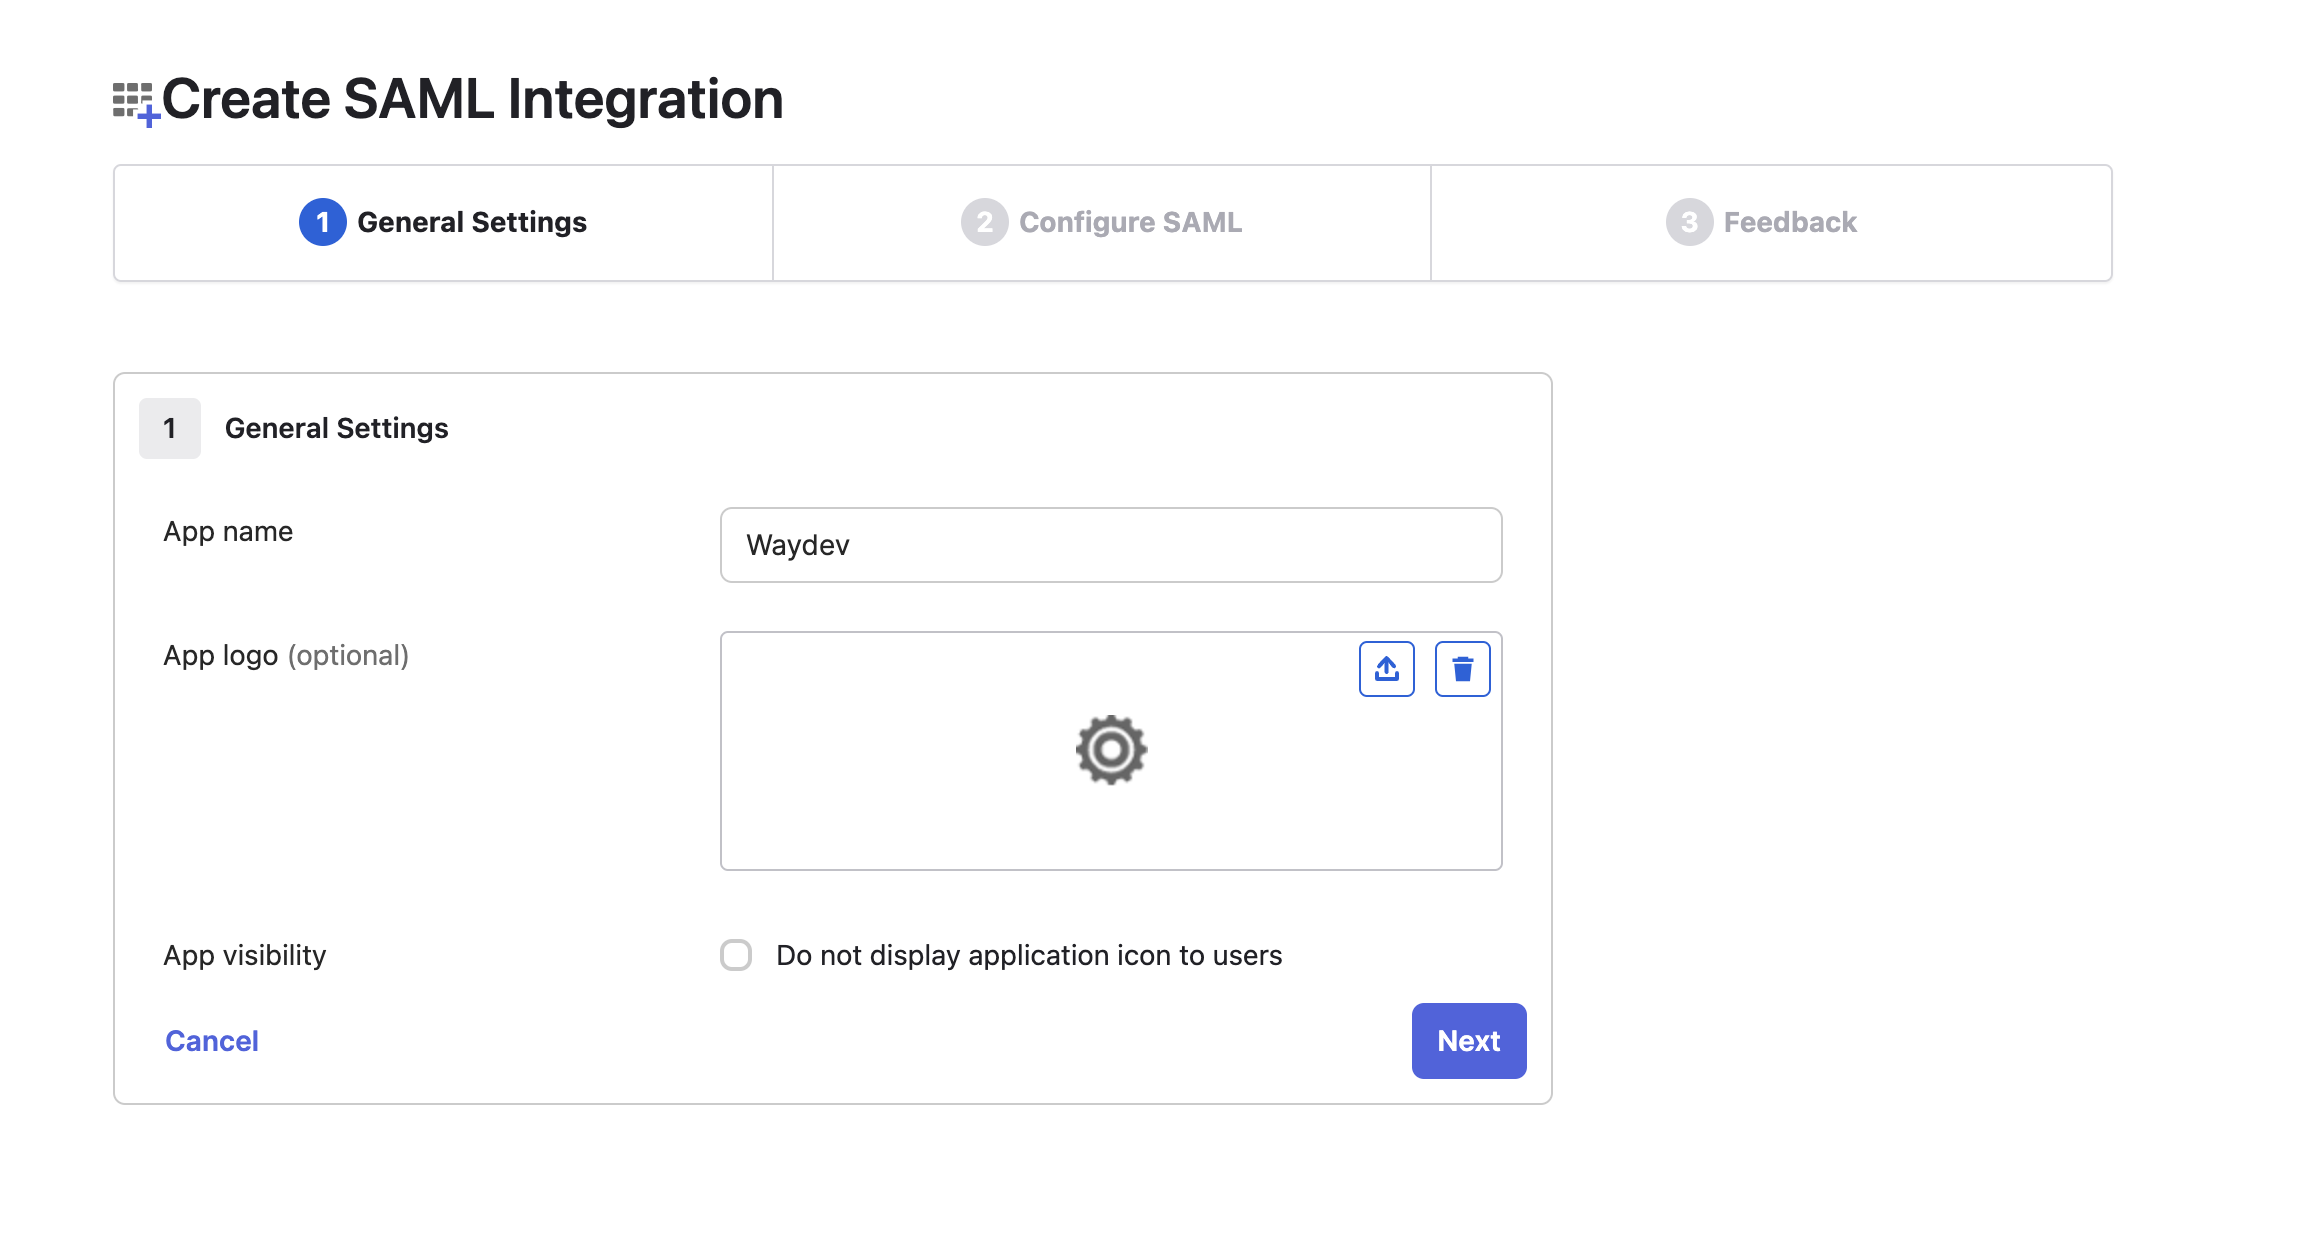
- Step 4: Fill out the App name. It can be anything (i.e. Waydev). Then click Next.
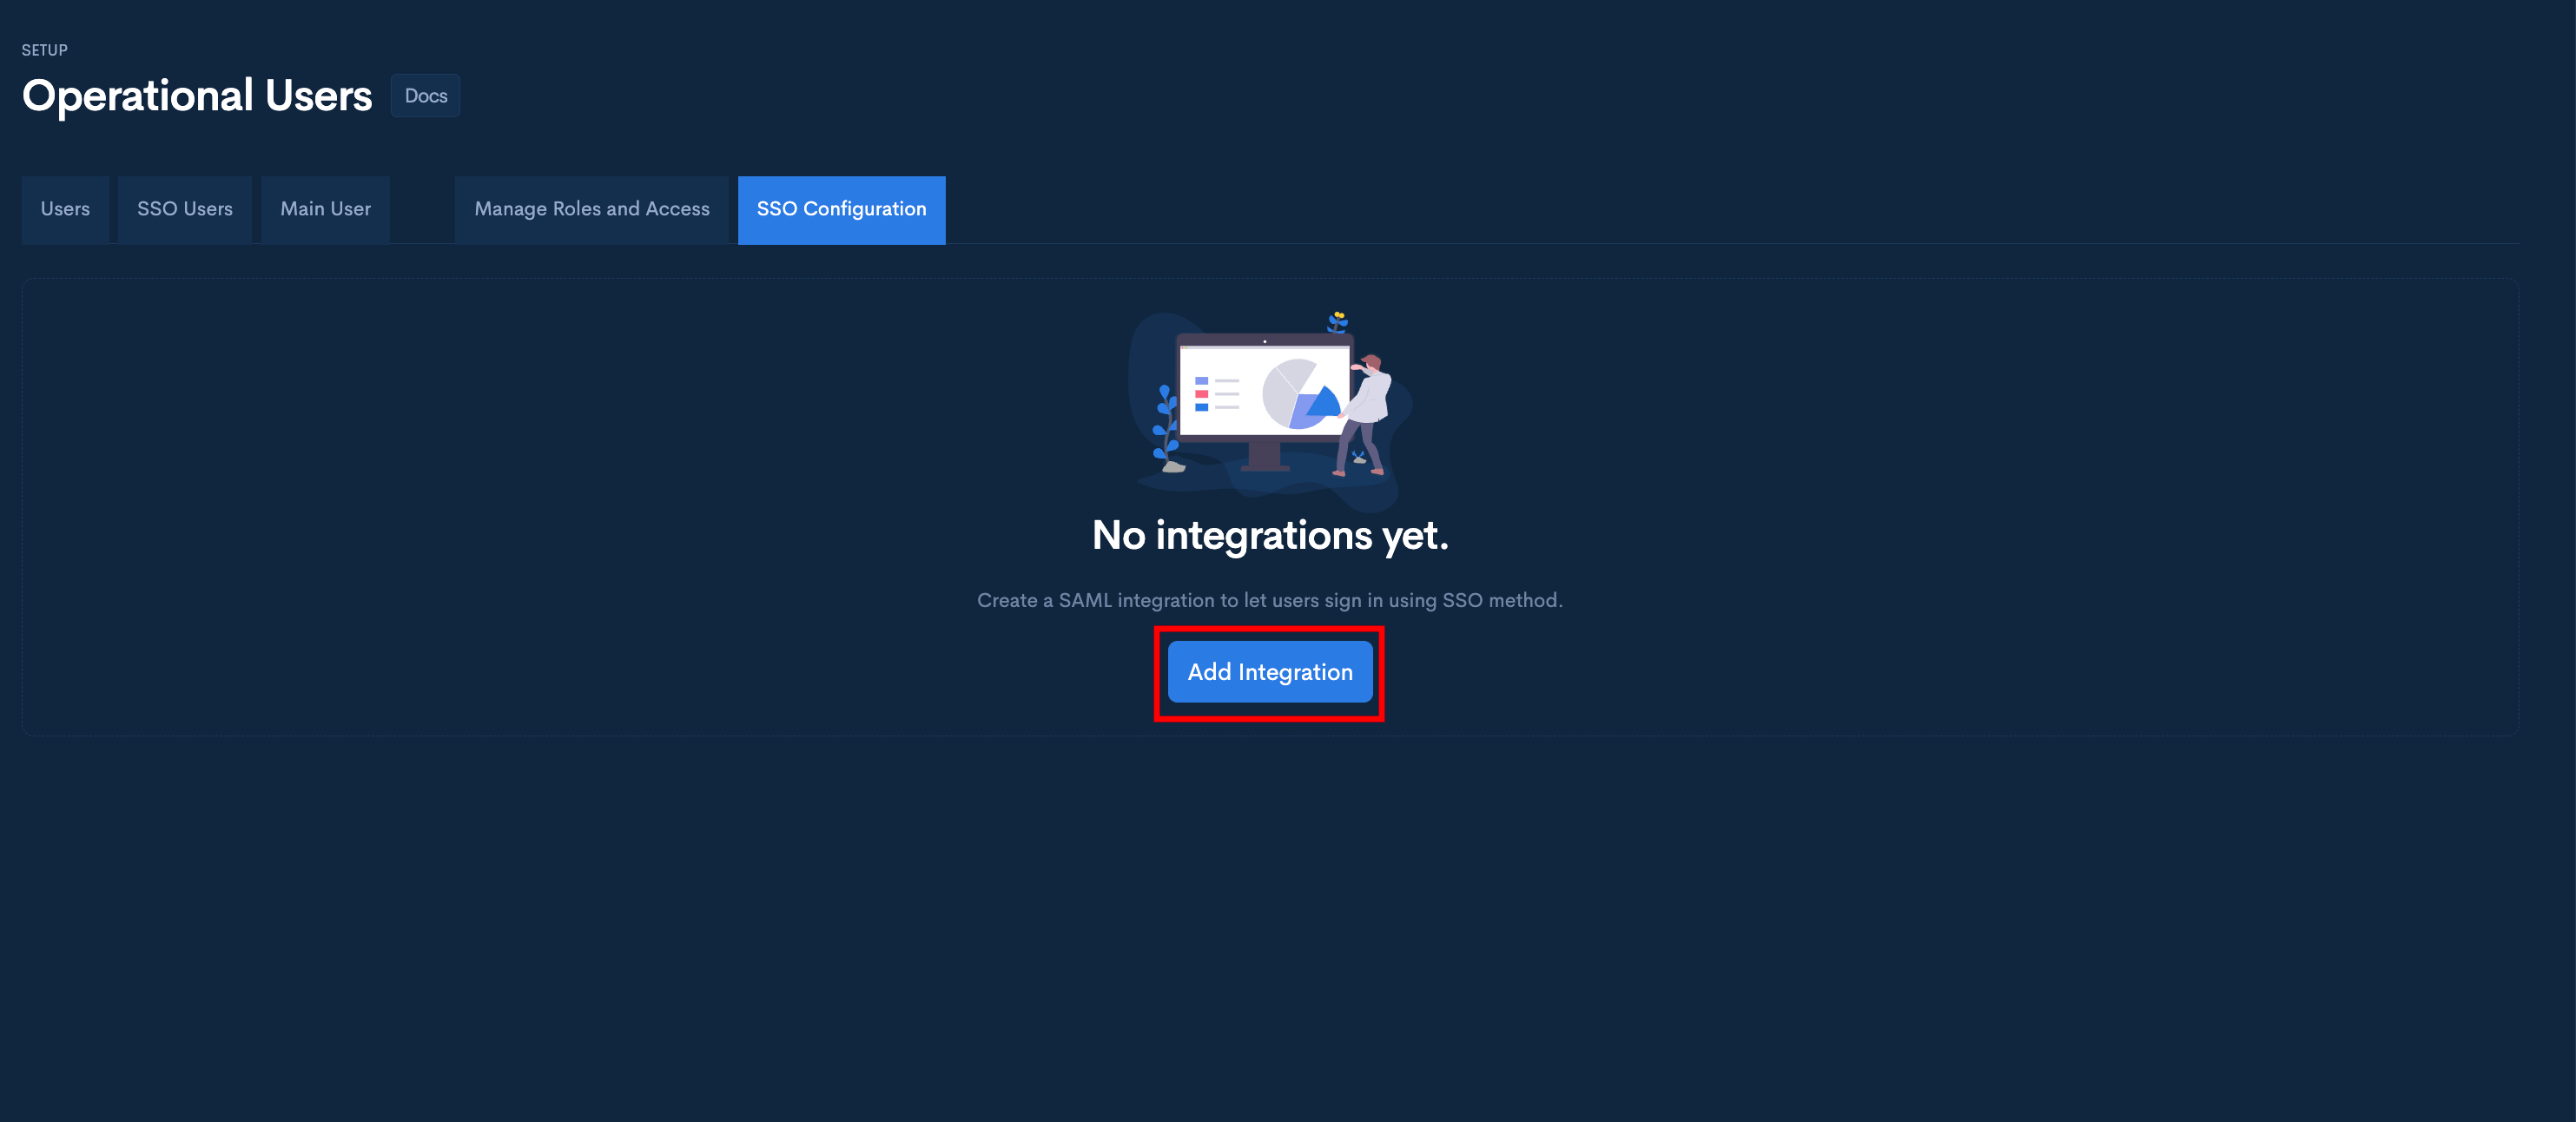
- Step 5: In another tab, open your Waydev App, and select Setup -> Operational Users -> SSO Configuration
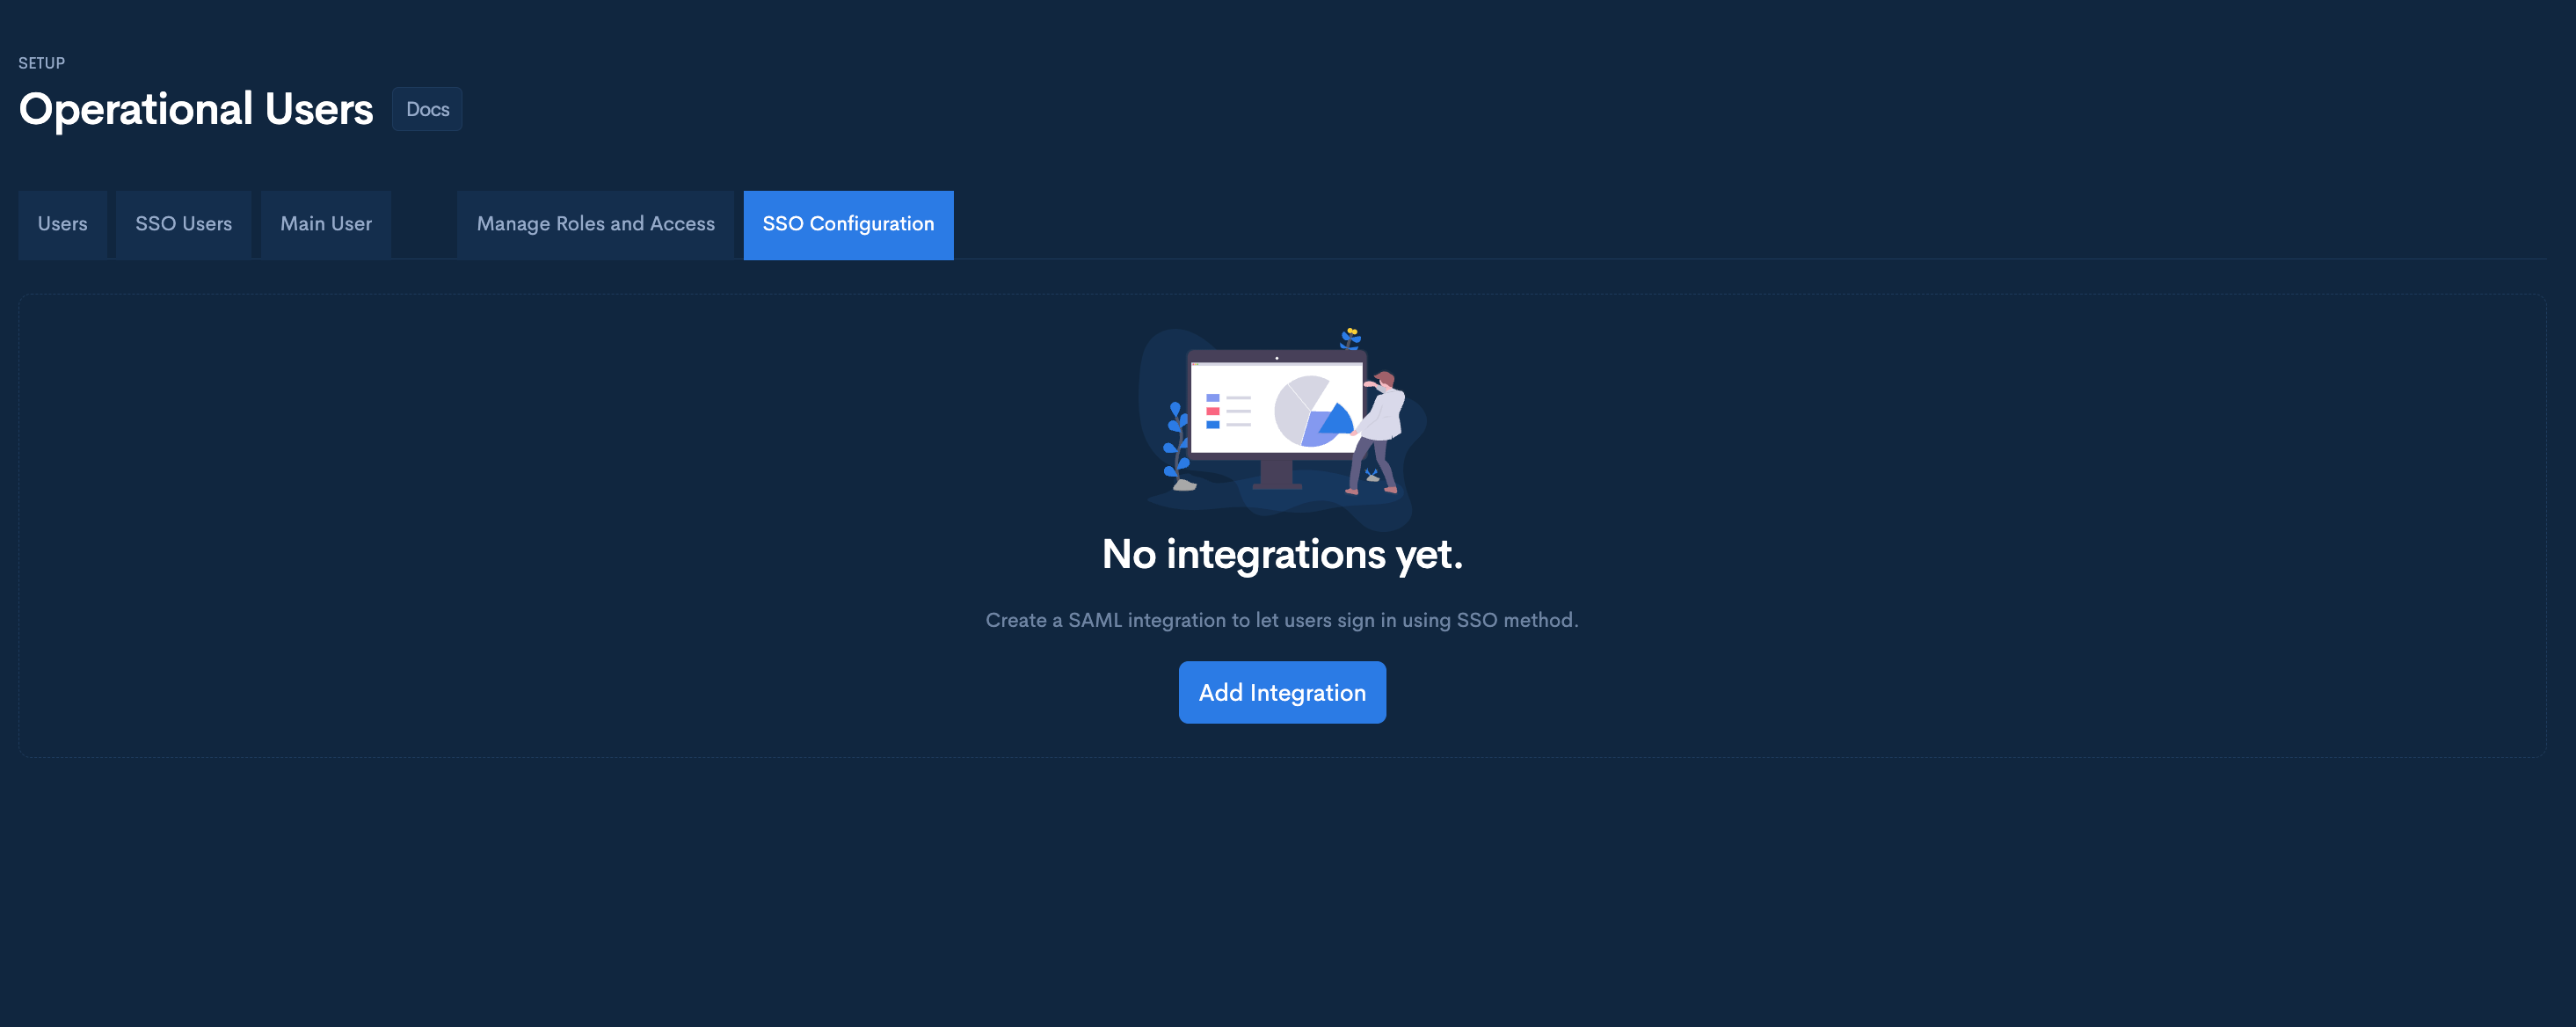
- Step 6: Click the "Add Integration" button.
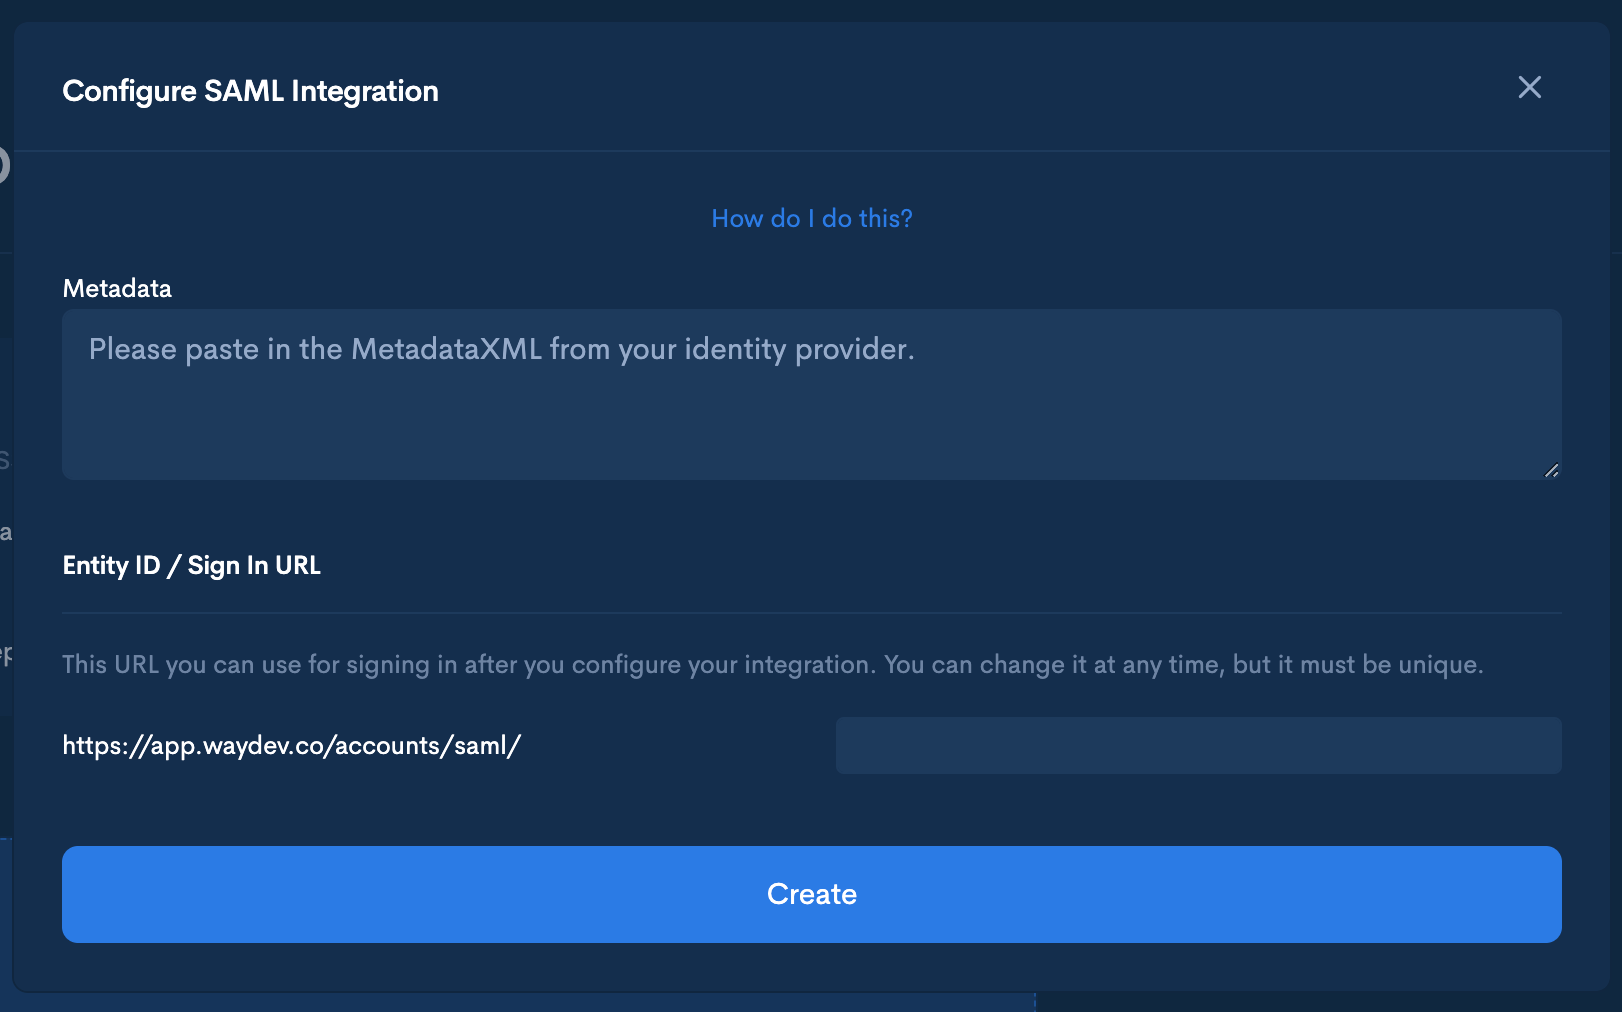
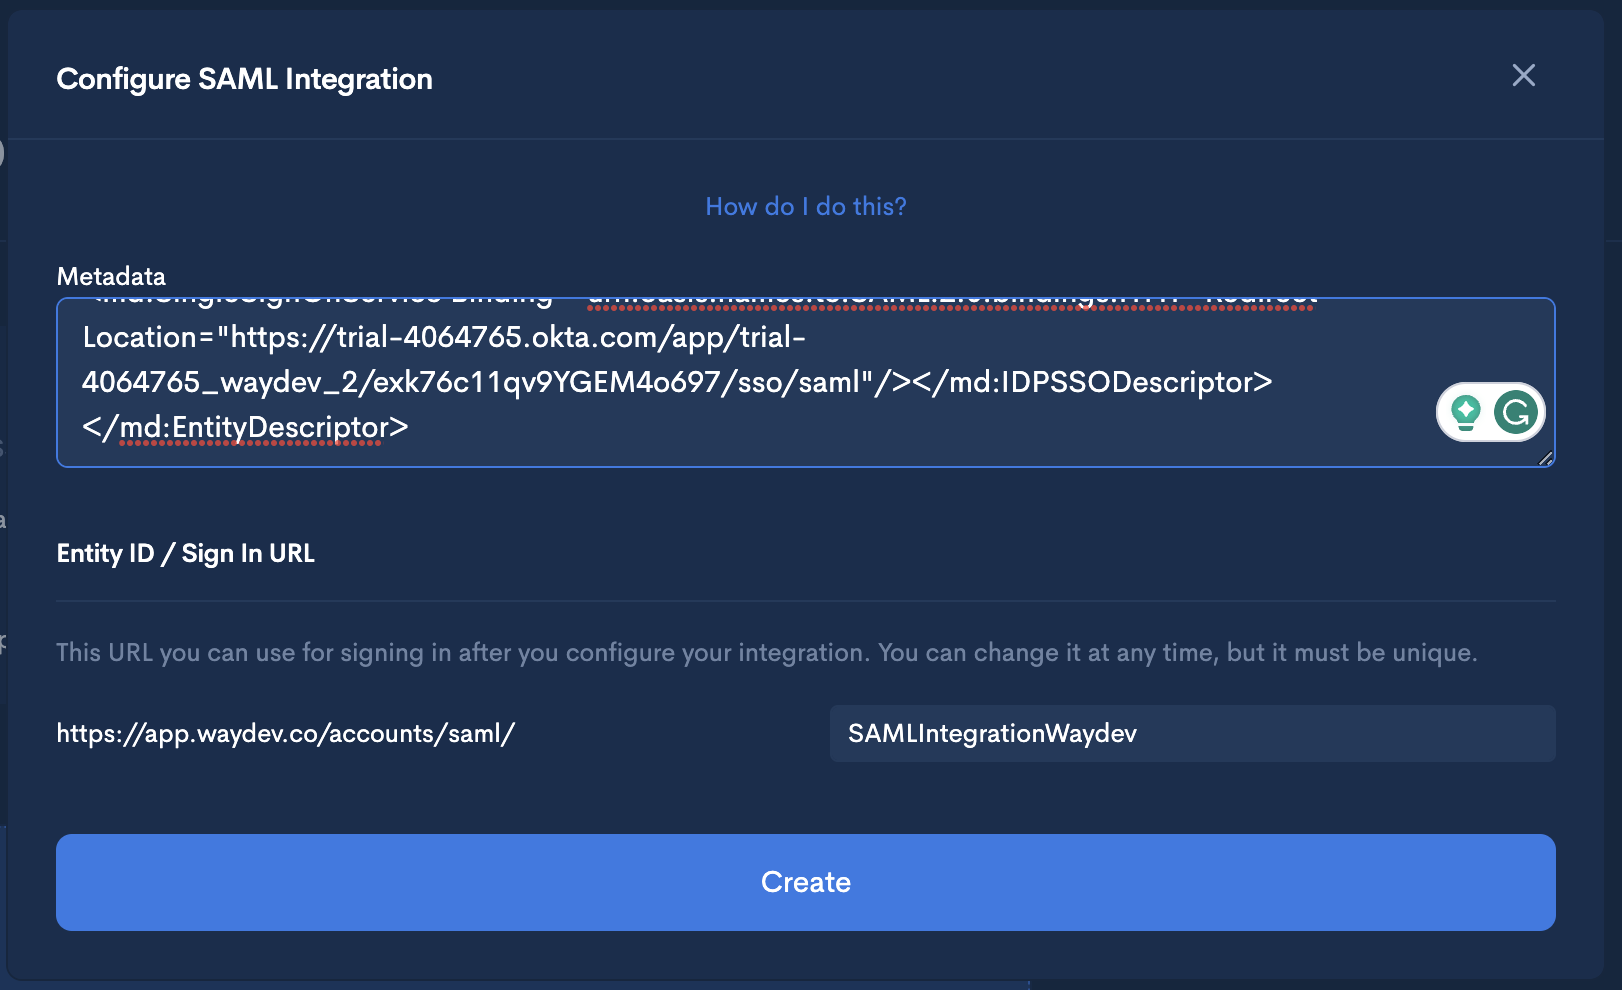
- Step 7: In the Configure SAML integration modal, fill in the “Login URL” field with your organization name. This is the URL you will use for logging in after you configure your integration. You can use your organization name or something else. It just needs to be unique. You will use this same URL in Step 8 below.
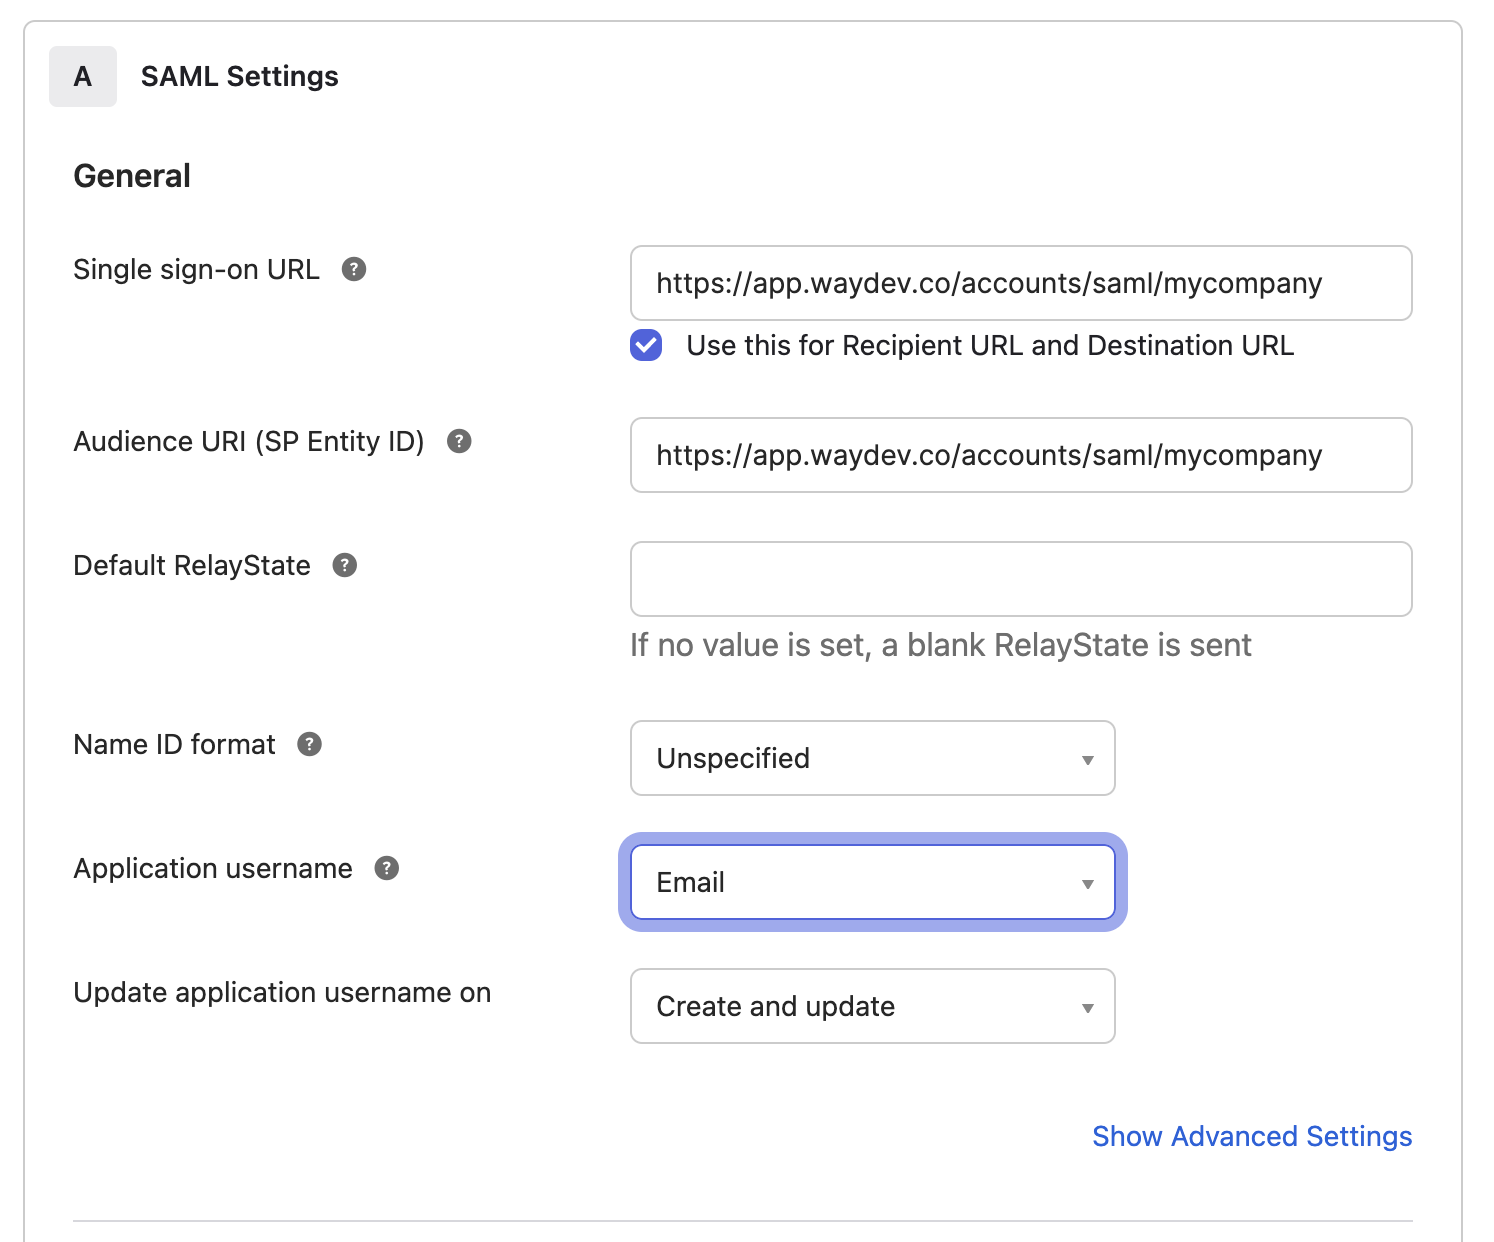
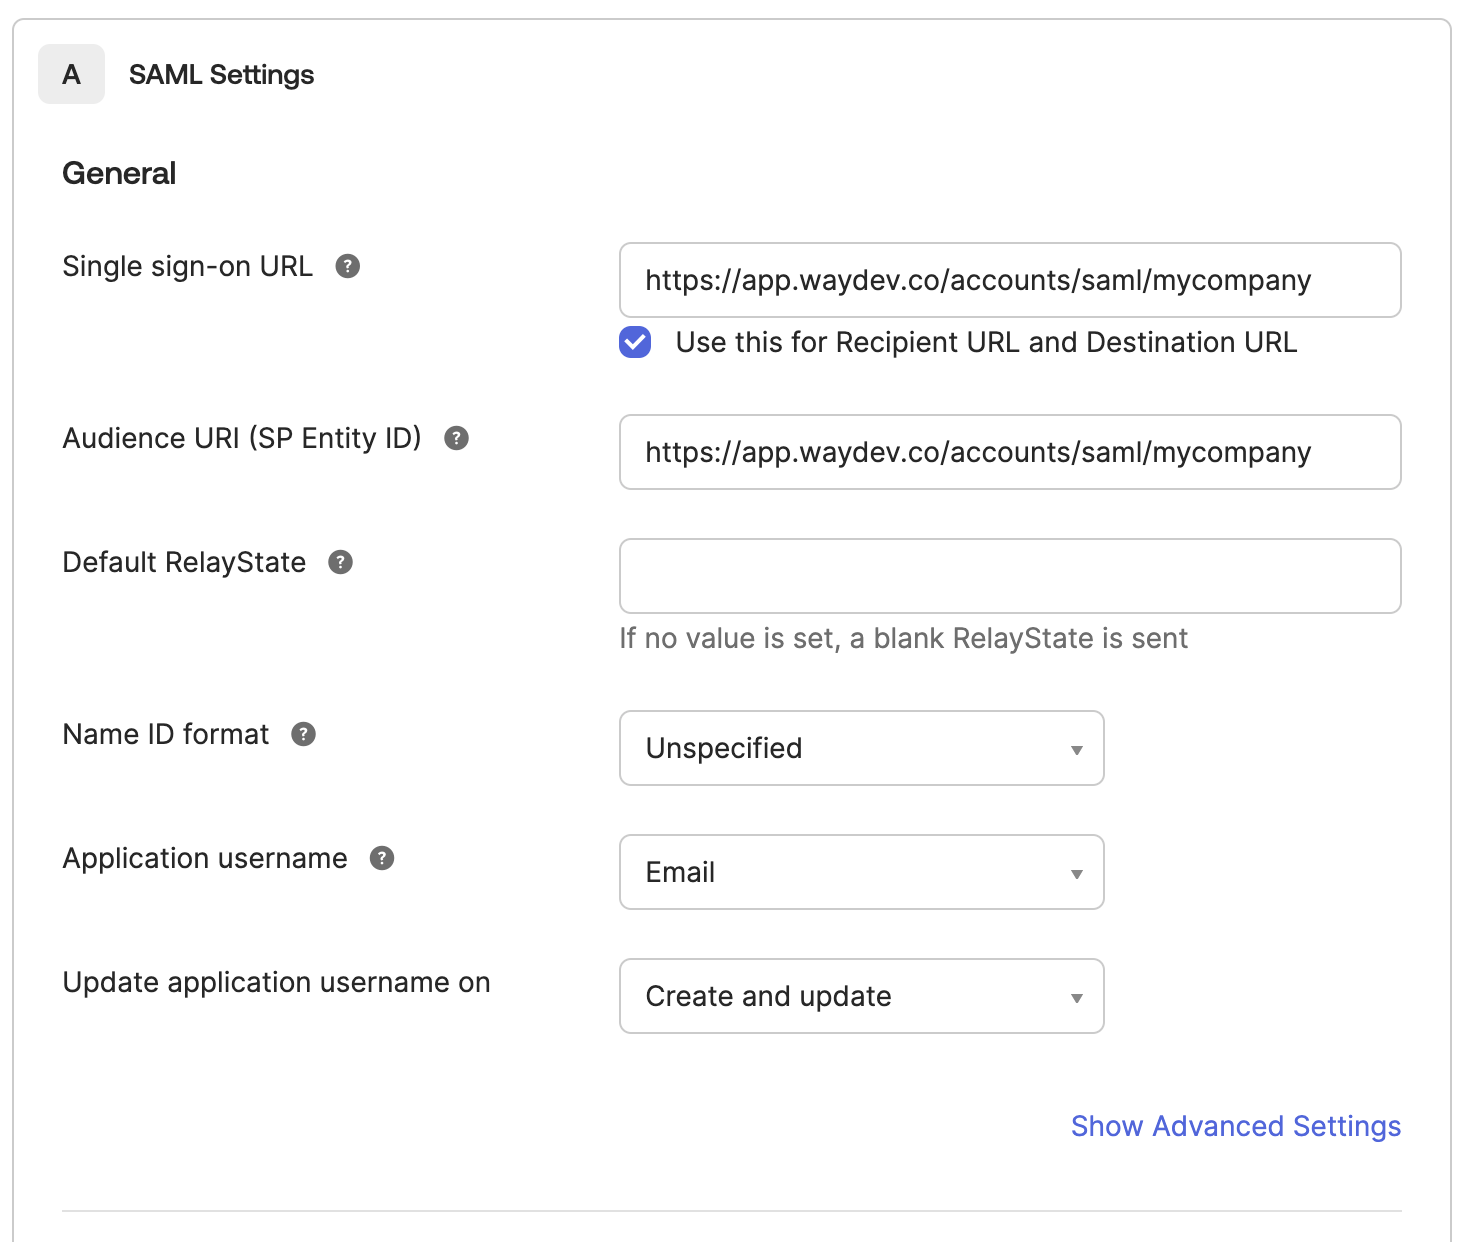
- Step 8: Navigate back to where you left off in Okta and fill in the following information under the General settings:
A. Single sign-on URL: This is the full URL from the screen above in Waydev; i.e. https://app.waydev.co/accounts/saml/mycompany
B. Audience URI (SP Entity ID): This is the same URL as in step A, above.
C. Application username: Select “Email” from the drop down menu.
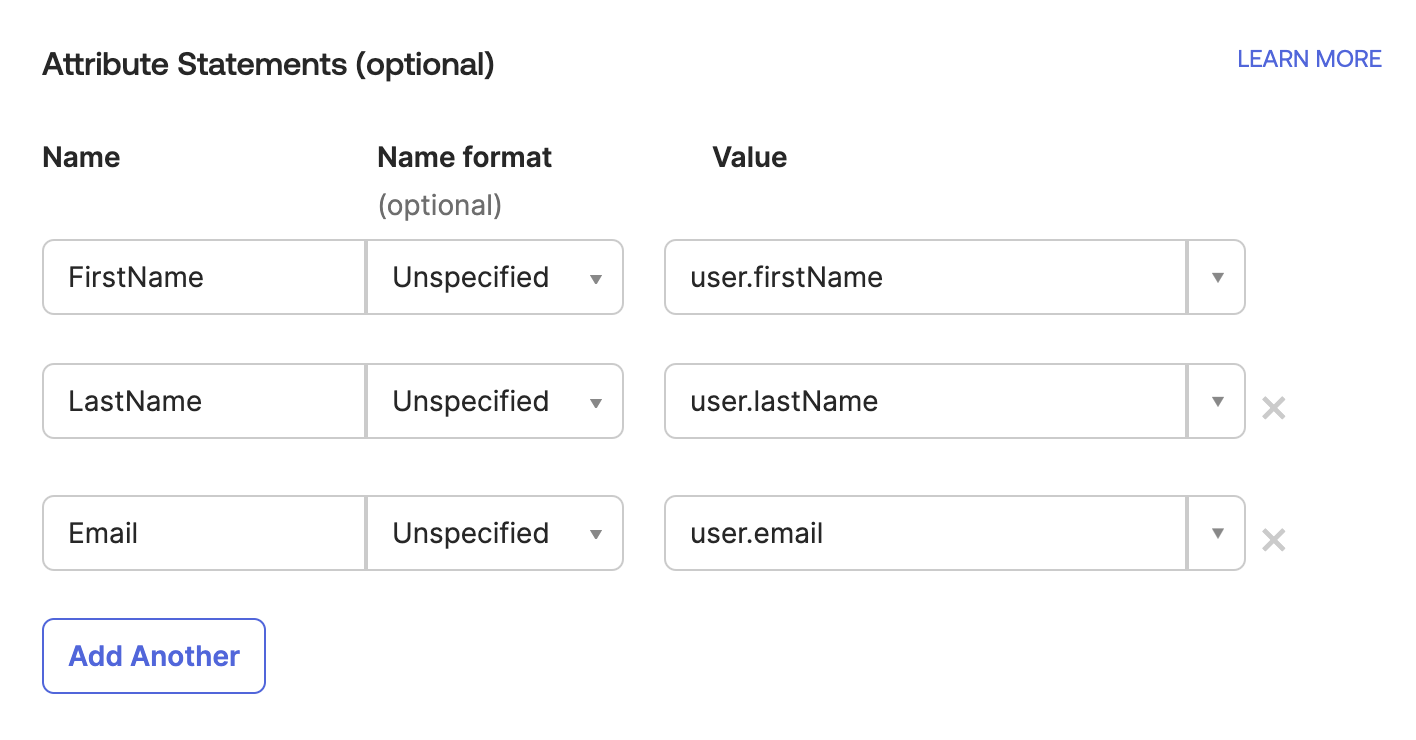
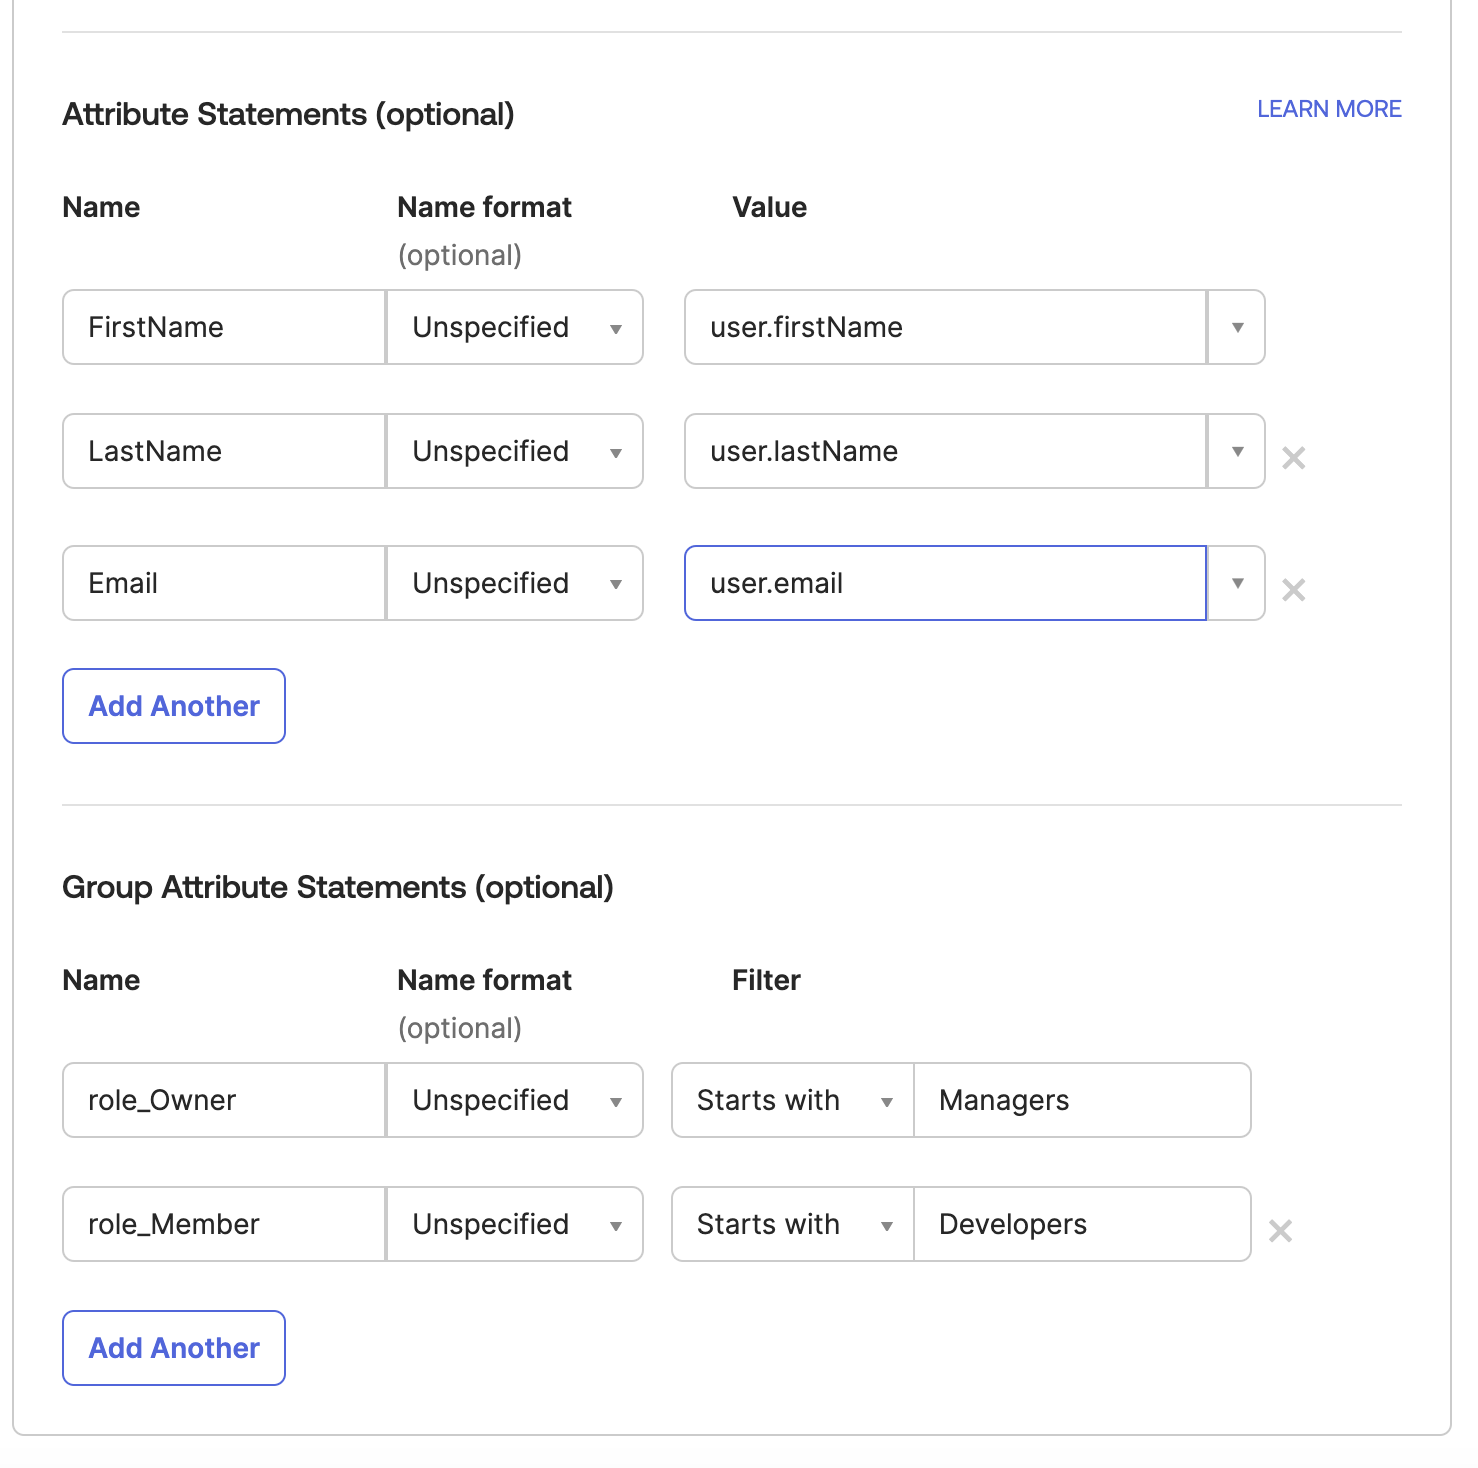
- Step 9: On the same screen, under Attribute Statements, click Add Another to add two more rows so you can map the following fields:
C. FirstName
D. LastName
E. Email
These fields are case sensitive.
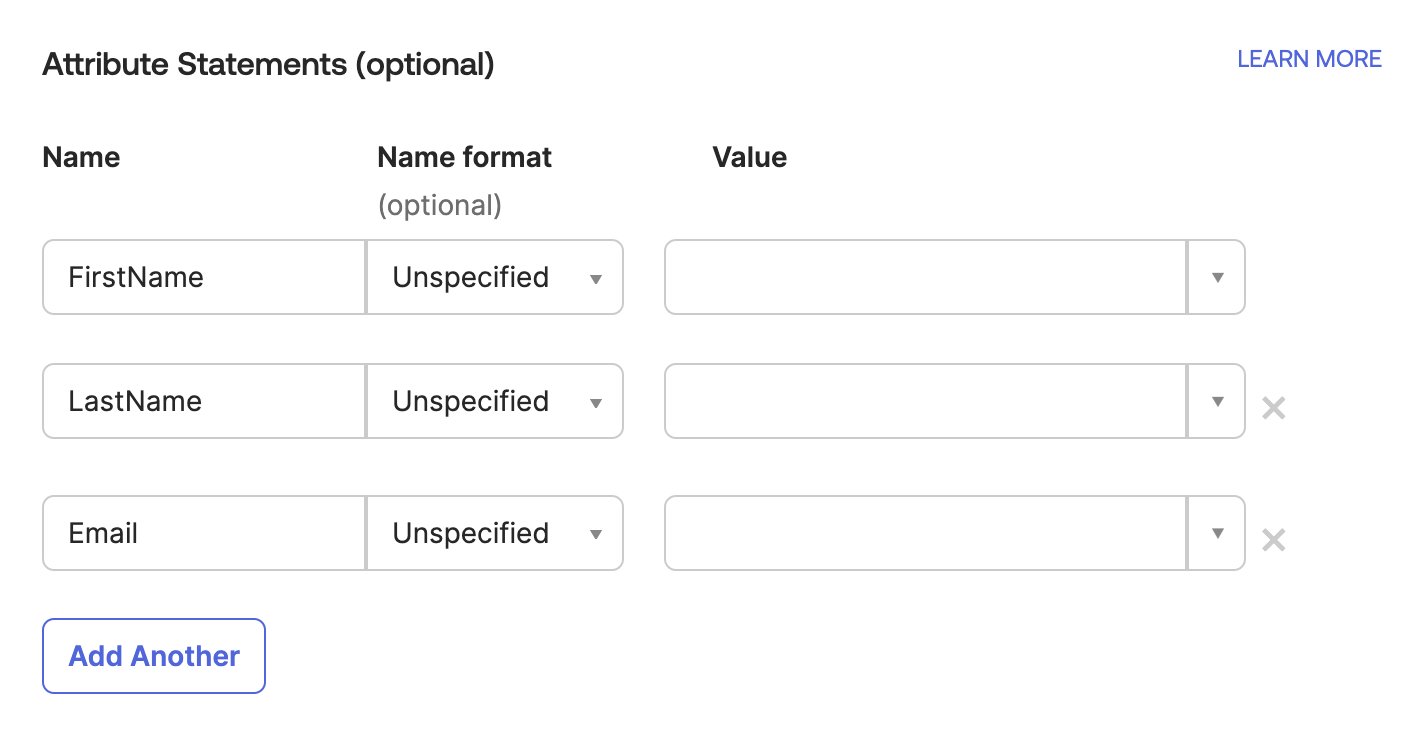
- Step 10: Using the drop-down menu under Value, map the values appropriately to the fields you just created.
- Step 11: Under Group Attribute Statements, map your current roles in Okta to their respective role in Waydev. "Owners" and "Members" are roles created by default for your organization, but you can go into Waydev with your initial/setup account and create any roles and associated permissions you'd like.
For the Okta automatic role assignment to work, roles need to be previously created.
These fields are case-sensitive.
Make sure your roles are spelled exactly the same in Waydev and Okta. The name needs to follow this format: role_Rolename, "Rolename" being the name of the role from Waydev.
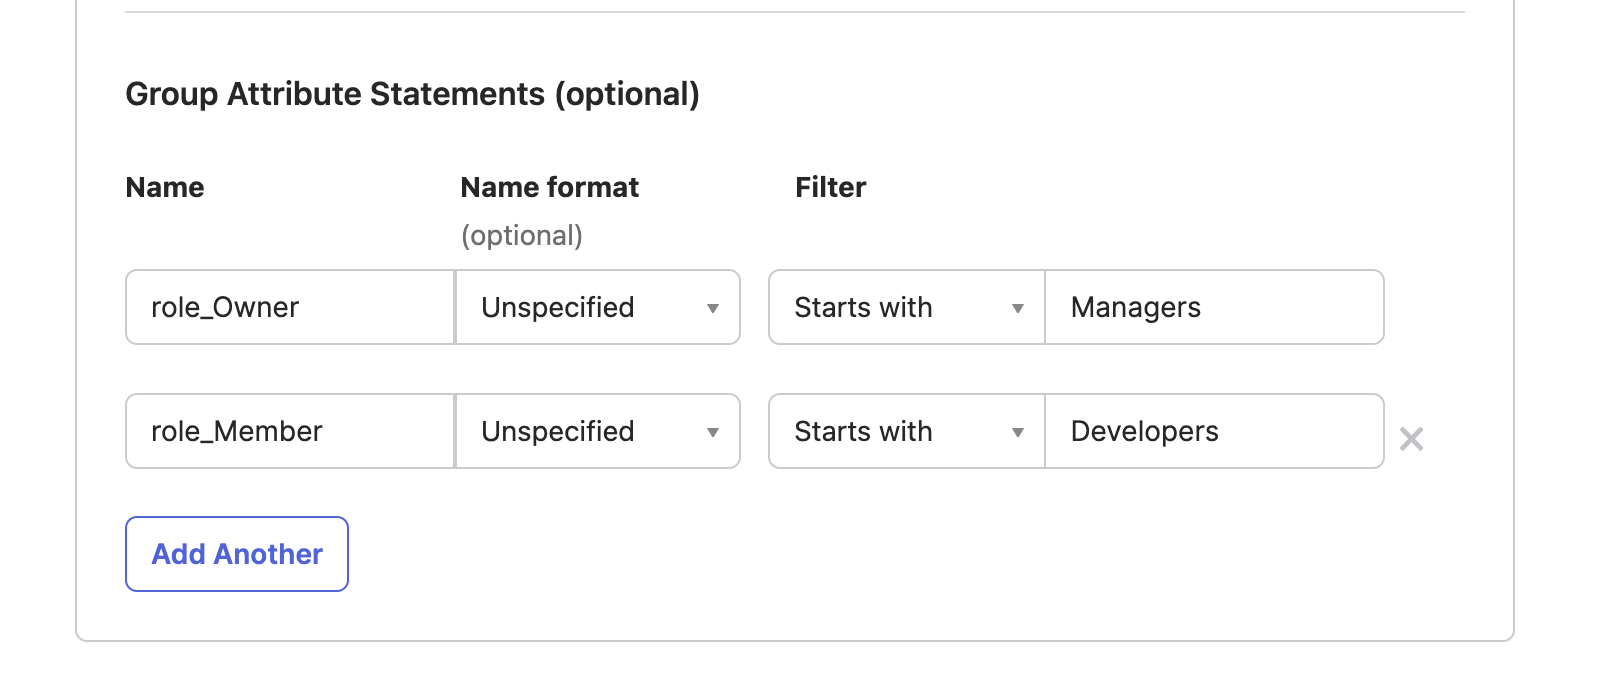
In this example: “Managers” and “Developers” in the screenshot above are roles that your organization already has in Okta. The “Managers” Okta Group will be mapped to the Waydev “Owners” Role and the “Developers” Okta Group to the “Members” Waydev Role.
The end result for this step looks something like this:
- Step 12: Click Next.
- Step 13: Select "I am an Okta customer, adding an Internal app."
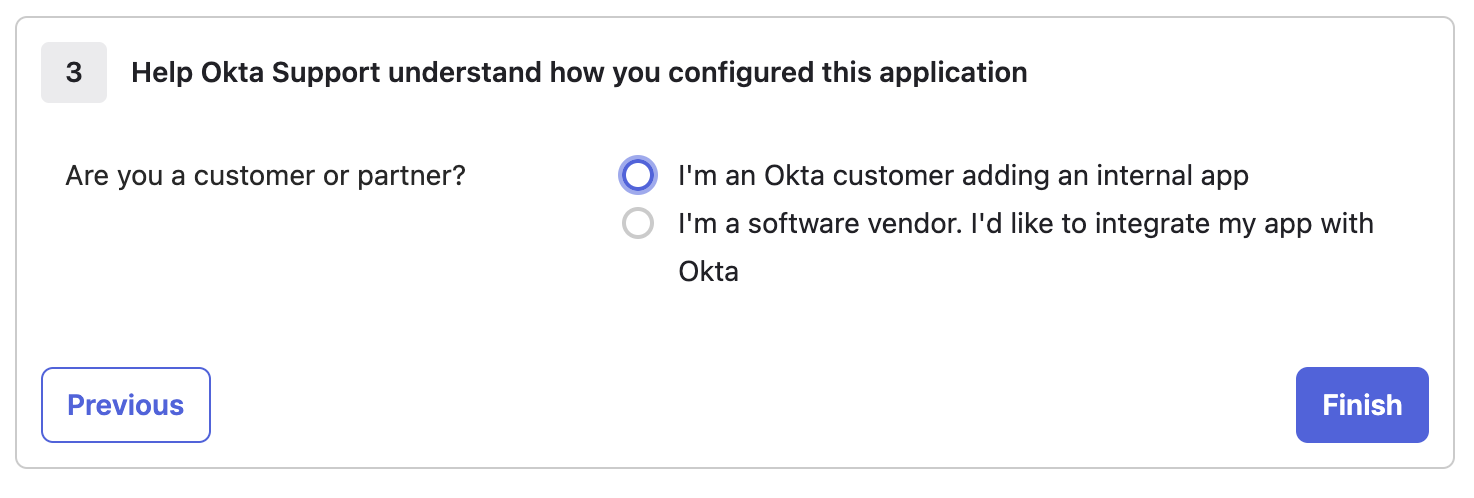
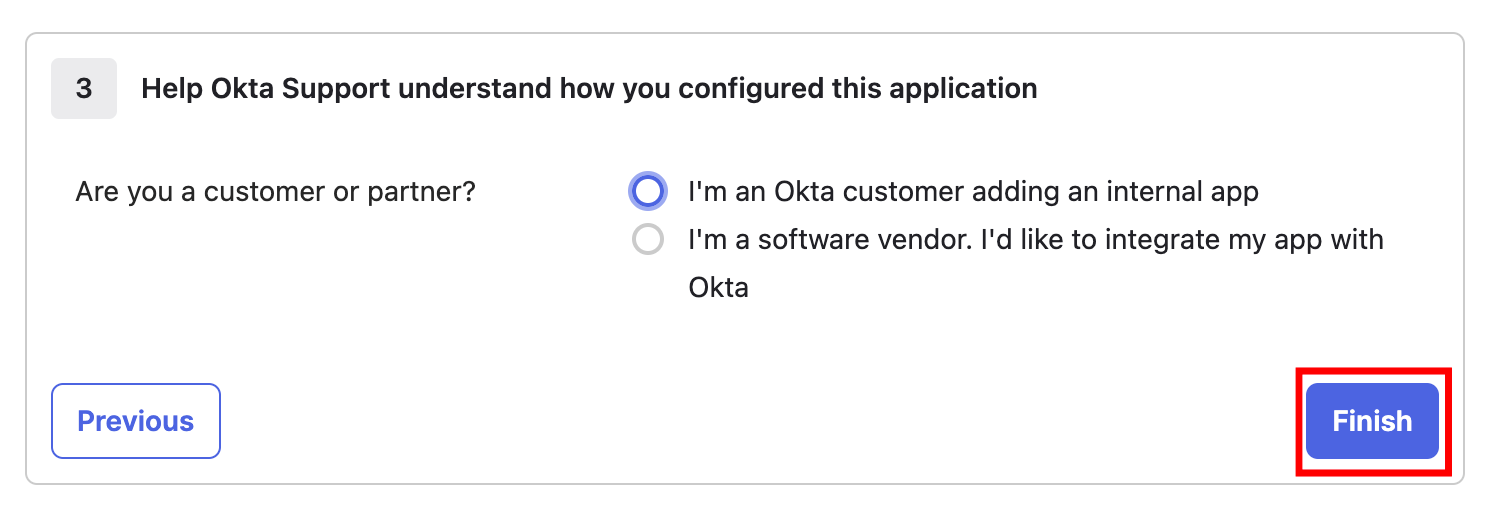
- Step 14: Then click Finish.
- Step 15: After clicking Finish, you will be redirected to the screen below. Click the "View SAML Setup Instructions"
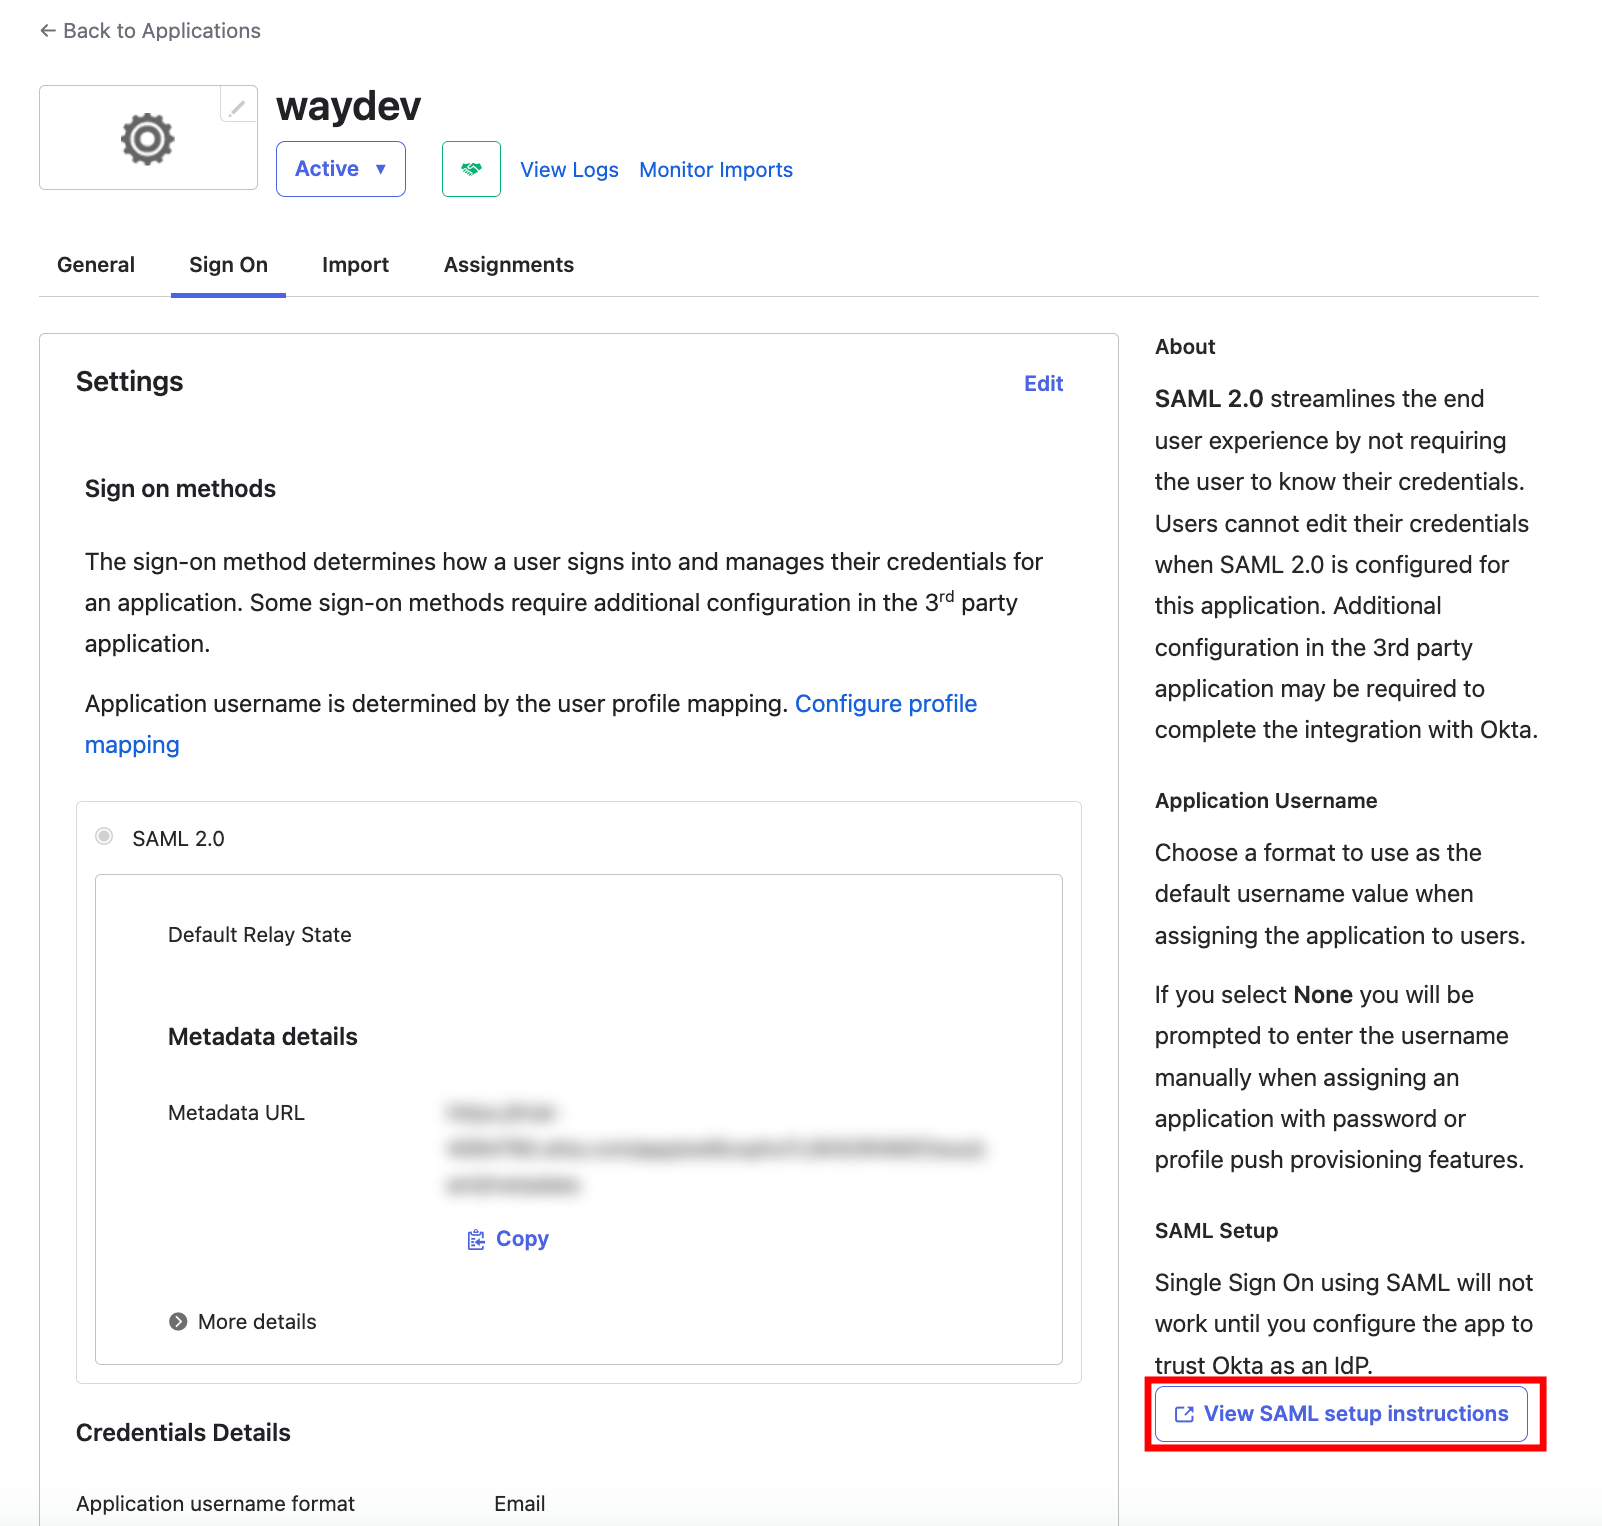
- Step 16 Copy the IDP Data from the bottom of the page

- Step 17: In your Waydev *tab, paste the metadata in the metadata field.
-
Step 18: Click Create.
-
Step 19: Once you click Create, your Okta Integration is complete in Waydev.
-
Step 20: You will need to go back to Okta and add users to the Waydev application.
-
Step 21: Navigate to Applications
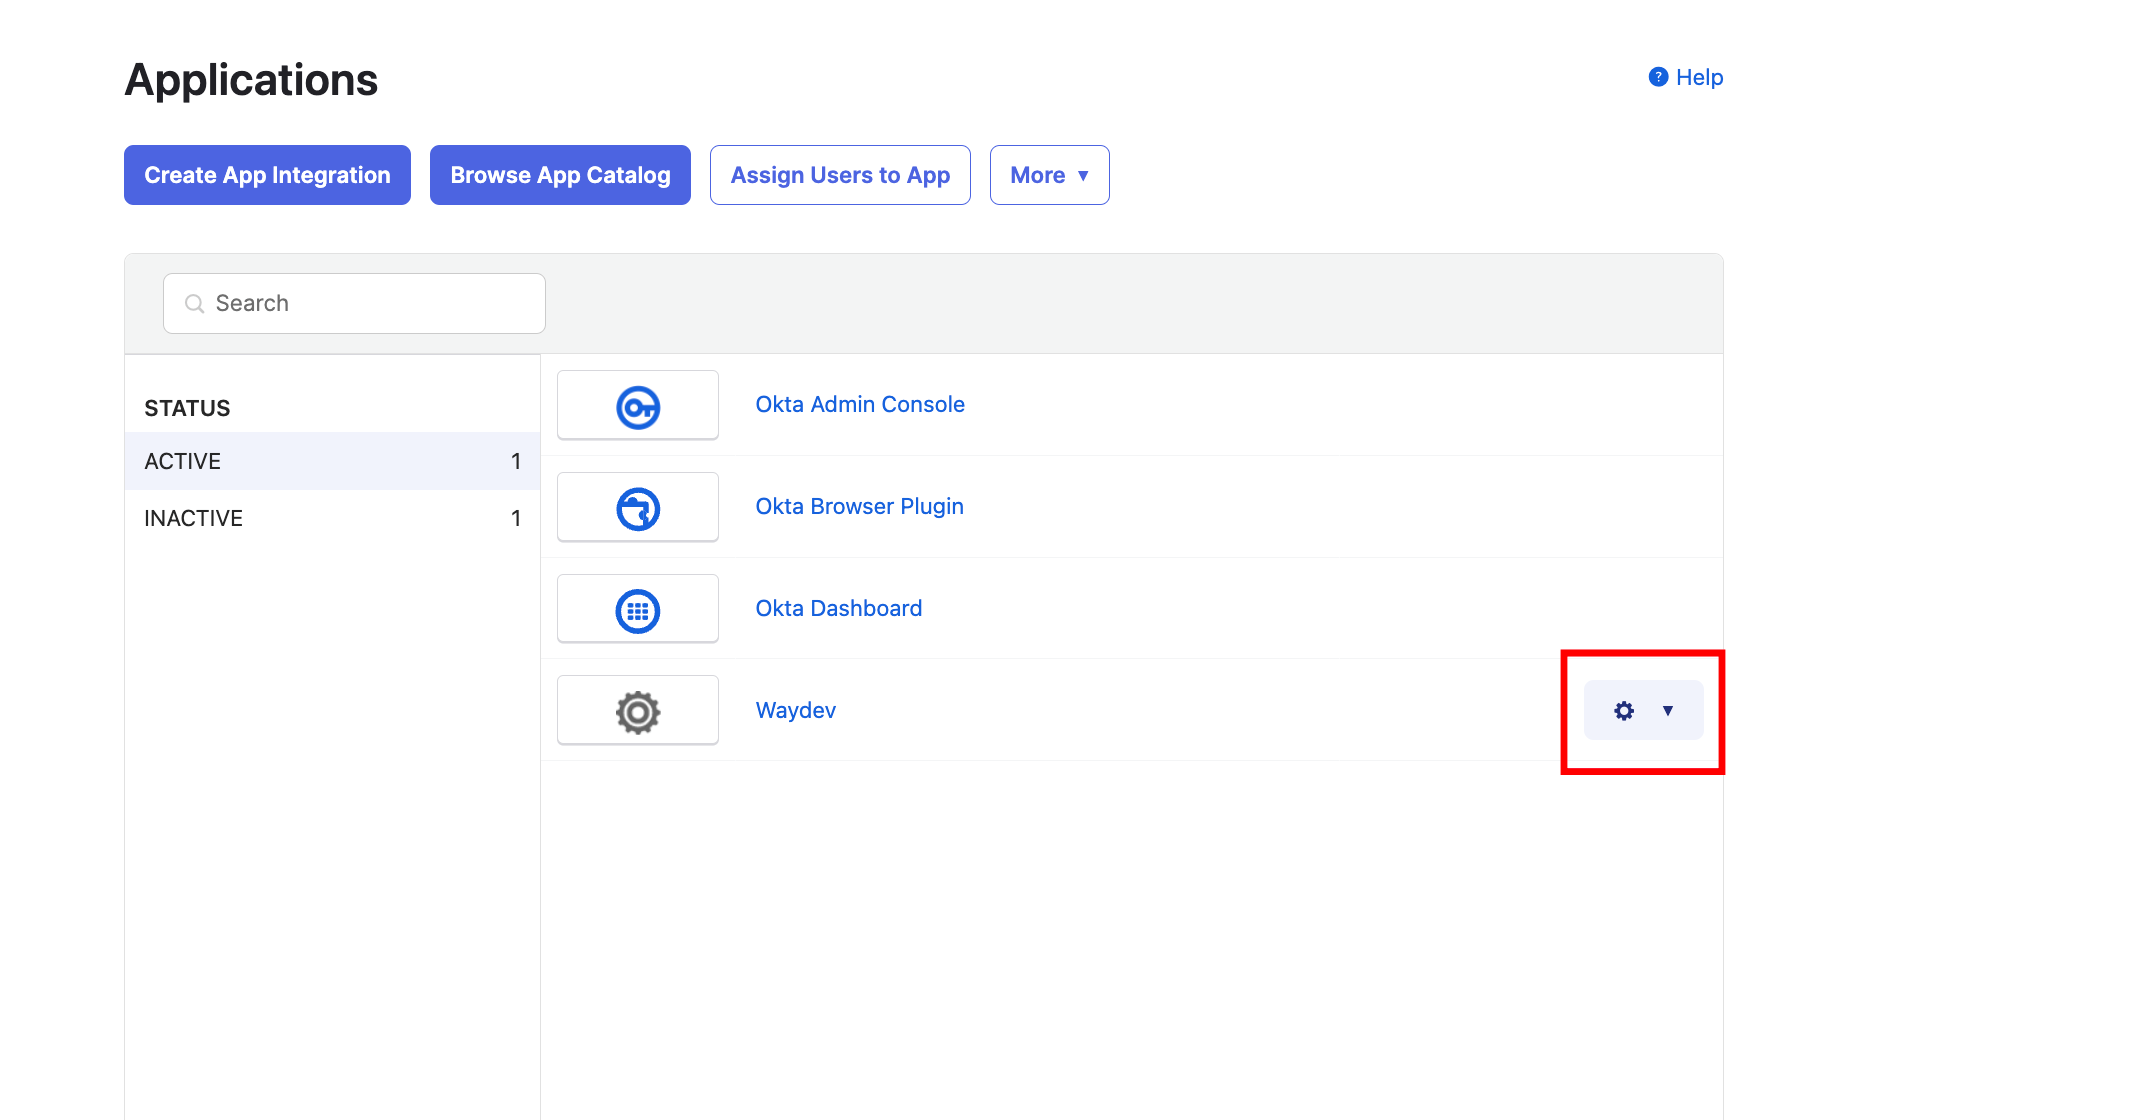
- Step 22: Click the settings button of the application you just created for Waydev
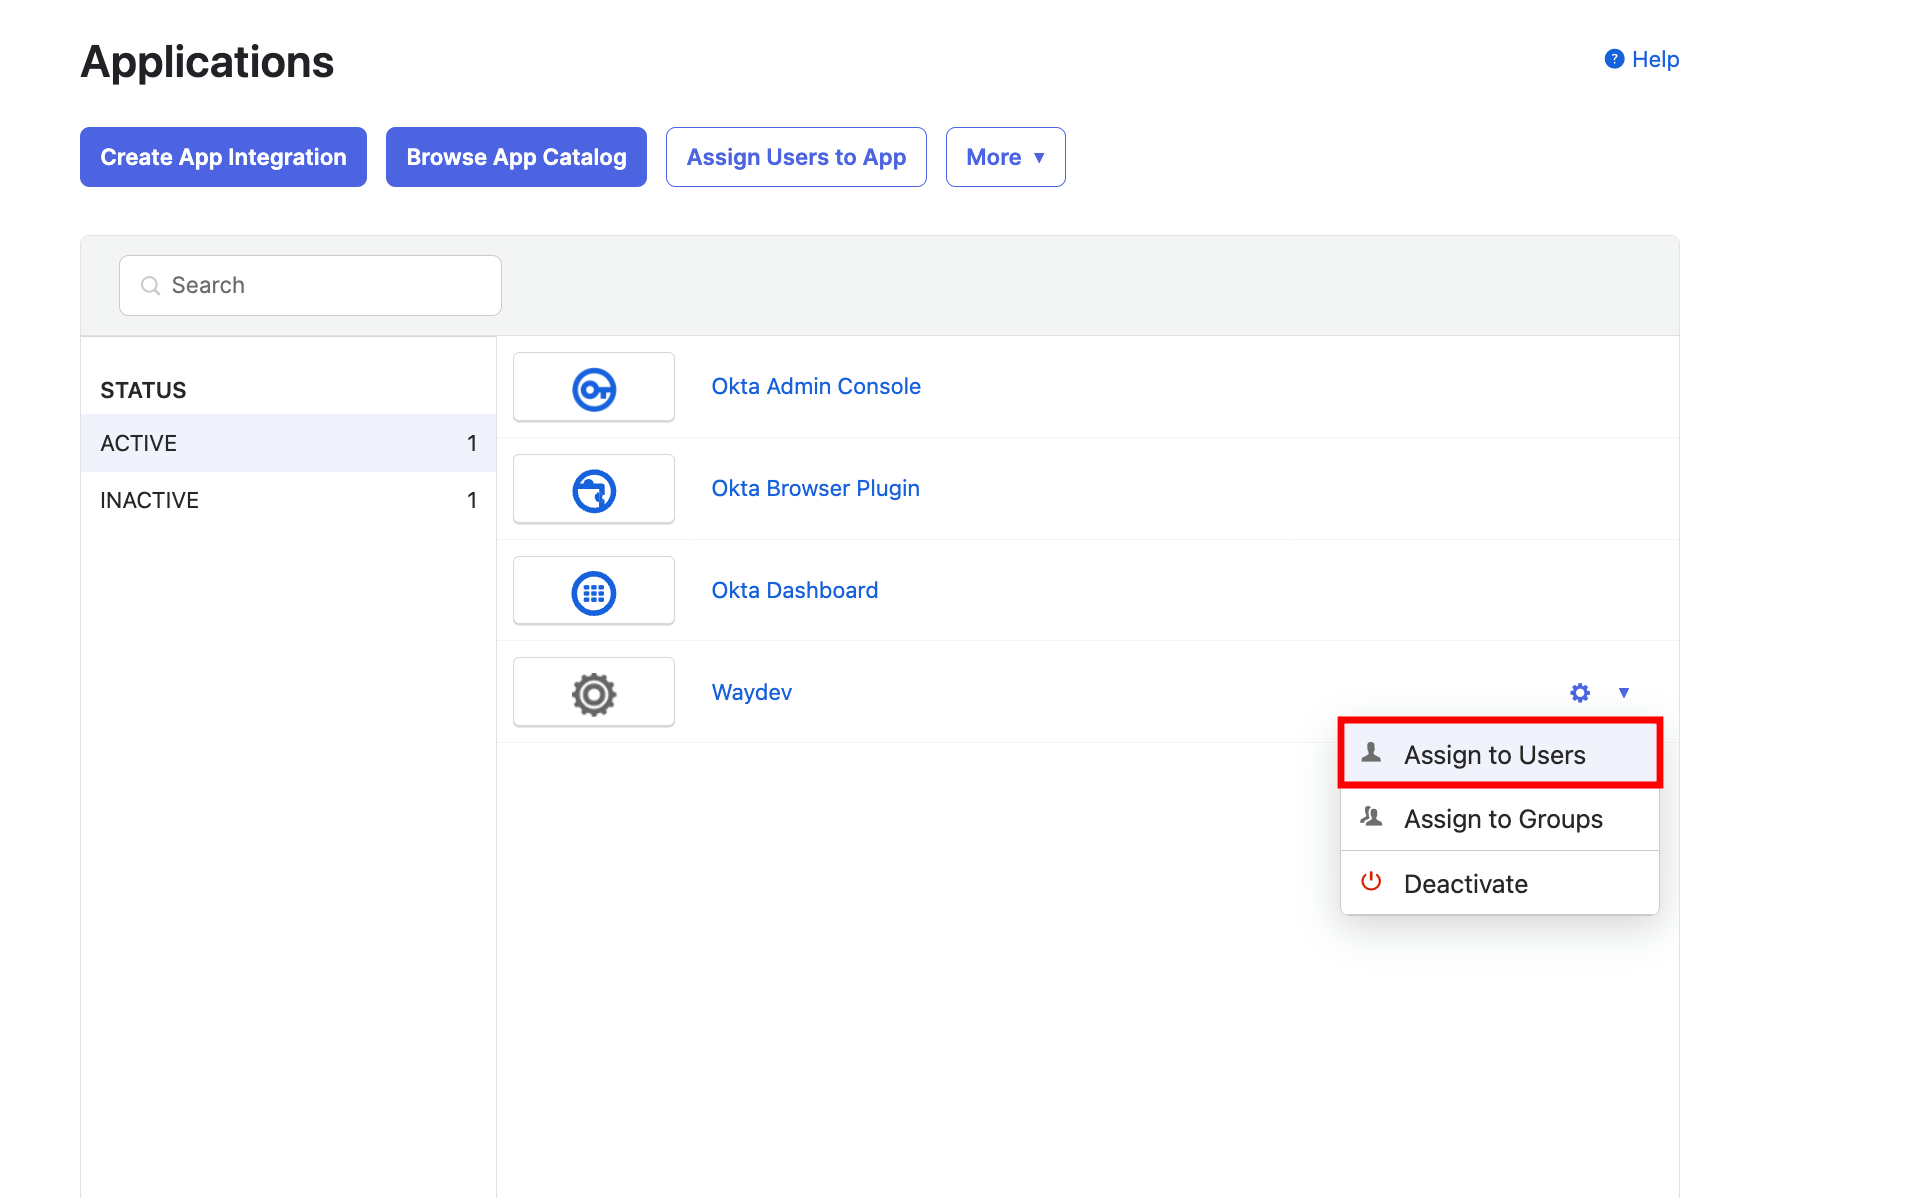
- Step 23: Click "Assign to Users"
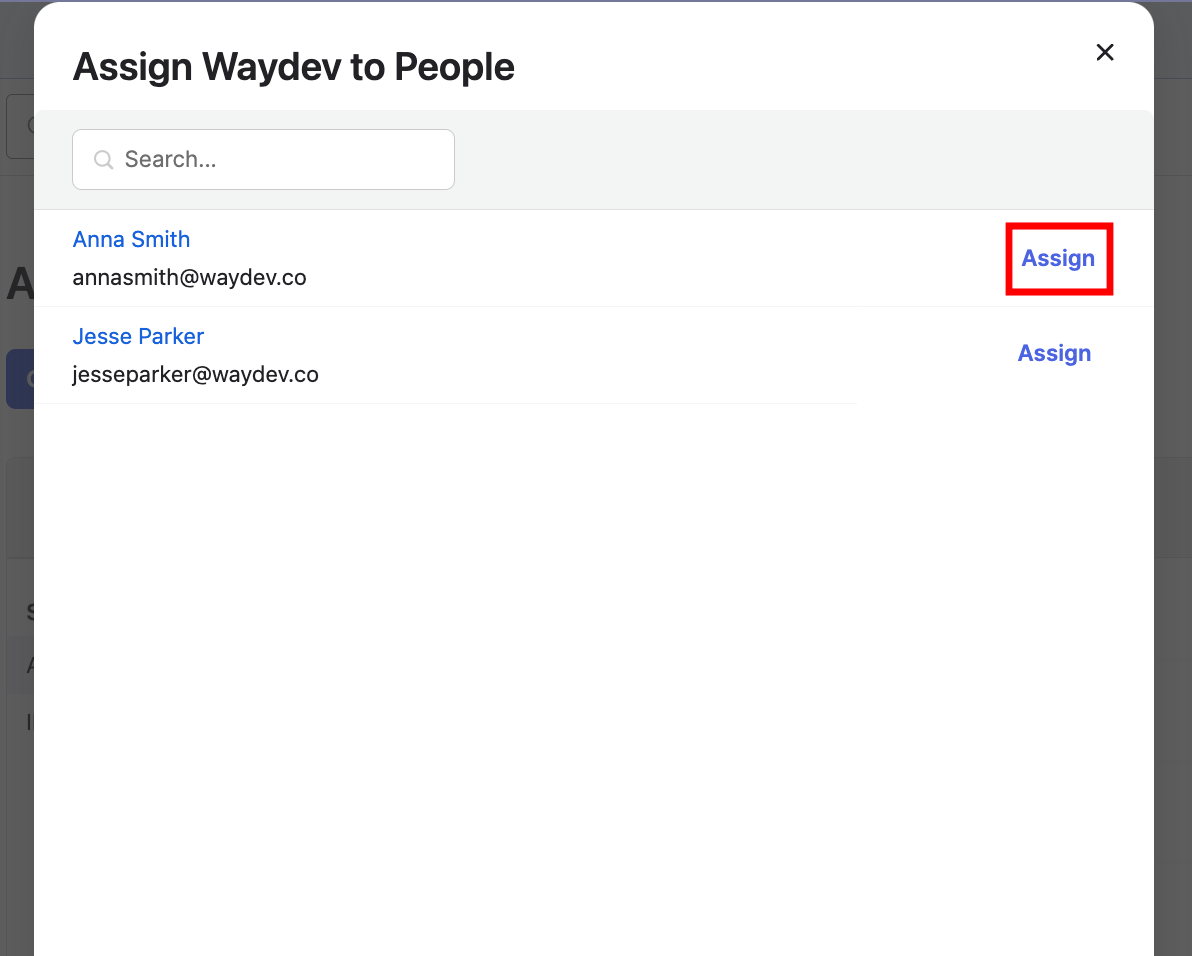
If you don't see a user in Okta that you would like added to Waydev, please reach out to your IT team to have them added.
- Step 24: Select the people you want to assign by clicking "Assign."
❗️Something went wrong
If you were not able to login to your Waydev account using your SAML URL, and you receive an error like the one below, make sure to review the following configuration steps:
- Does your sign-on URL to match the URL in Waydev? (Step 8)
- Review your “Attribute Statements” and “Group Attribute Statements”. These fields are case-sensitive and need to be identical to their respective Waydev Role and Okta Group. (Step 9-11)
Updated 4 months ago