

Set up Ticket Projects
Configure your ticket projects to ensure that you'll have accurate and real-time data regarding your boards.
Before configuring your ticket projects, make sure you sync them
- To sync your ticket projects, navigate to "Ticket Projects" from the Setup section in the sidebar menu.
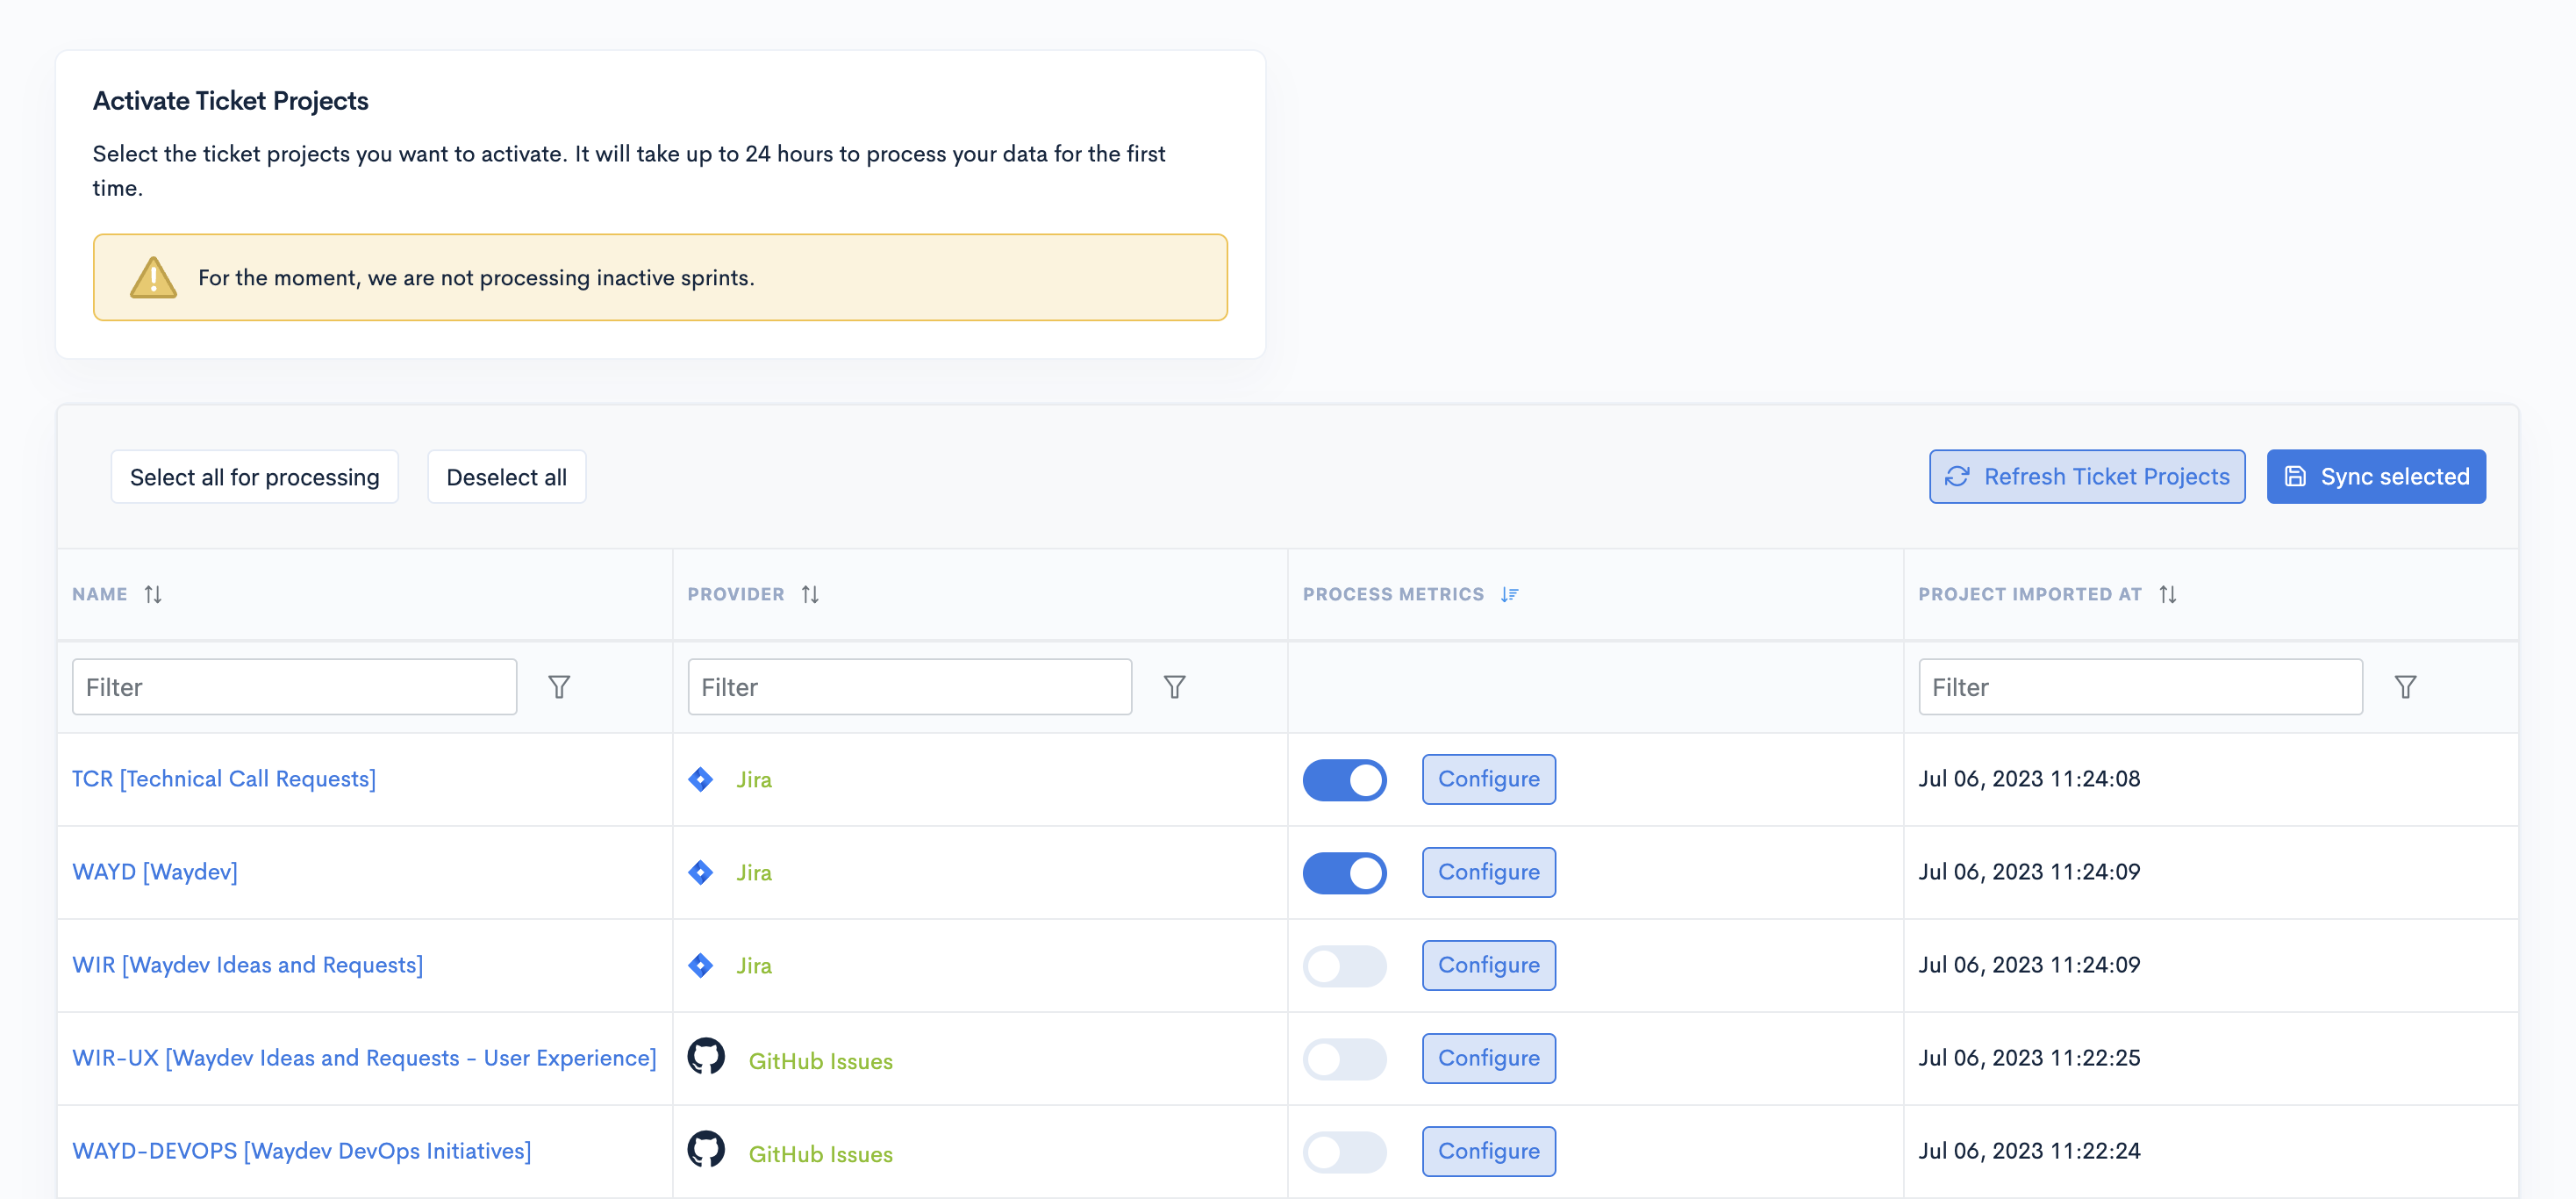
- Include the Ticket Projects you want processed by toggling them on (1) then click on Sync Selected (2).
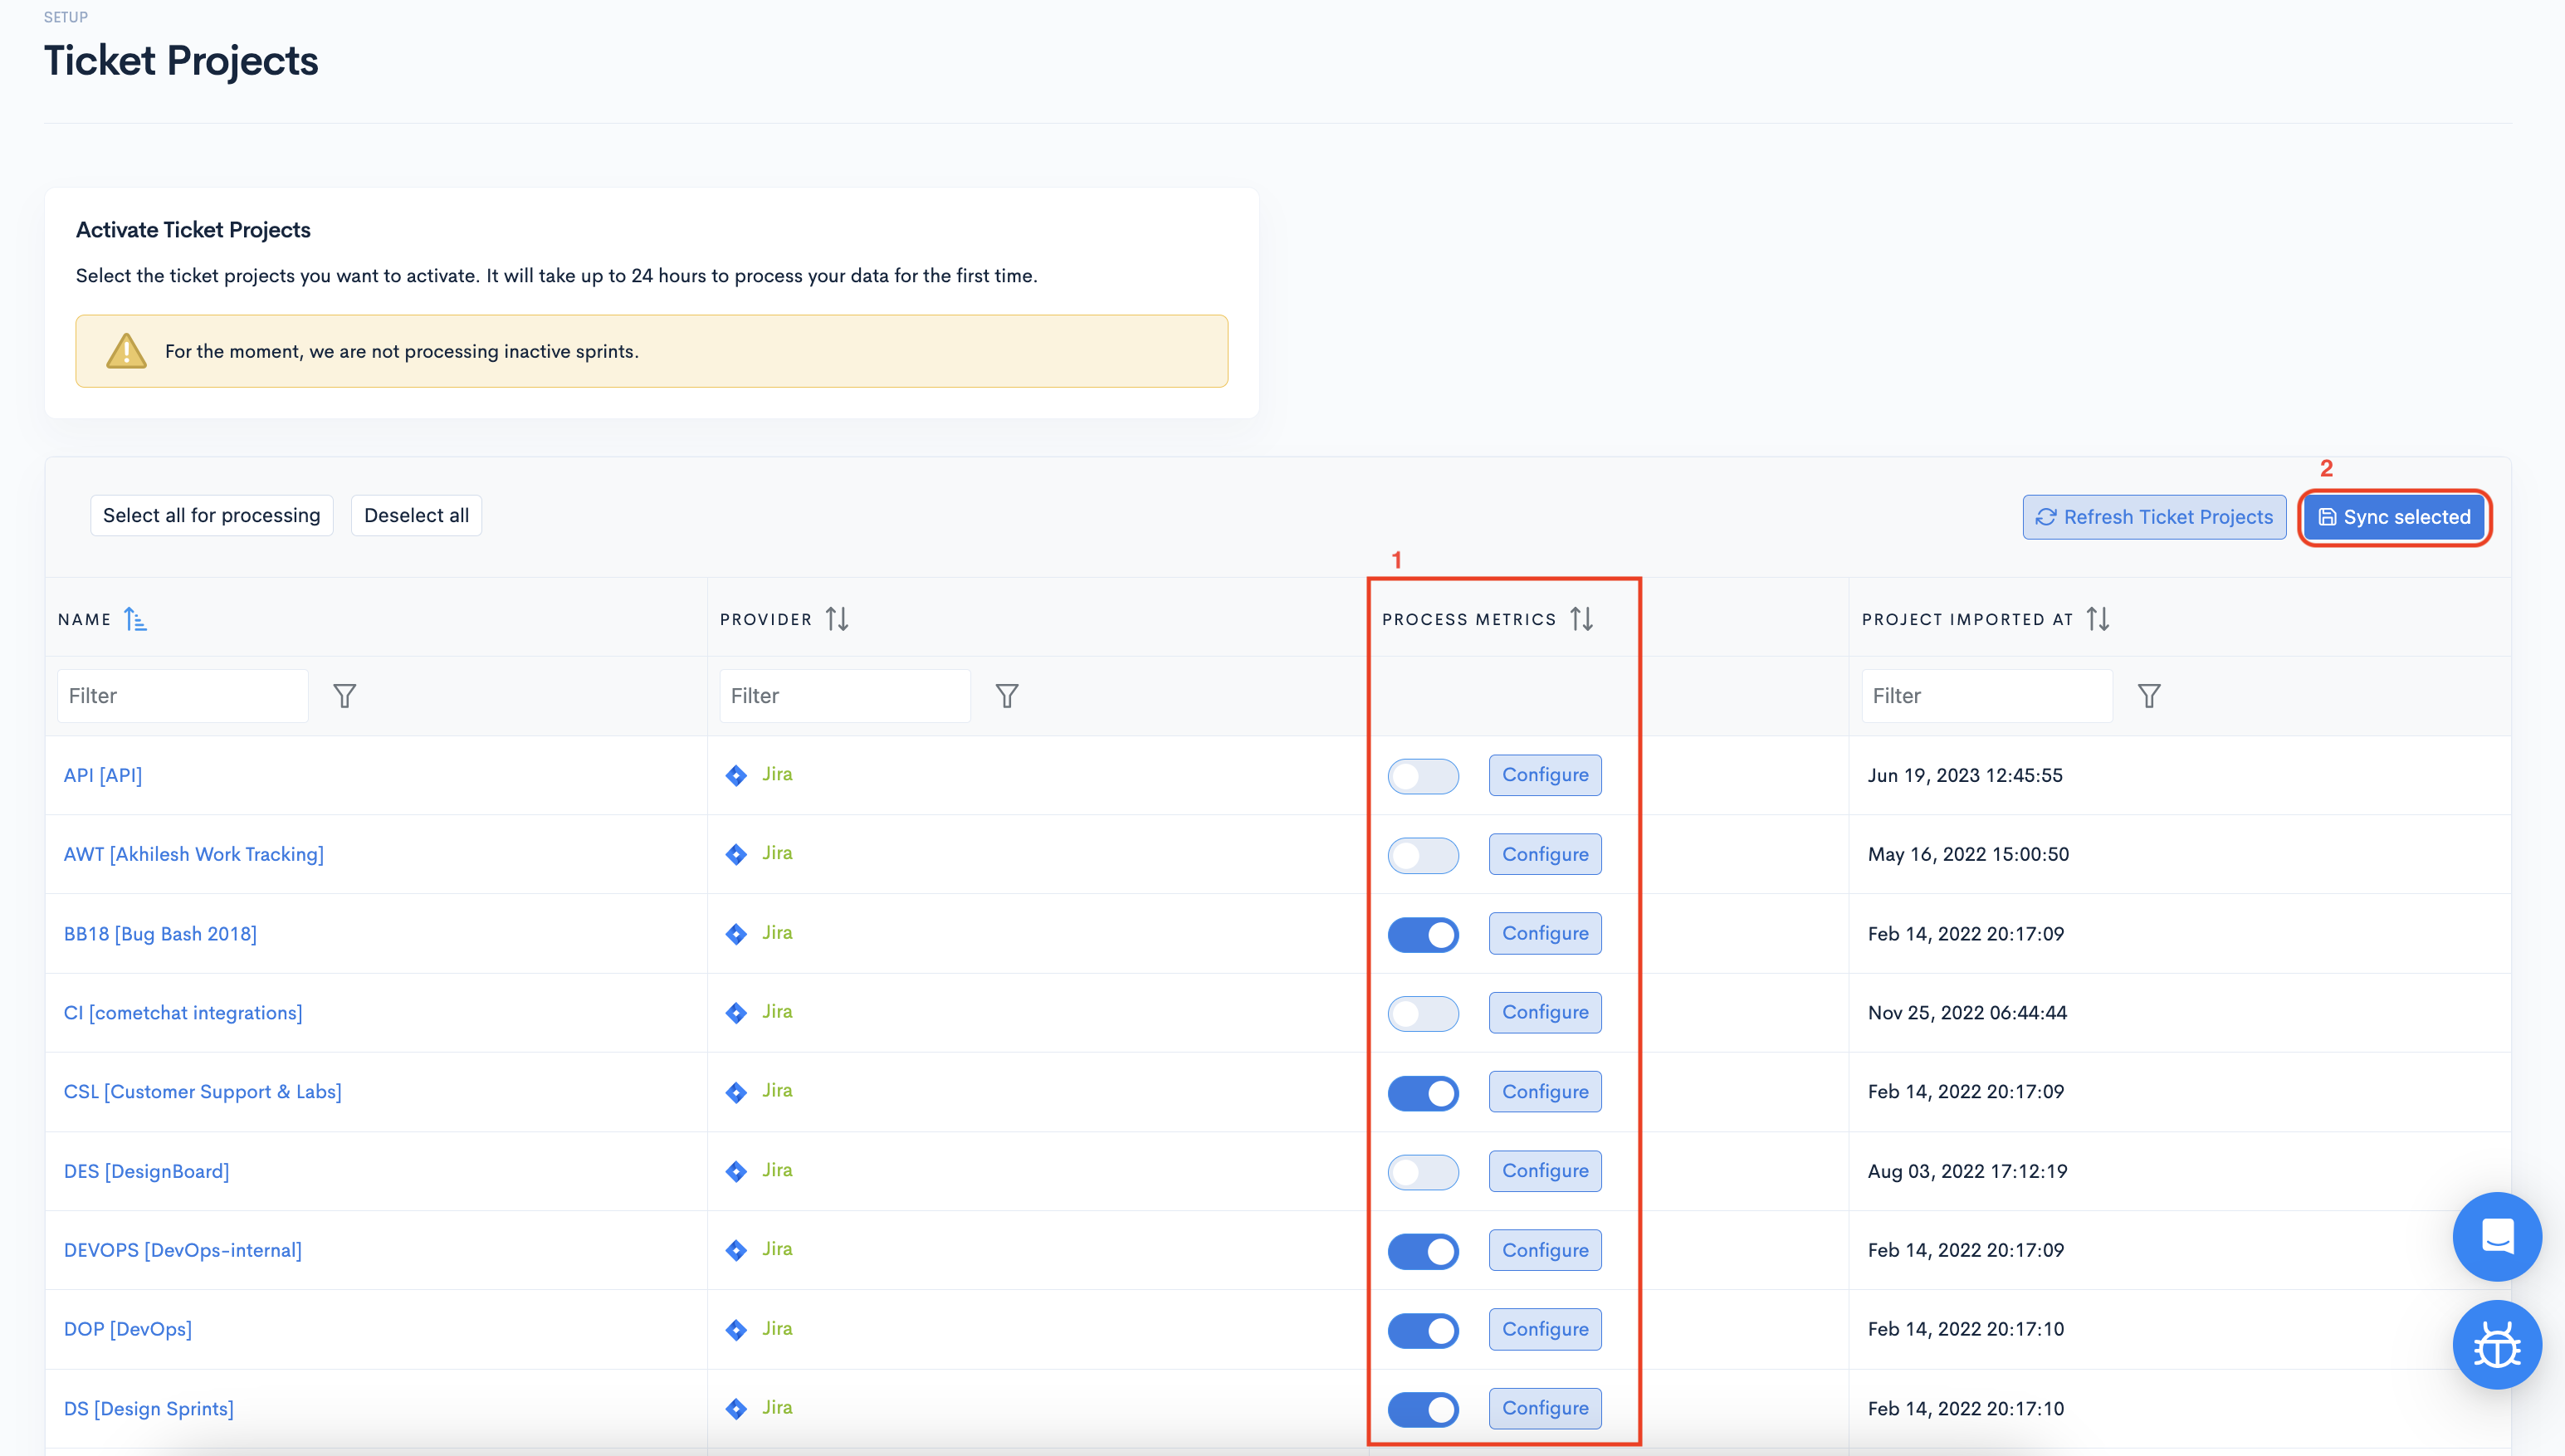
If you don't see a ticket project, click the "Refresh Ticket Projects" button.
How to configure all ticket projects
- Navigate to "Integrations" from the Setup section in the sidebar menu.
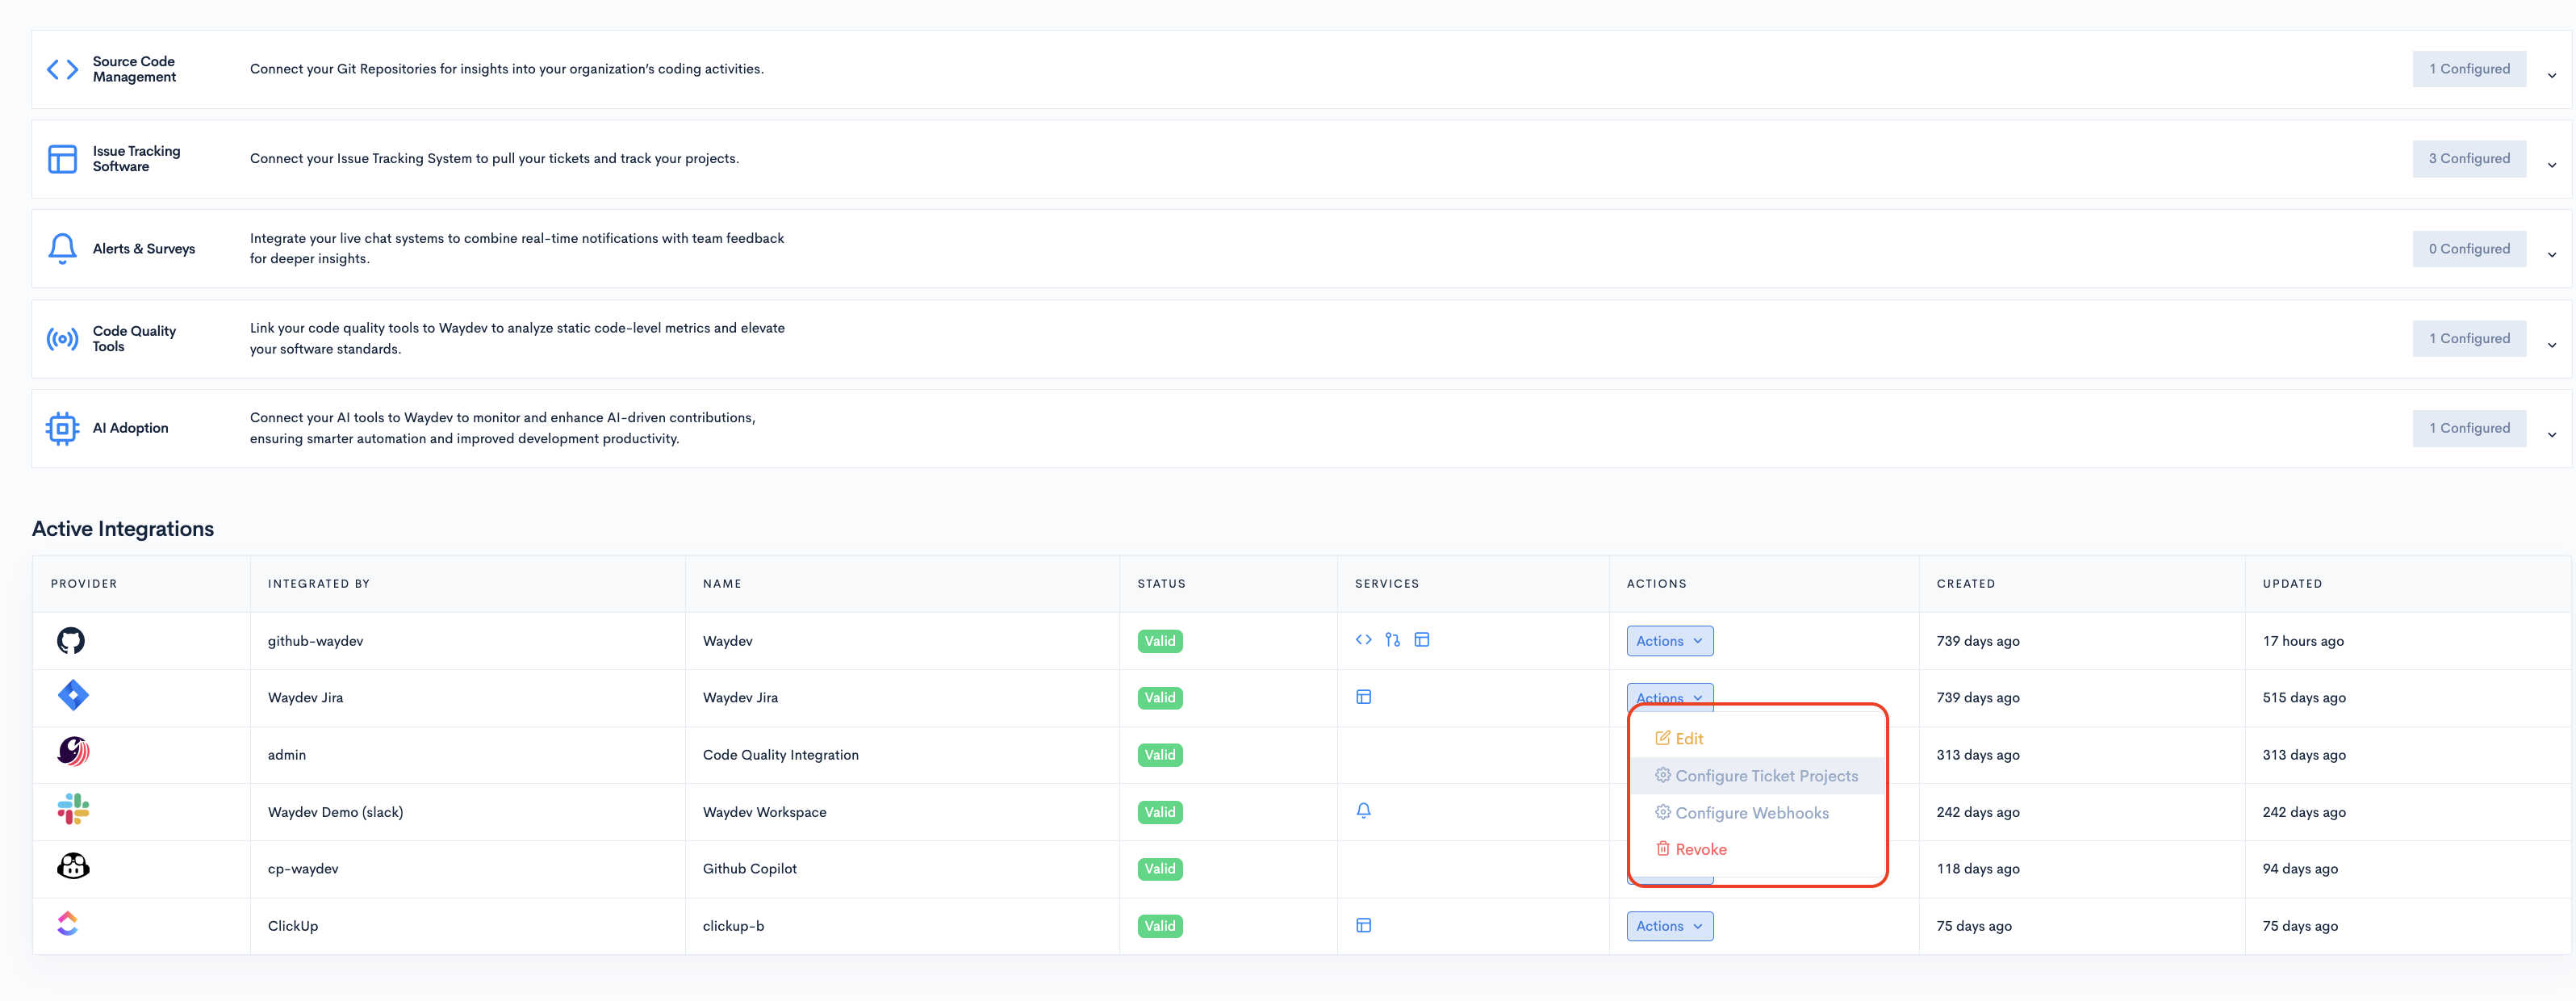
- Click the "Actions" button, then "Configure ticket Projects" for the Issue Tracking System you want to define projects for.
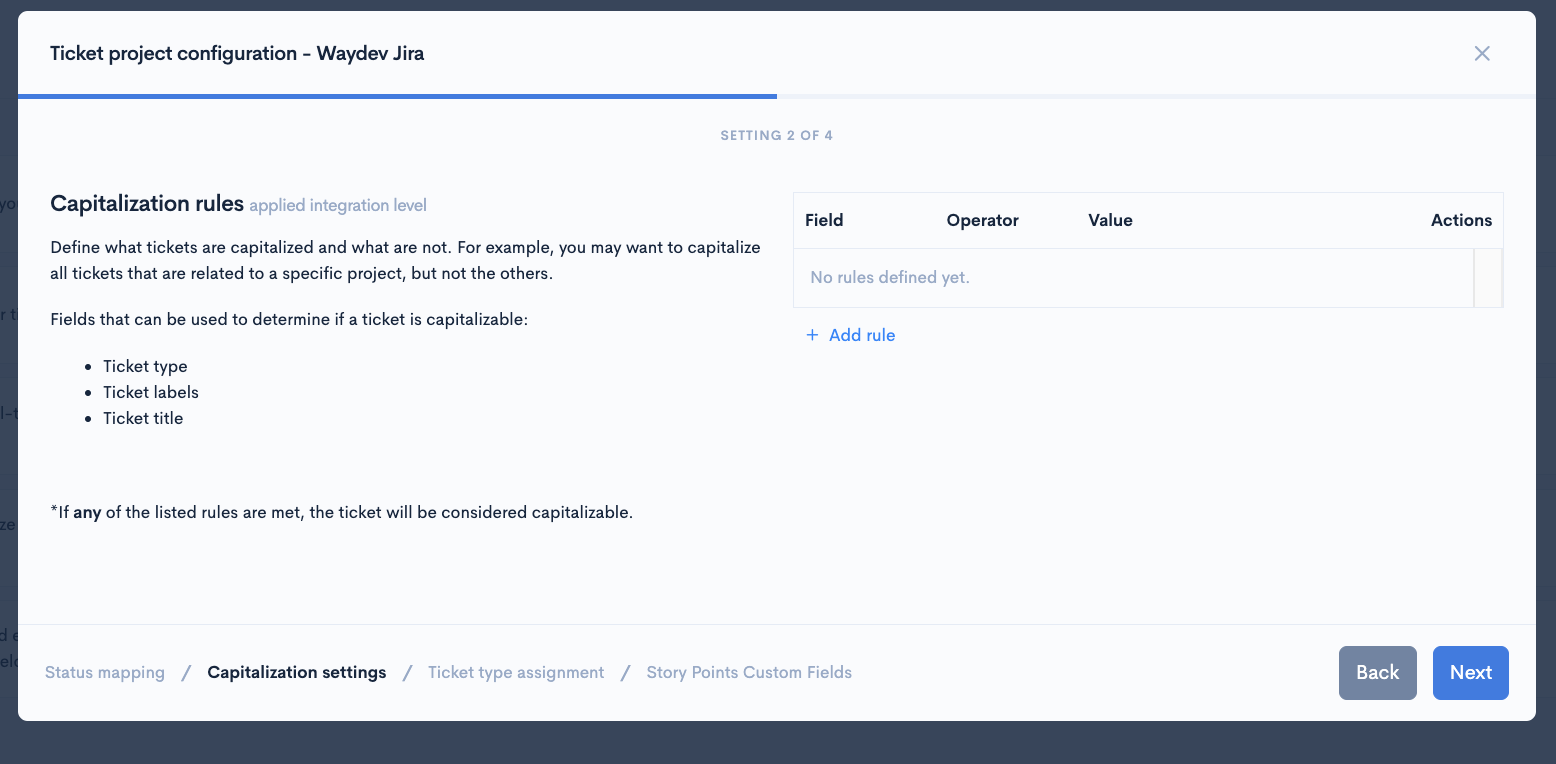
- This will open the configuration modal. Here, you can map ticket statuses to their respective categories.

- By clicking "Next," you will be able to Configure Cost Capitalization.
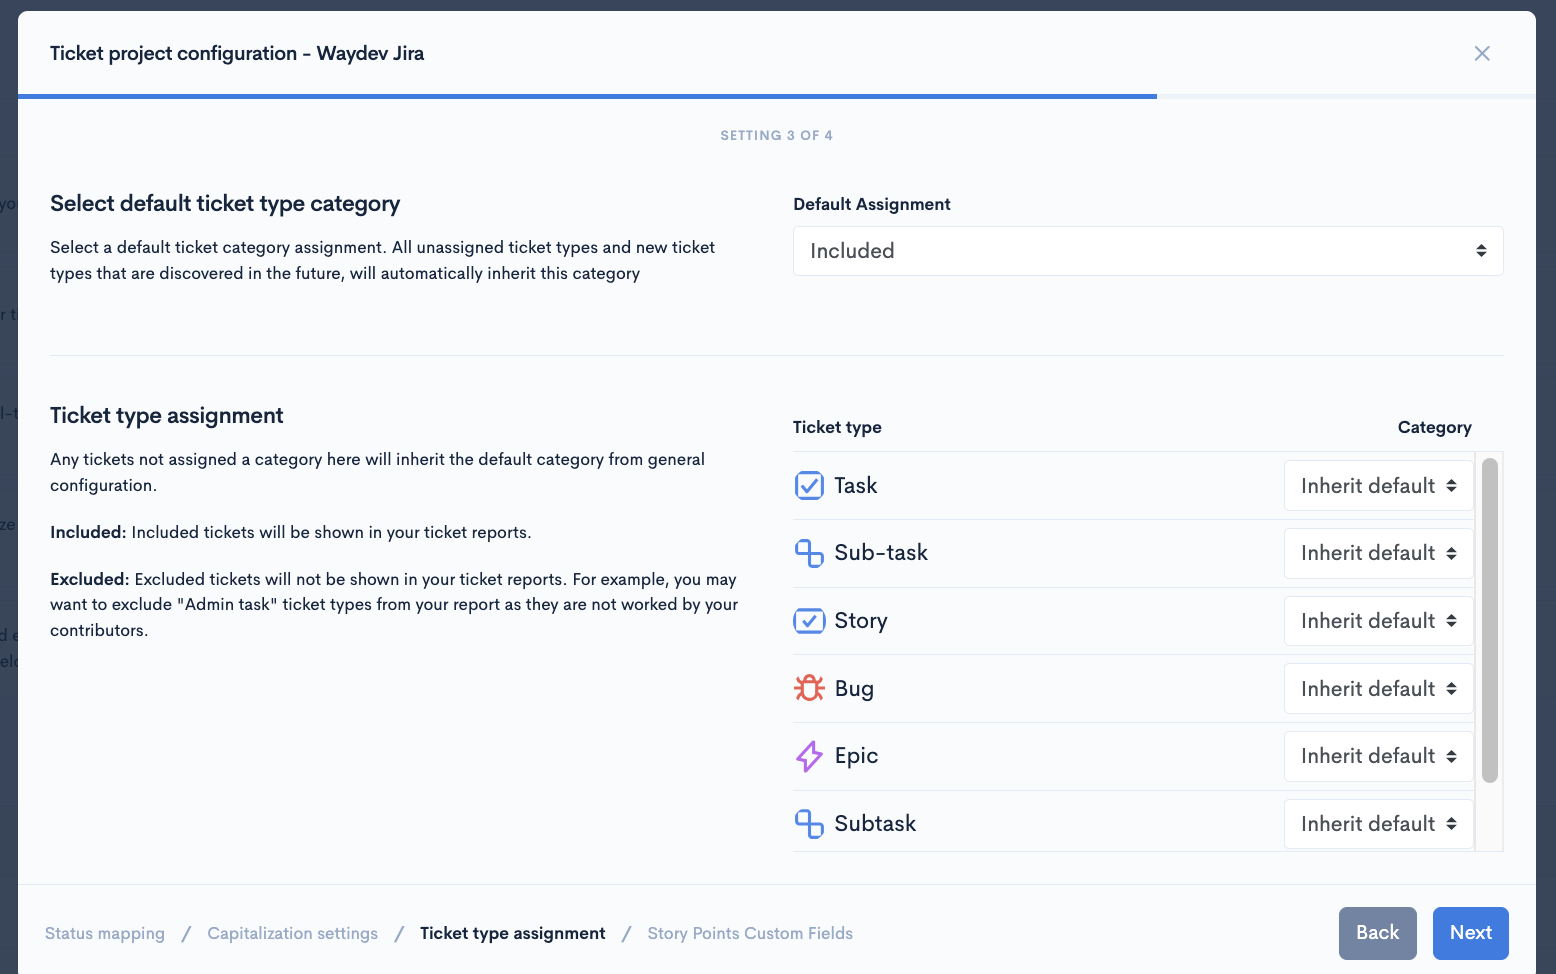
- The 3rd step in the modal allows you to configure issue type categories which can be excluded from or included in metrics.
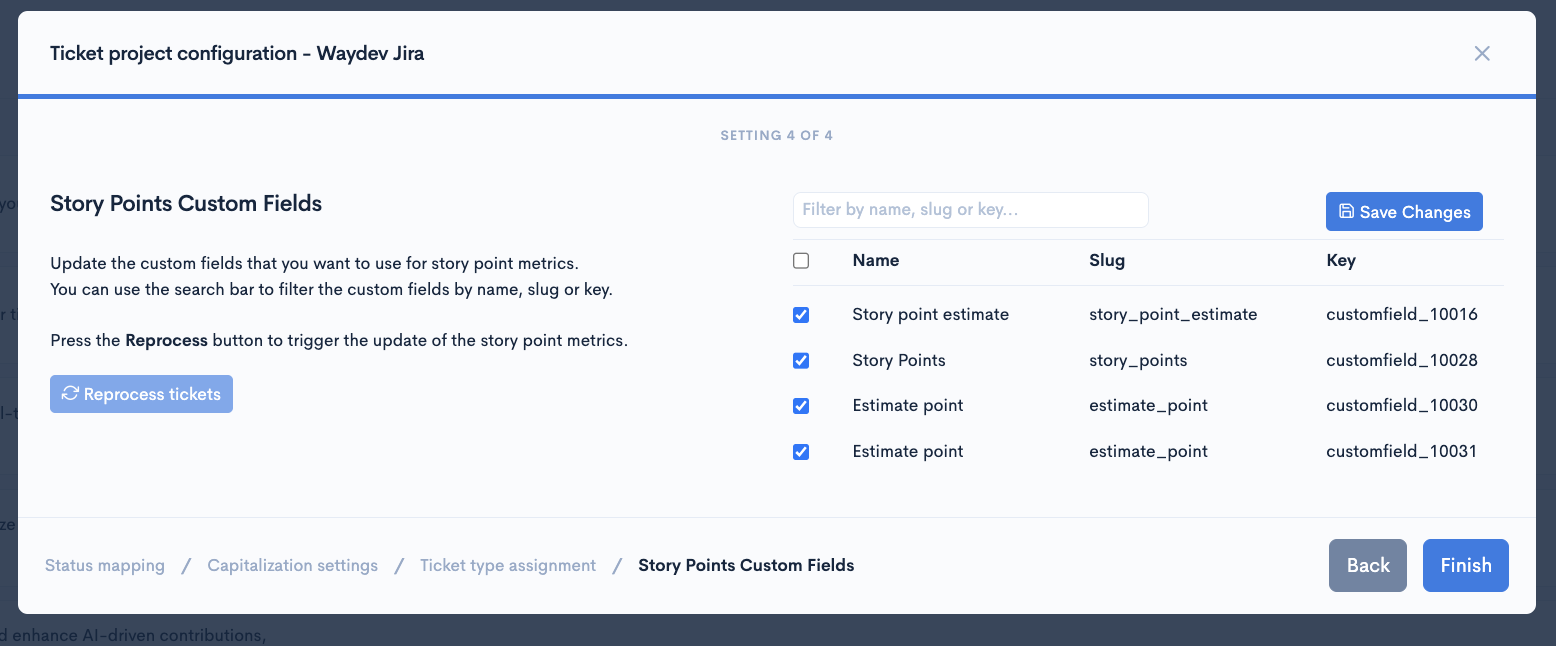
- In the 4th step, you can configure the Story Points Custom Fields.
- When done, click "Finish."
How to configure each ticket project individually
- In the sidebar menu, in the "Setup" section, navigate to "Ticket Projects."
- Upon selecting "Ticket Projects," you will be presented with a list of all ticket projects that are linked to your Waydev account.
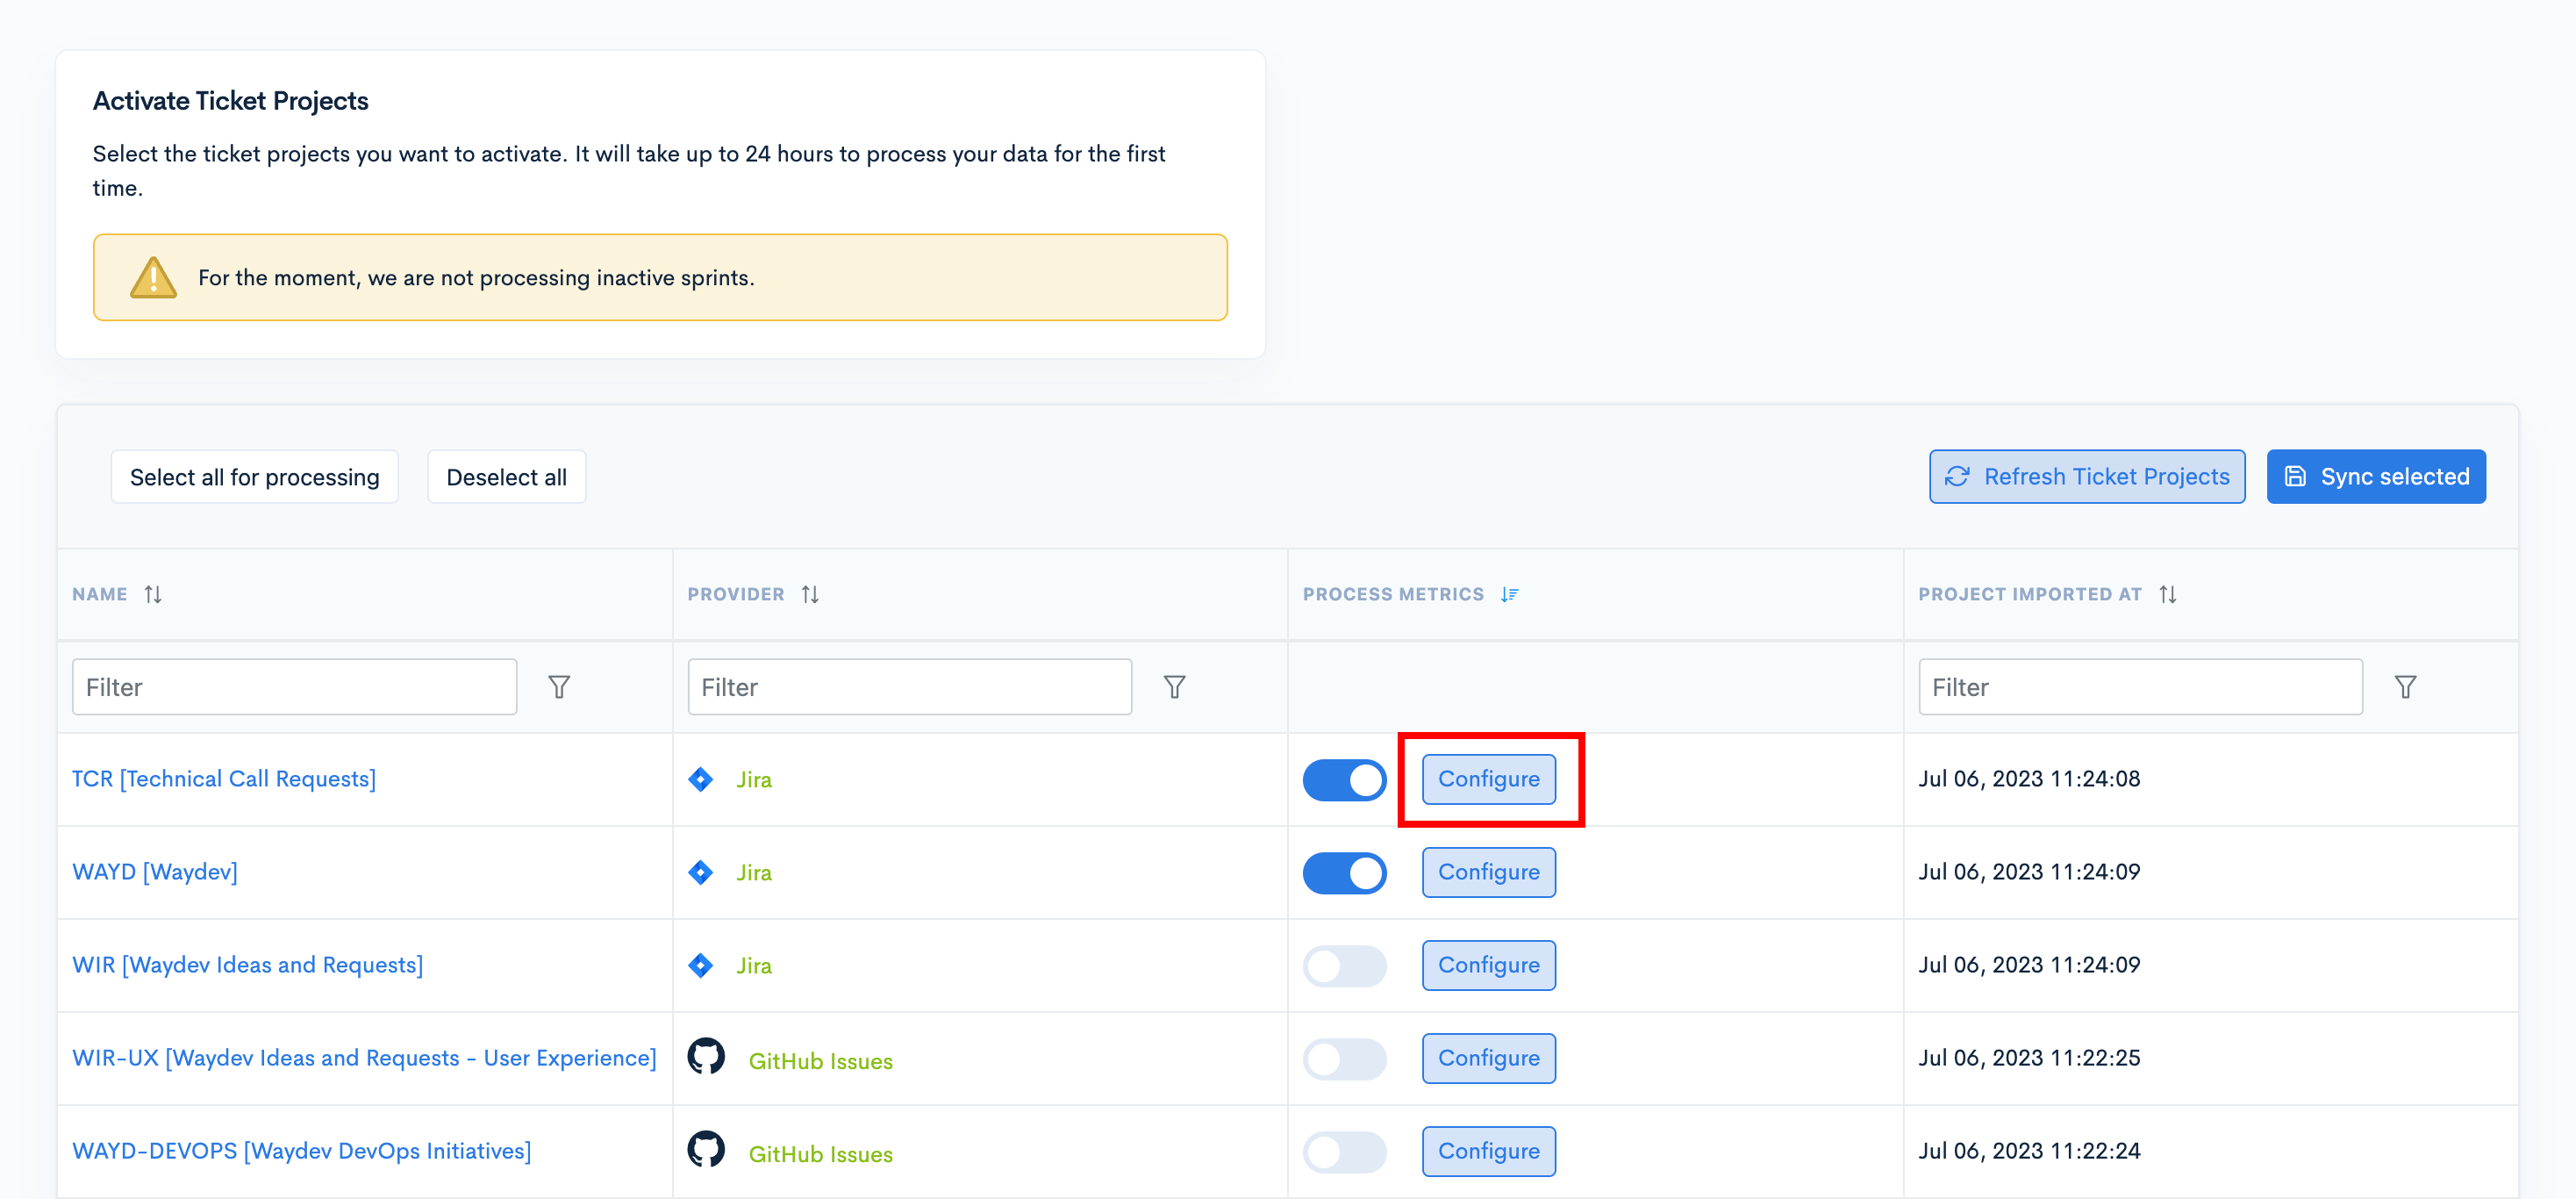
- Click the "Configure" button for the Ticket Project you want to configure.
- This will open the configuration modal. Here, you can map ticket statuses to their respective categories.
- By clicking "Next," you will be able to Configure Cost Capitalization.
- The 3rd step in the modal allows you to configure issue type categories which can be excluded from or included in metrics.
- In the 4th step, you can configure the Story Points Custom Fields.
- When done, click "Finish."
Managing ticket projects during the Initial Tour
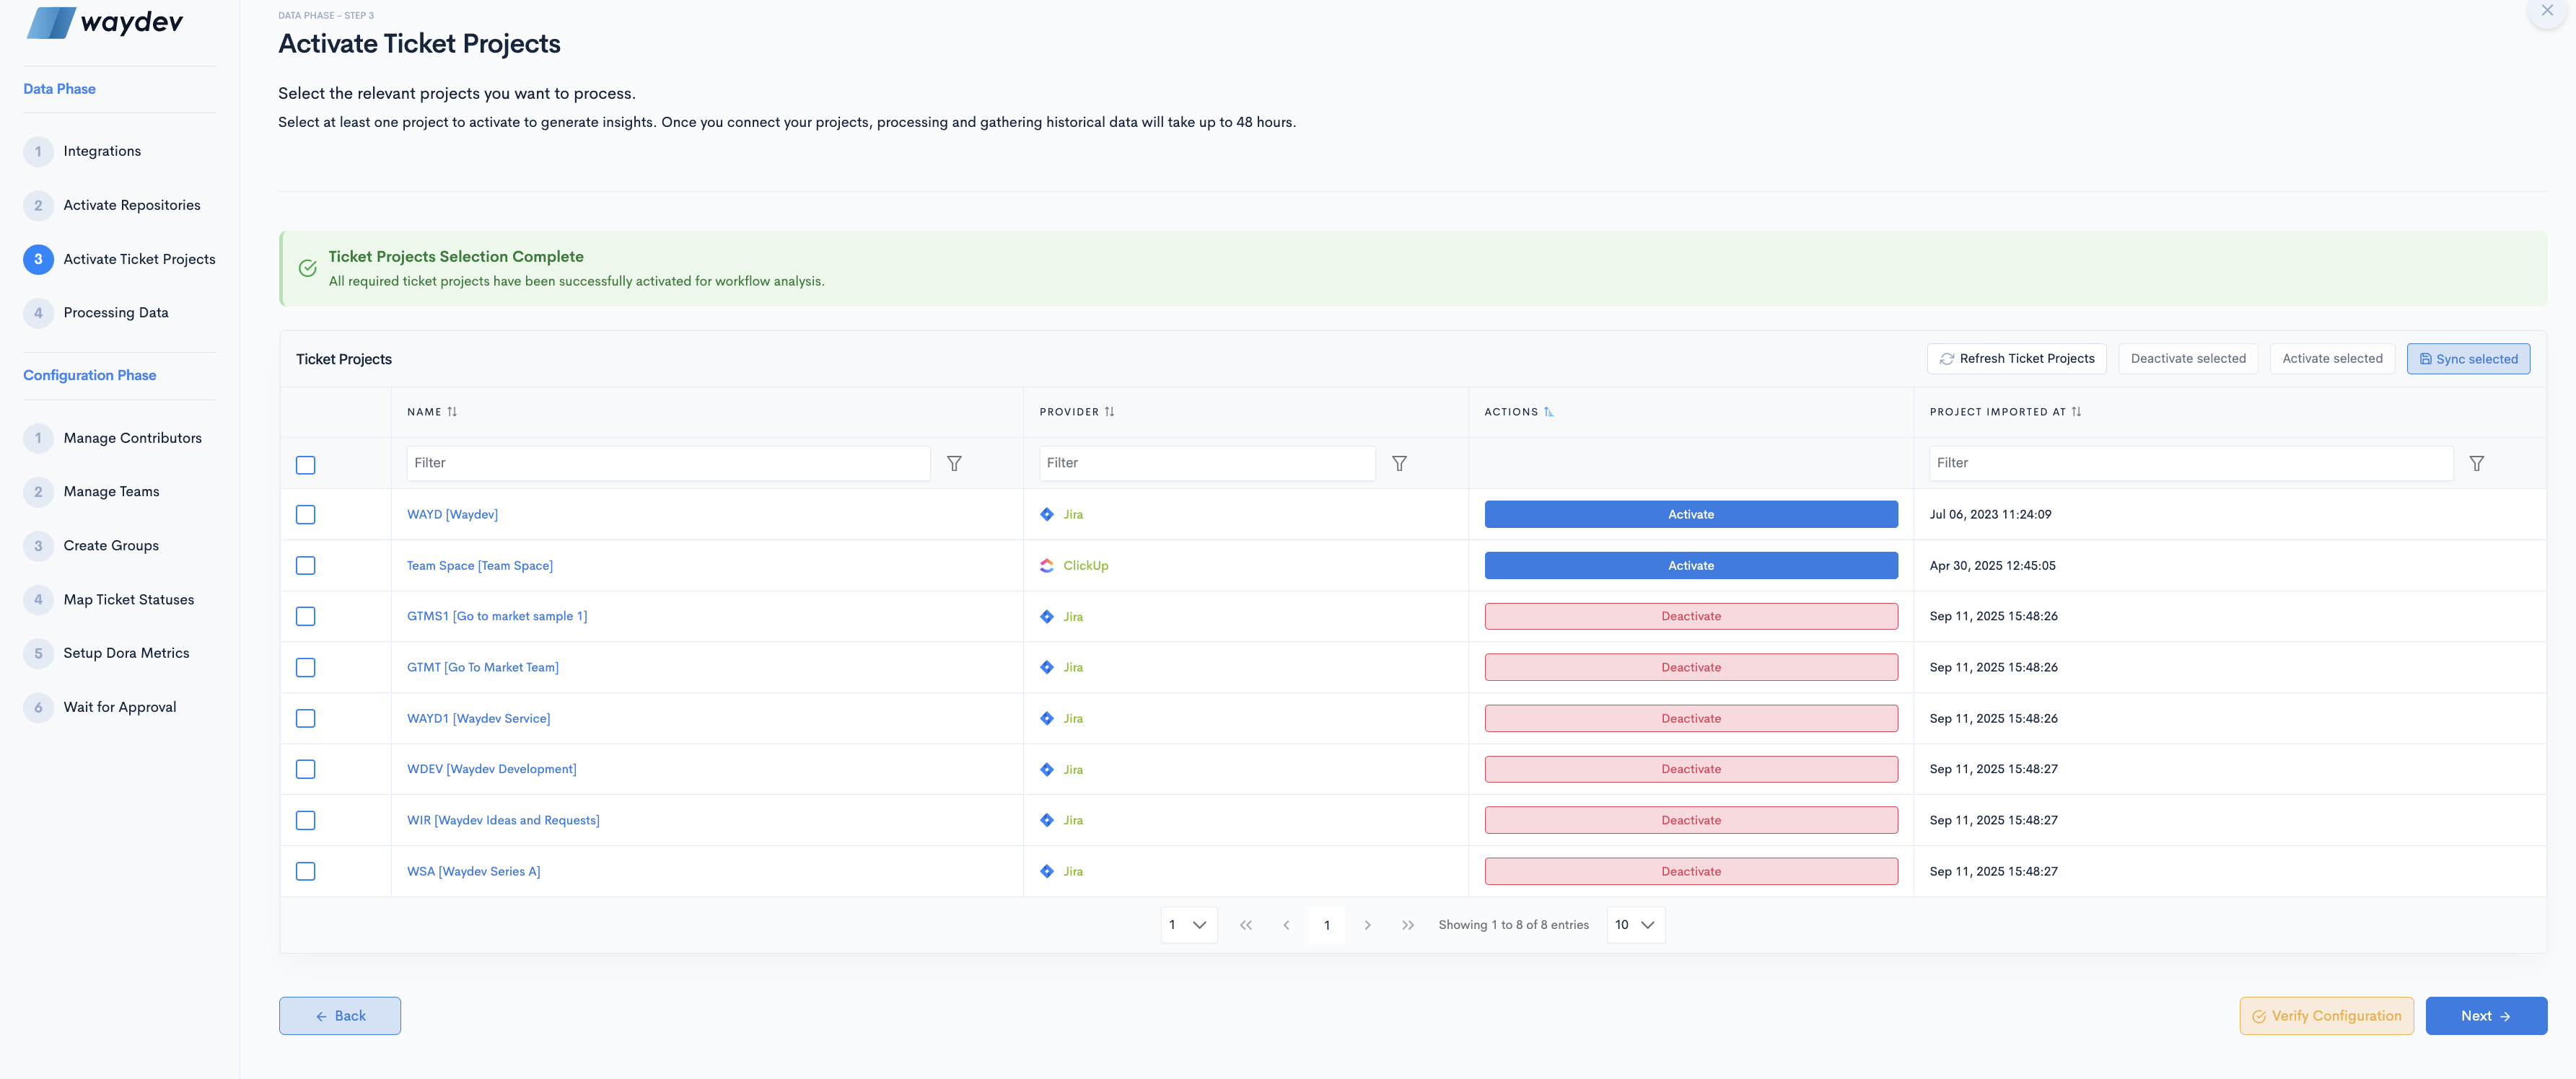
For a smoother process, during the initial setup, you will only be able to Activate and Deactivate ticket projects.
Updated 7 months ago