
Setup Projects
Business units, pods, spaces, tribes, or groups.
What is a project in Waydev
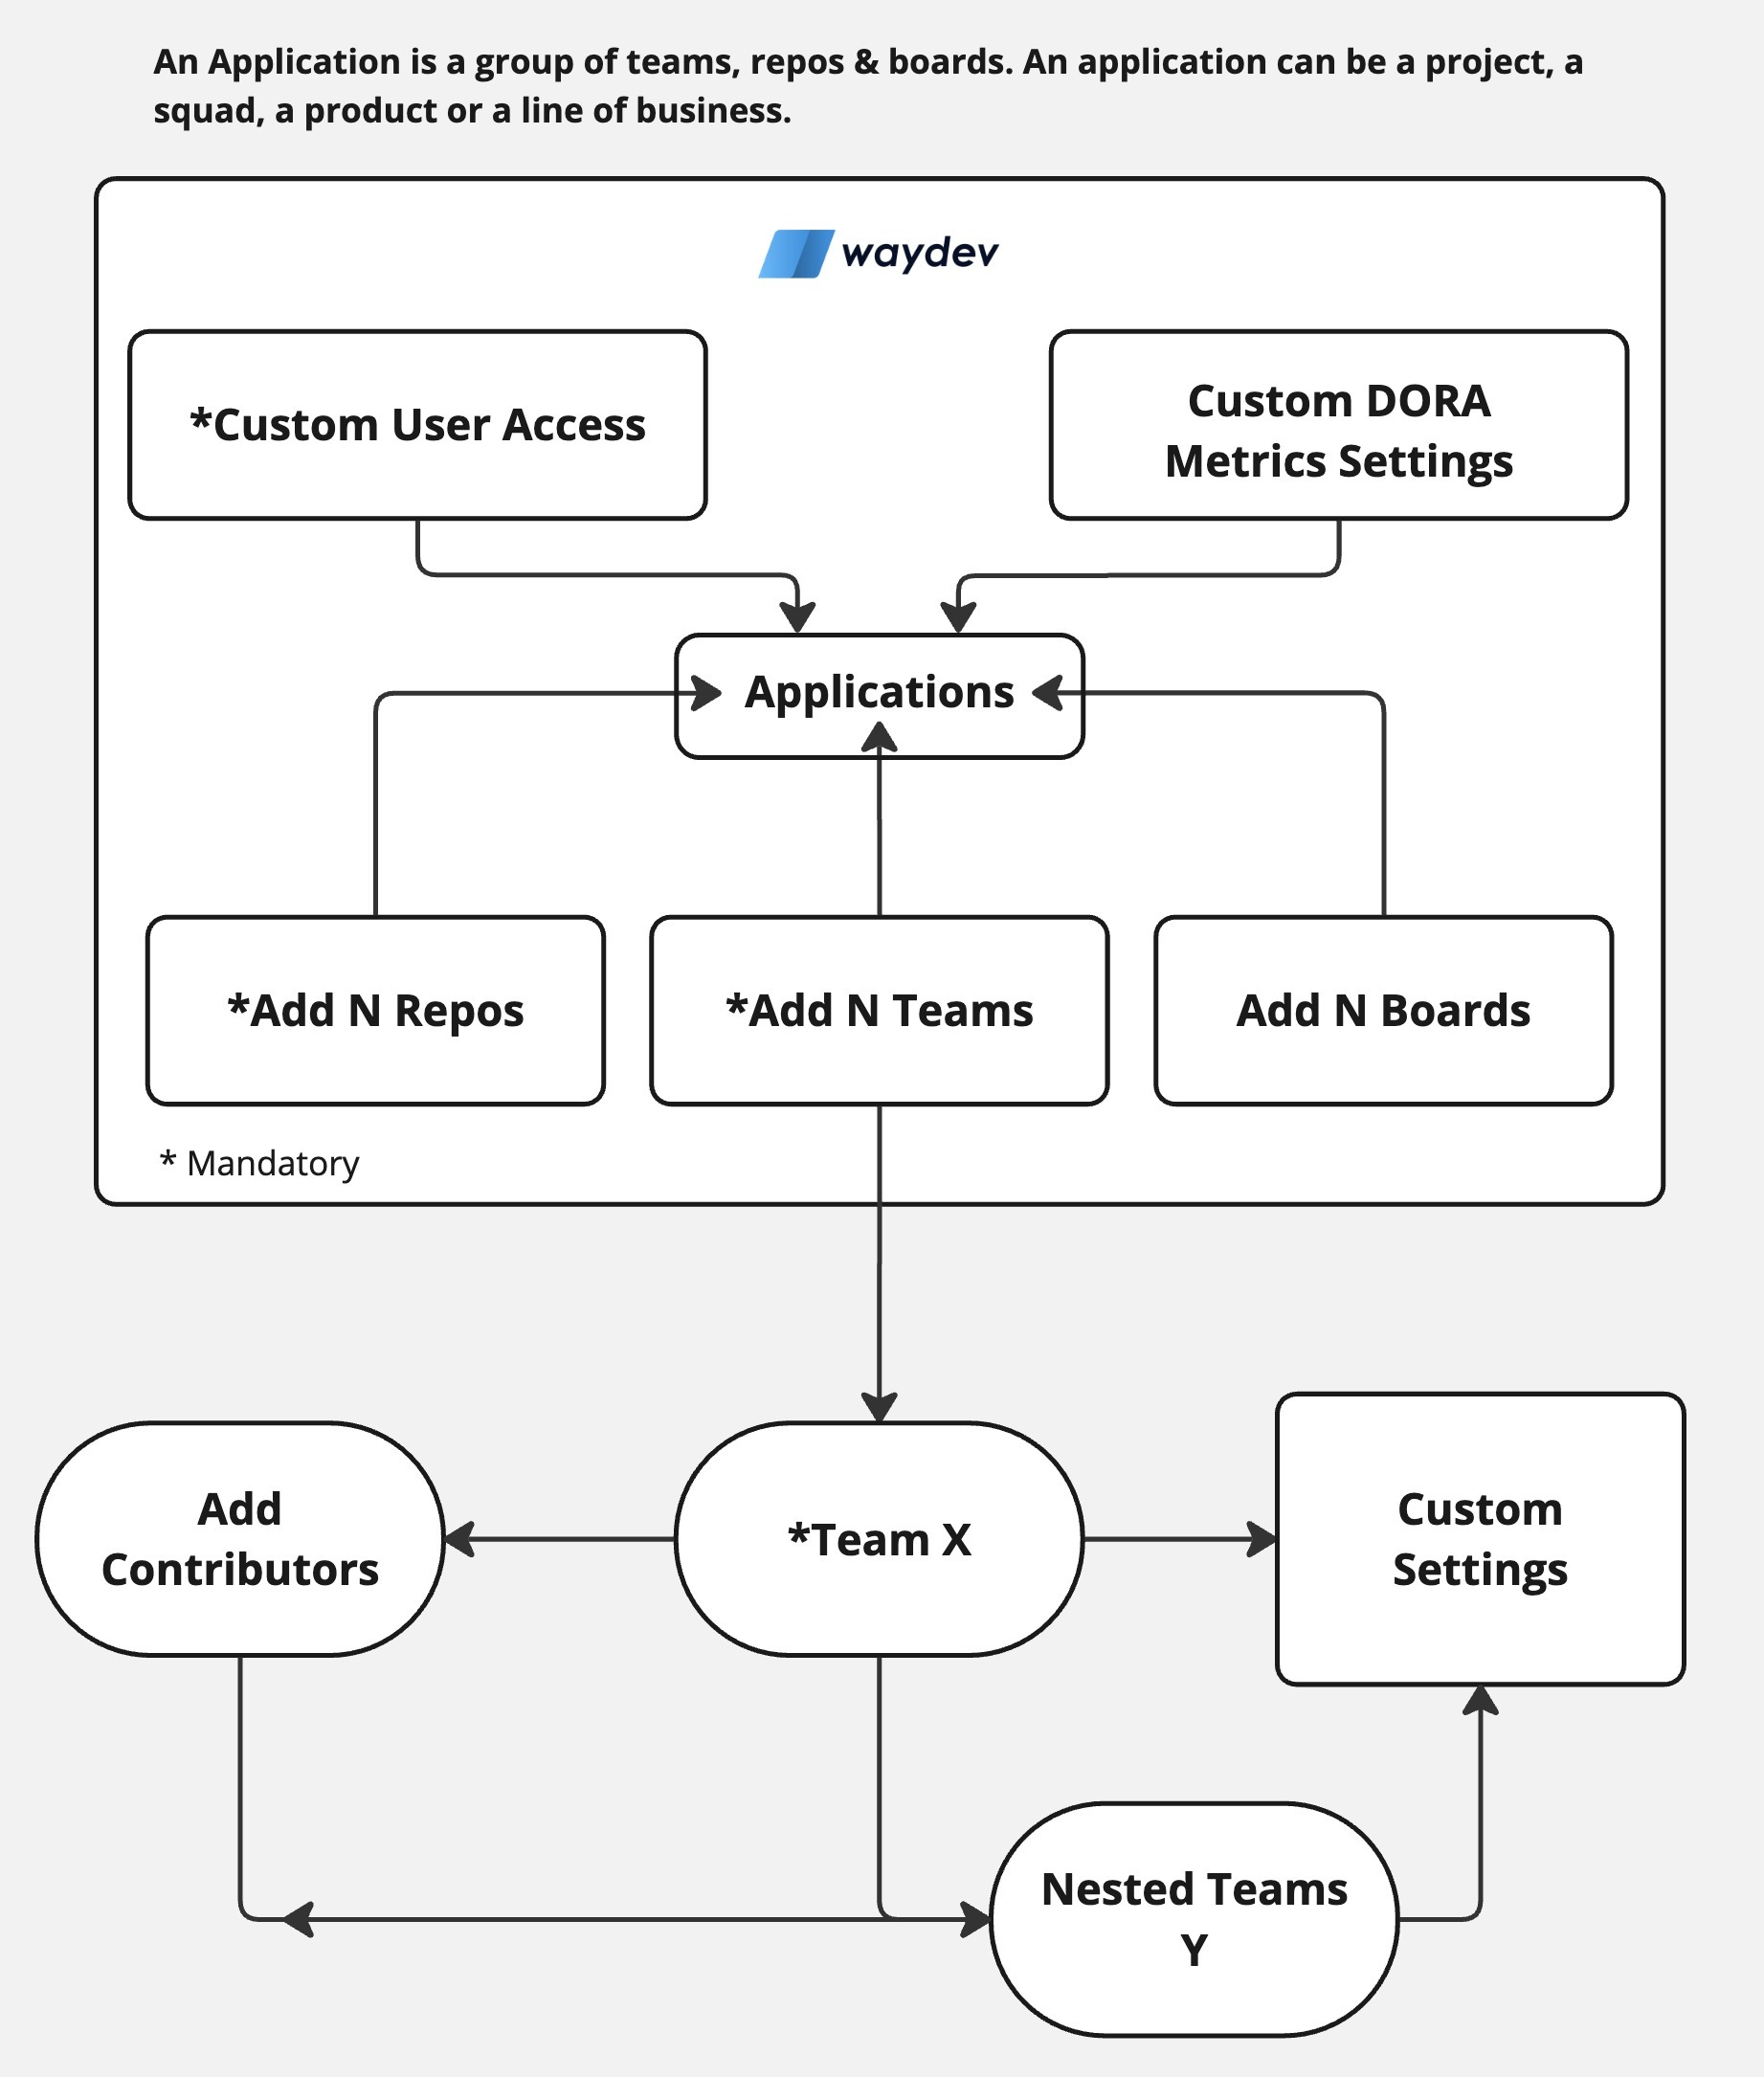
Projects in Waydev are used to group multiple repositories, teams, and boards into a single entity, allowing for more efficient management and filtering of reports. This feature simplifies tracking and analyzing project progress across various components.
How to manage a new Project
Follow the 9 straightforward steps.
Step 1: Go to Projects
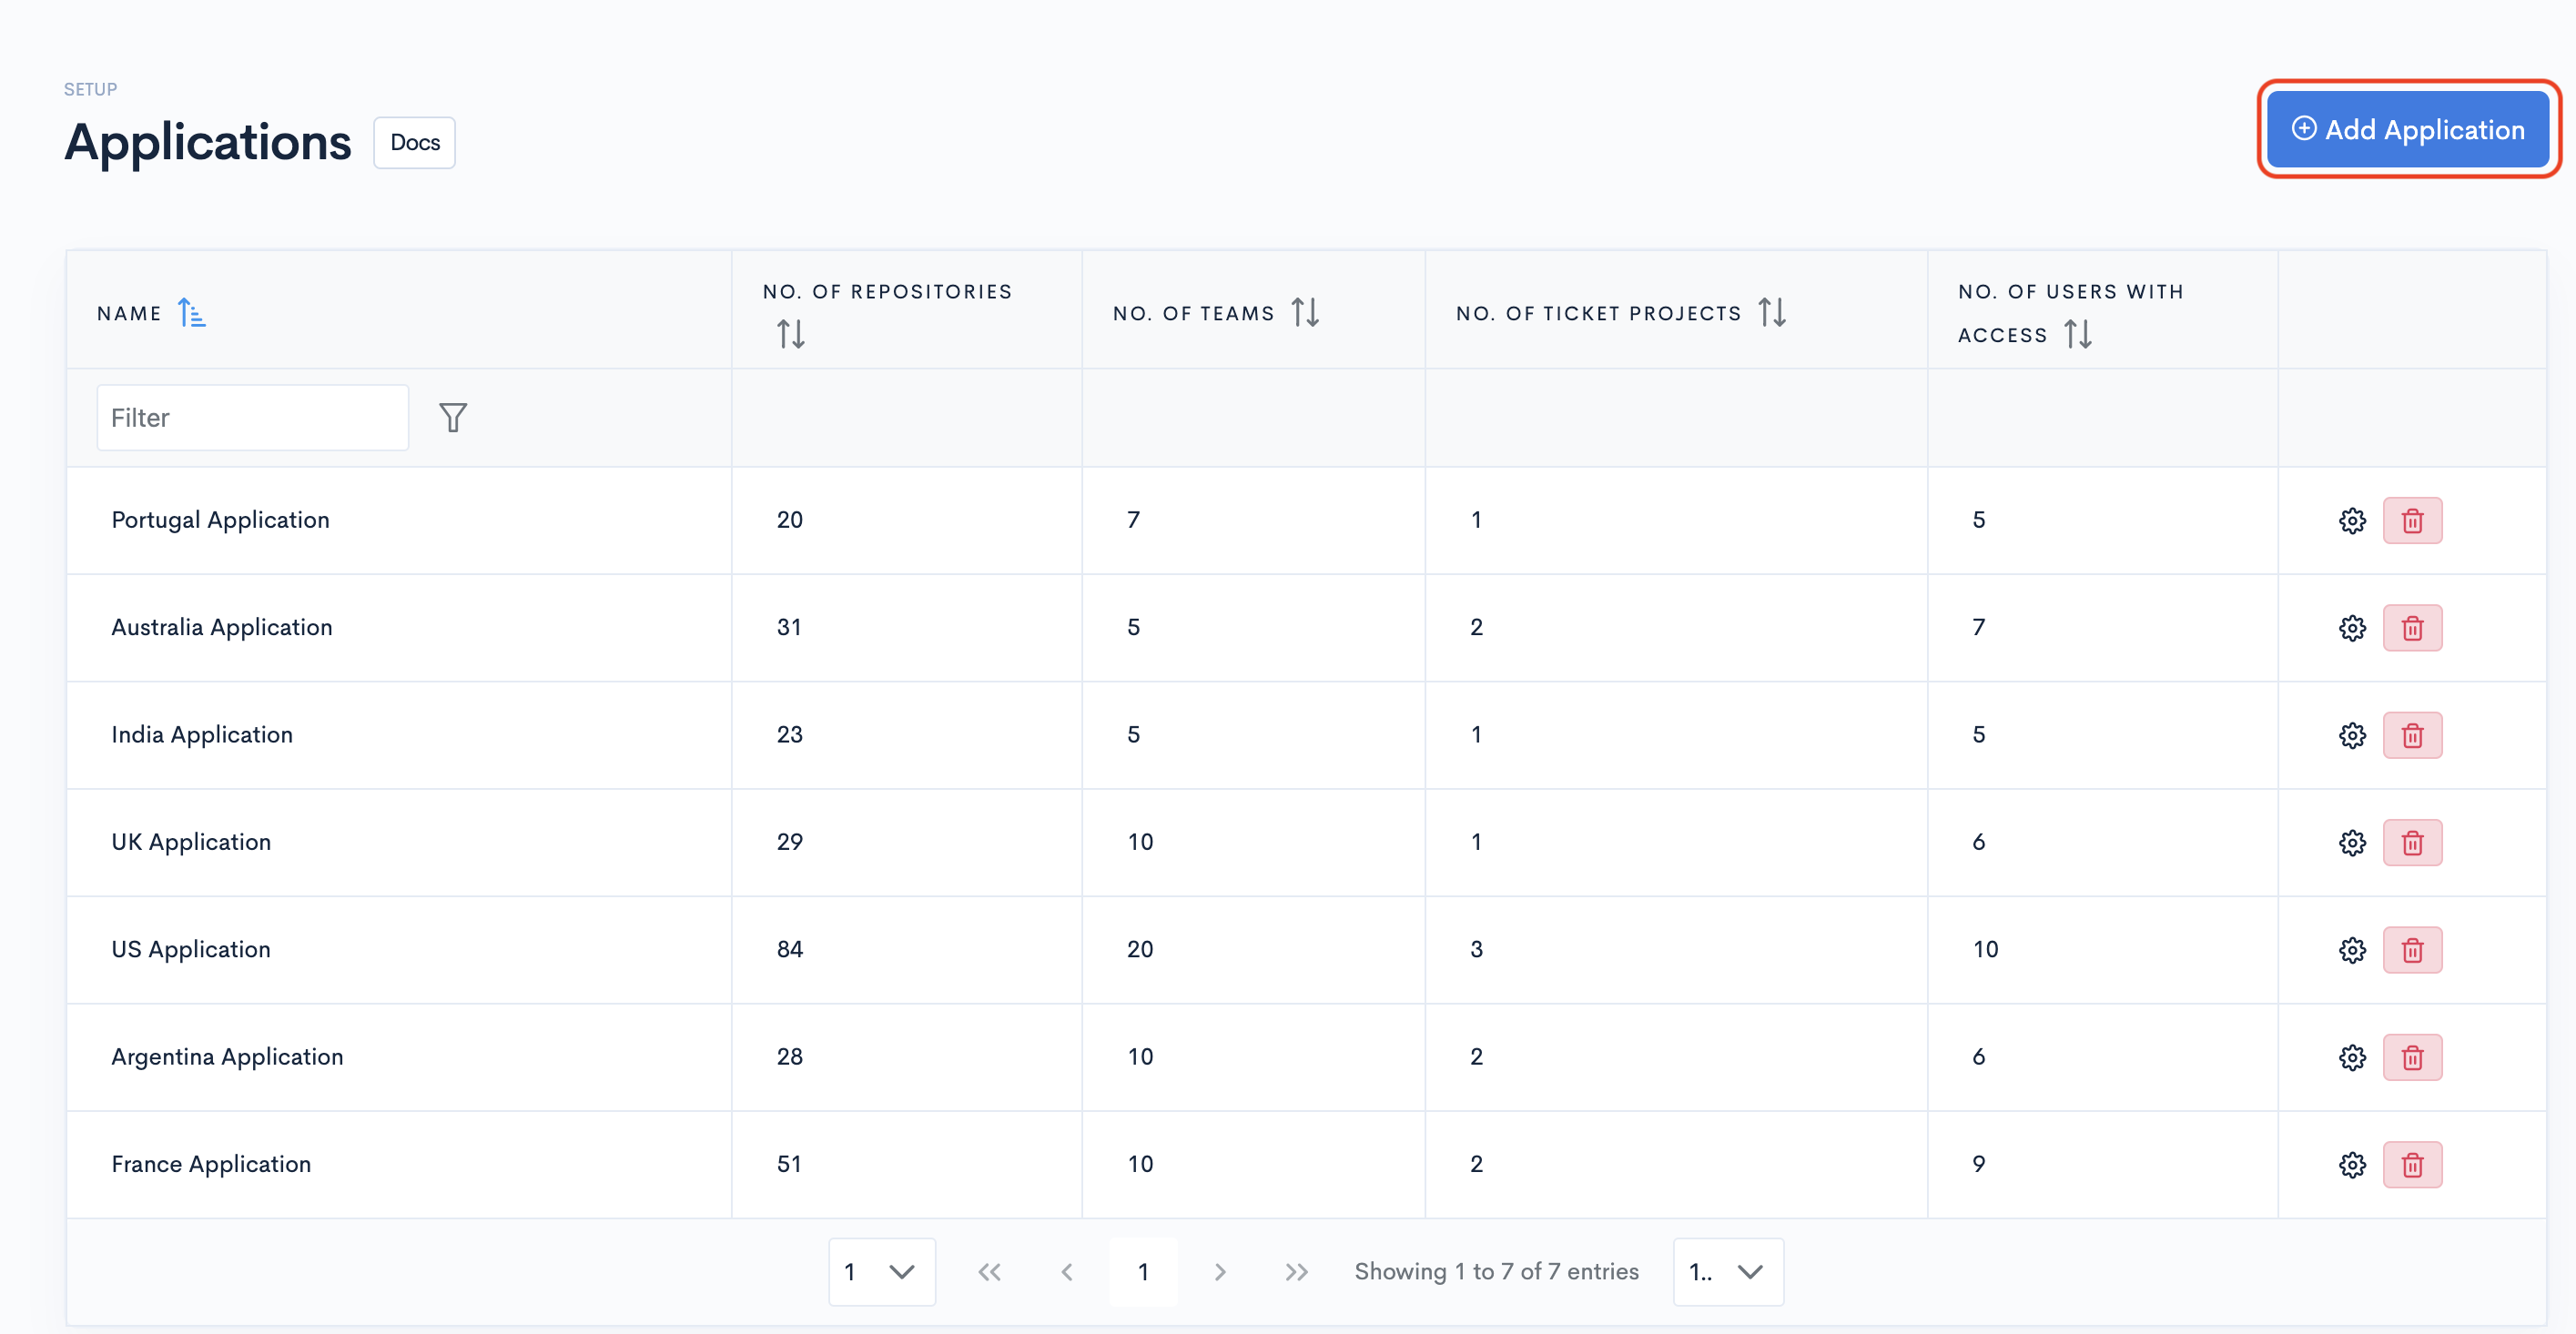
- Navigate to Setup > Projects.
- Click on the Add Project button in the top-right corner of the table.
Step 2: Create
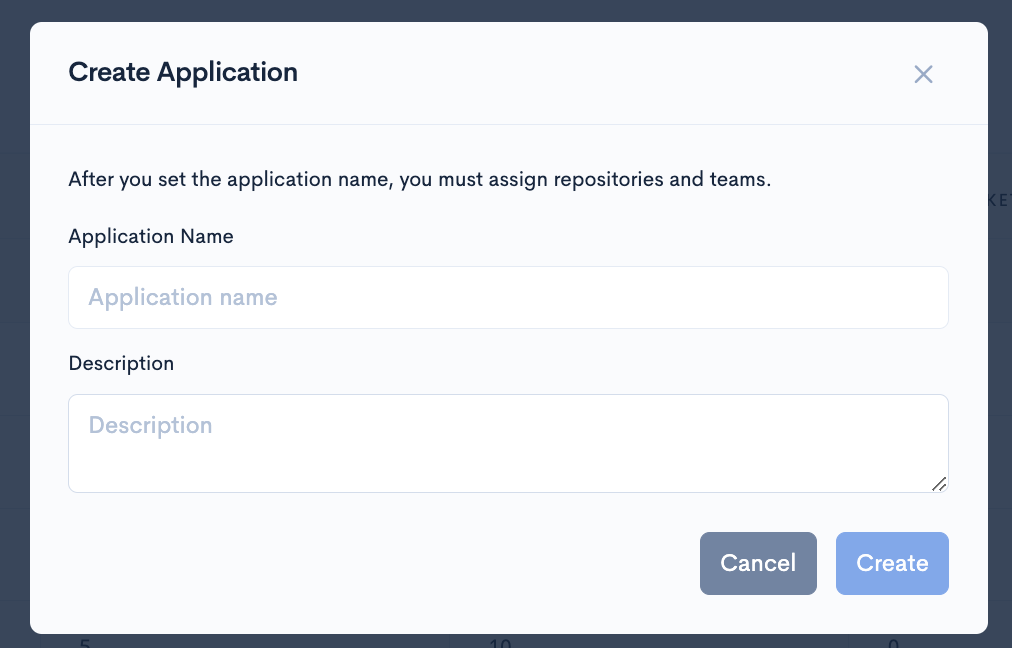
- Name your Project (required) and give it a description (optional).
- Then click Create.
Step 3: Project settings
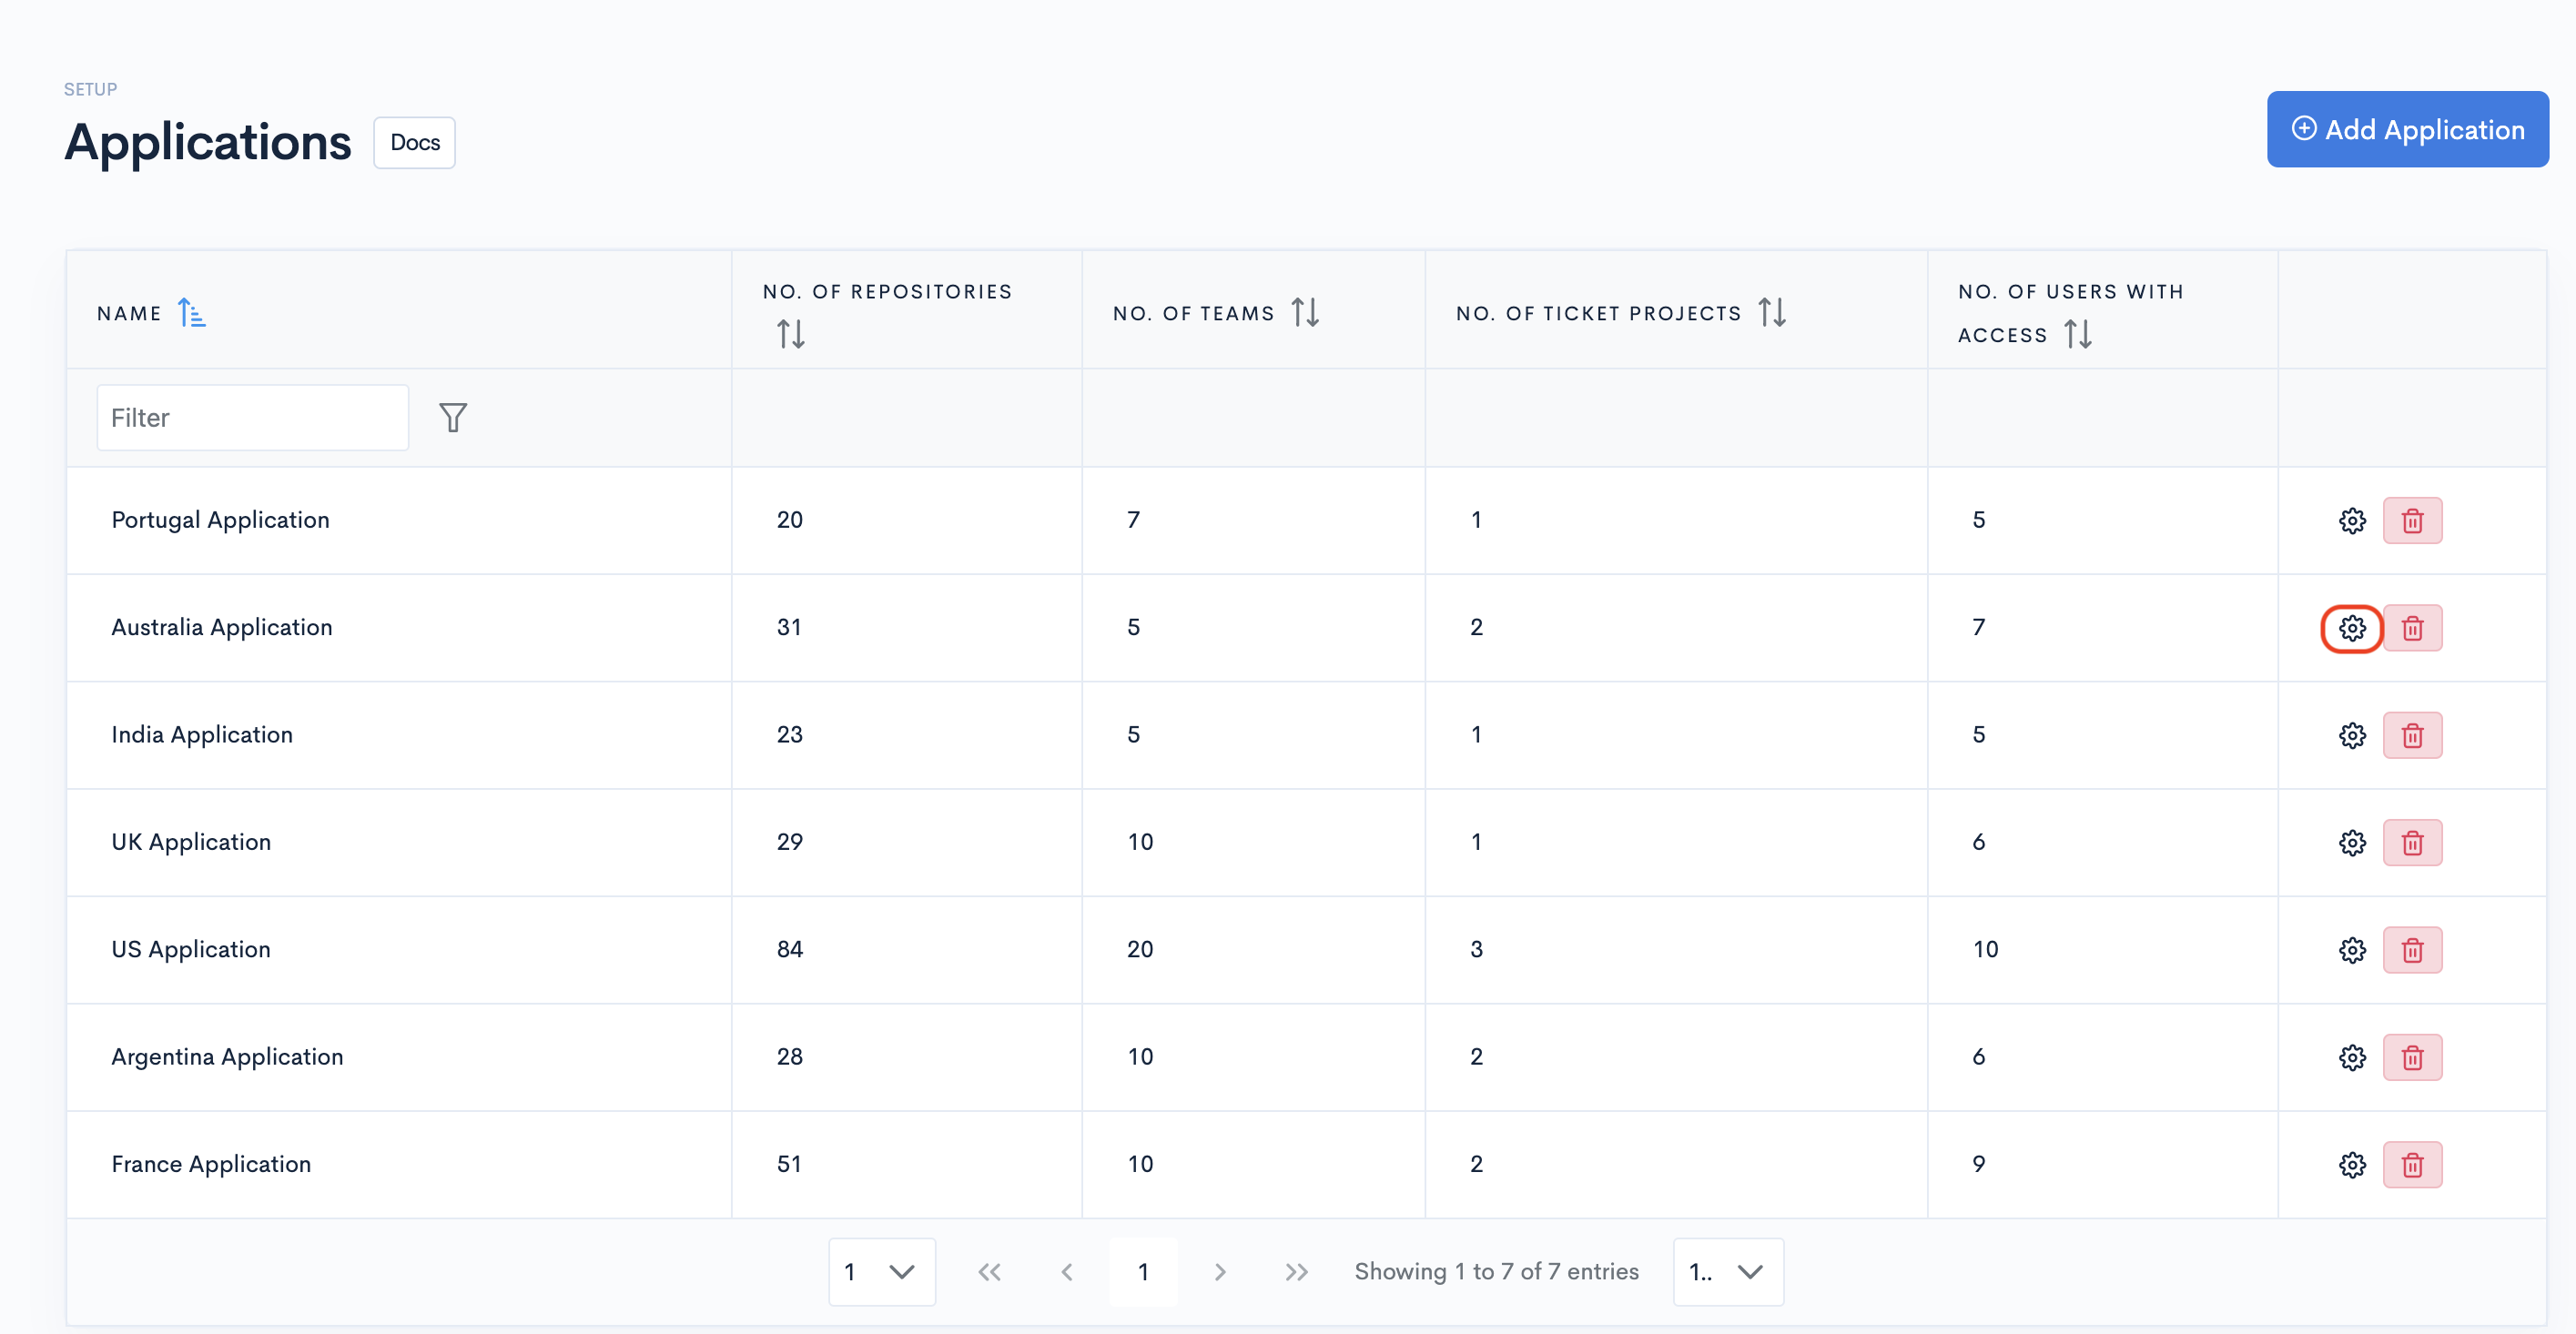
Now, click the ⚙️ gear button of the Project you just created.
You must assign at least one repository, one team, and one ticket project to access this project's data in the dashboards.
Step 4: DORA Metrics detection
Optionally, set up DORA Metrics for this project.
- Find out how to set up DORA Metrics detection in Waydev.
- Otherwise, the global DORA Metrics detections will apply to this project as well.
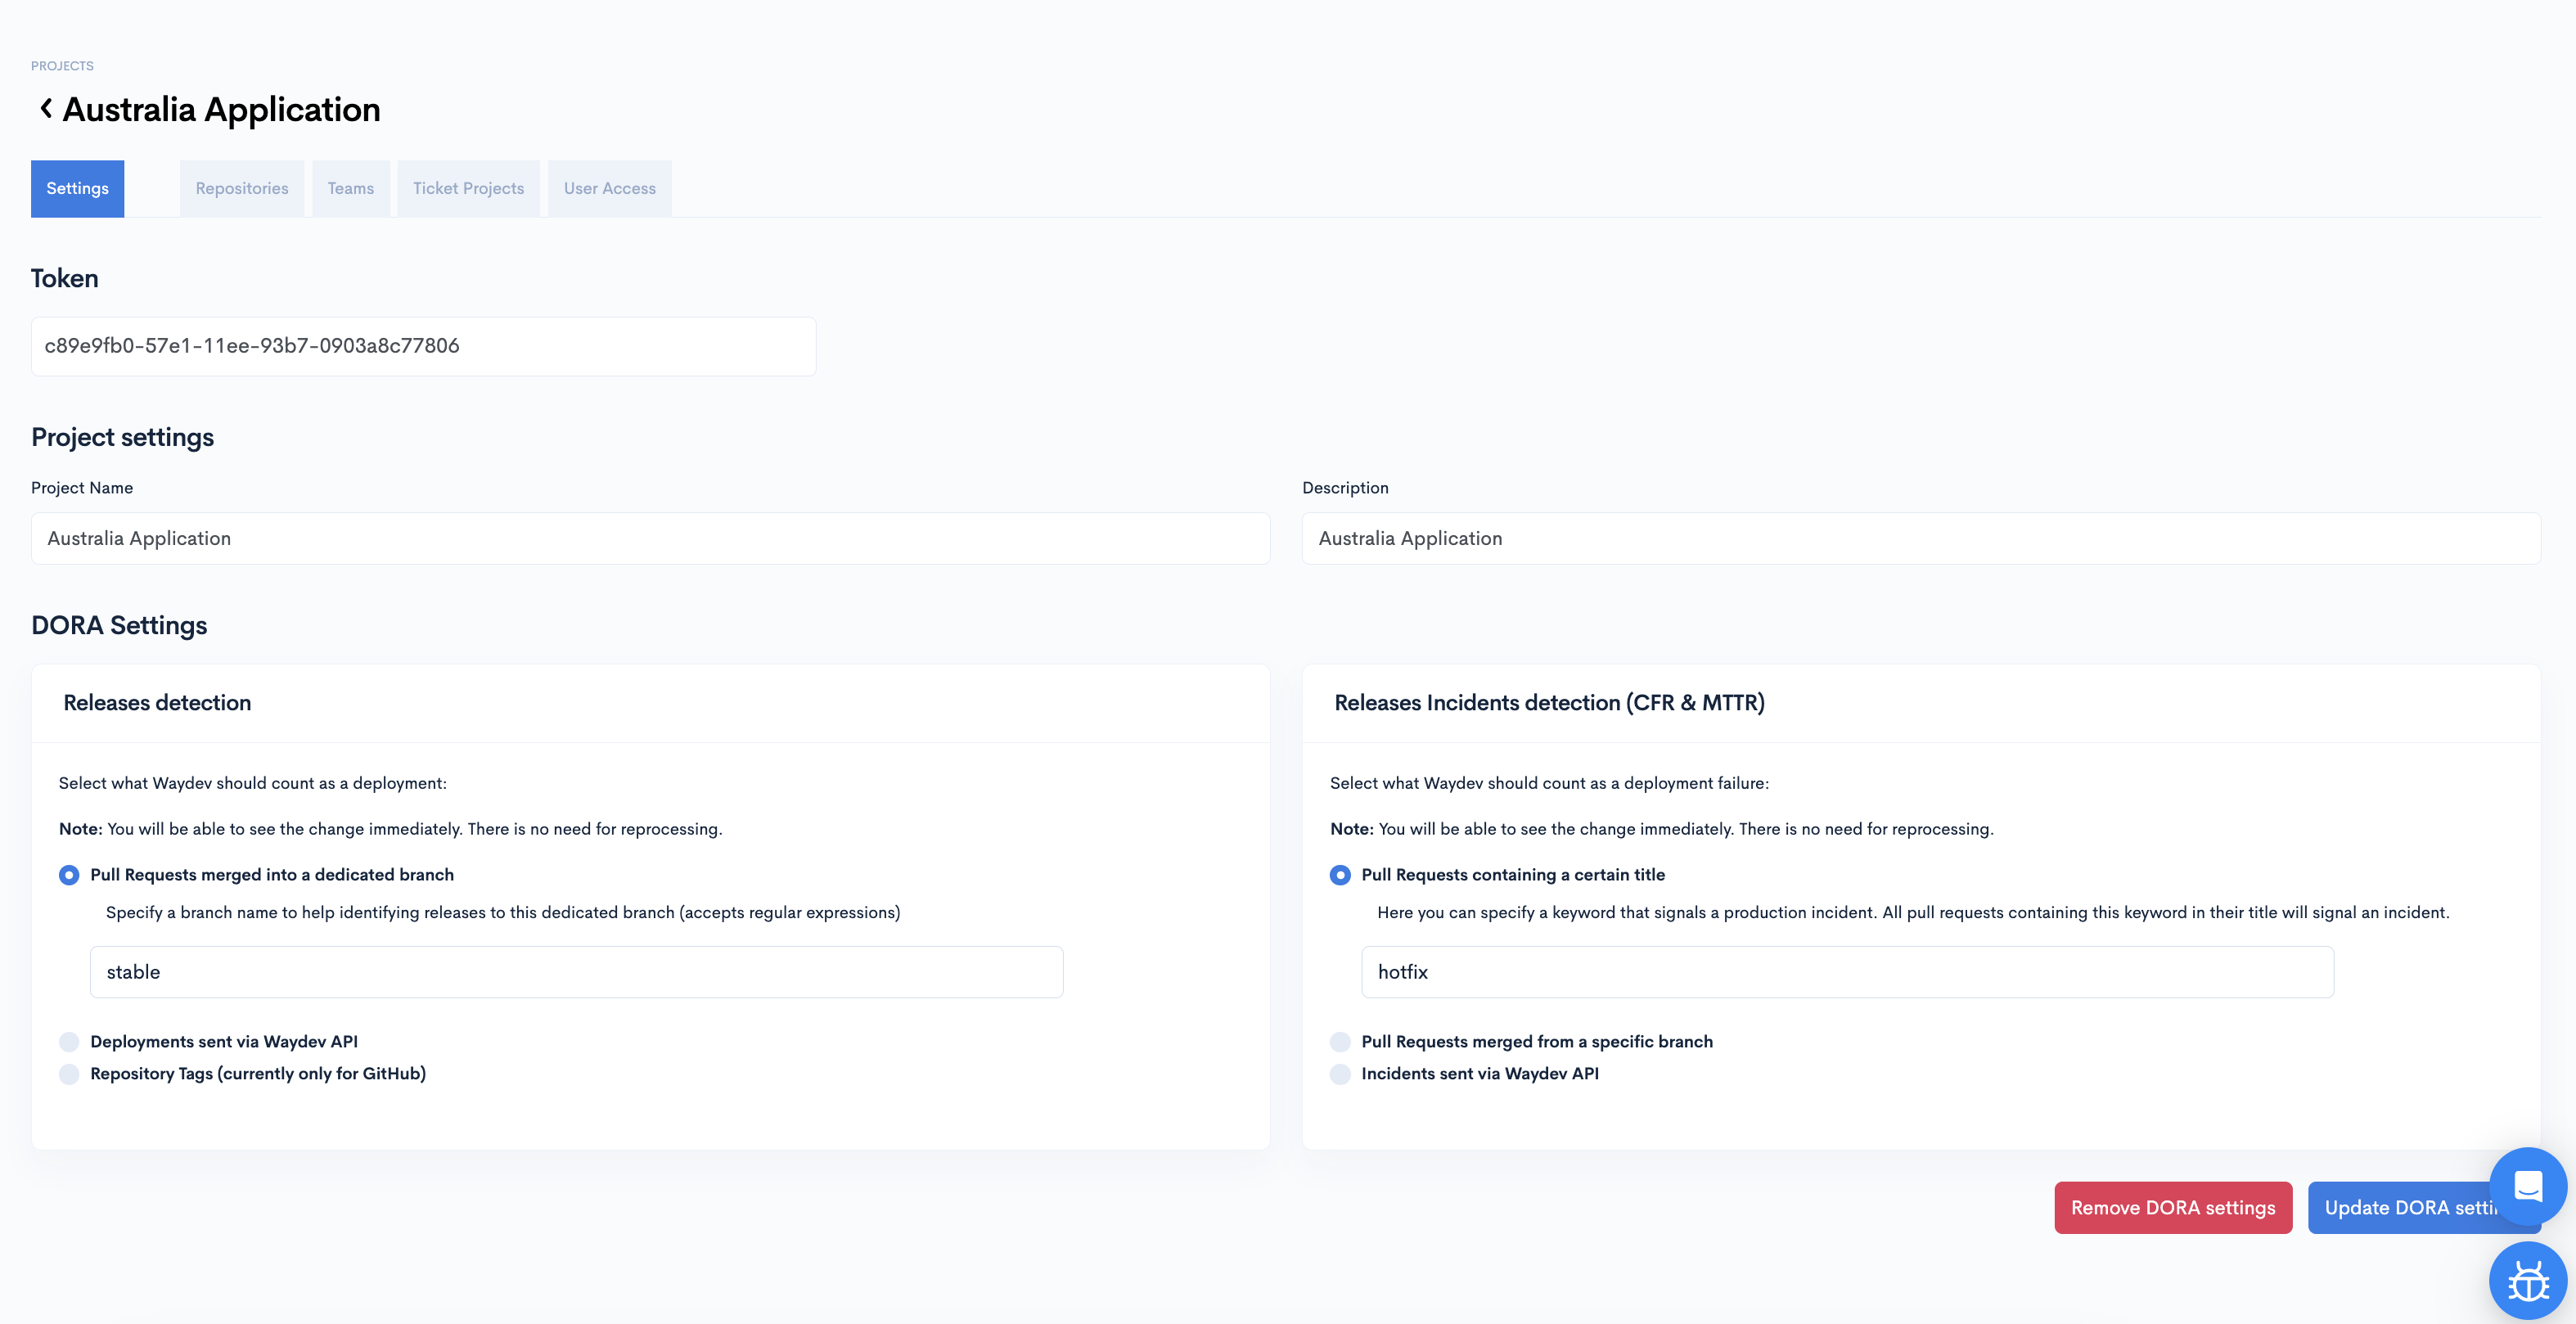
Step 5: Include Repositories
- Click the Repositories tab.
- Be aware that only the repositories marked for being processed are available on this list.
- If you need a missing repository, please first mark it for processing by Managing Repositories.
- Toggle on, from the right column, those you want to use in the stats of this project.
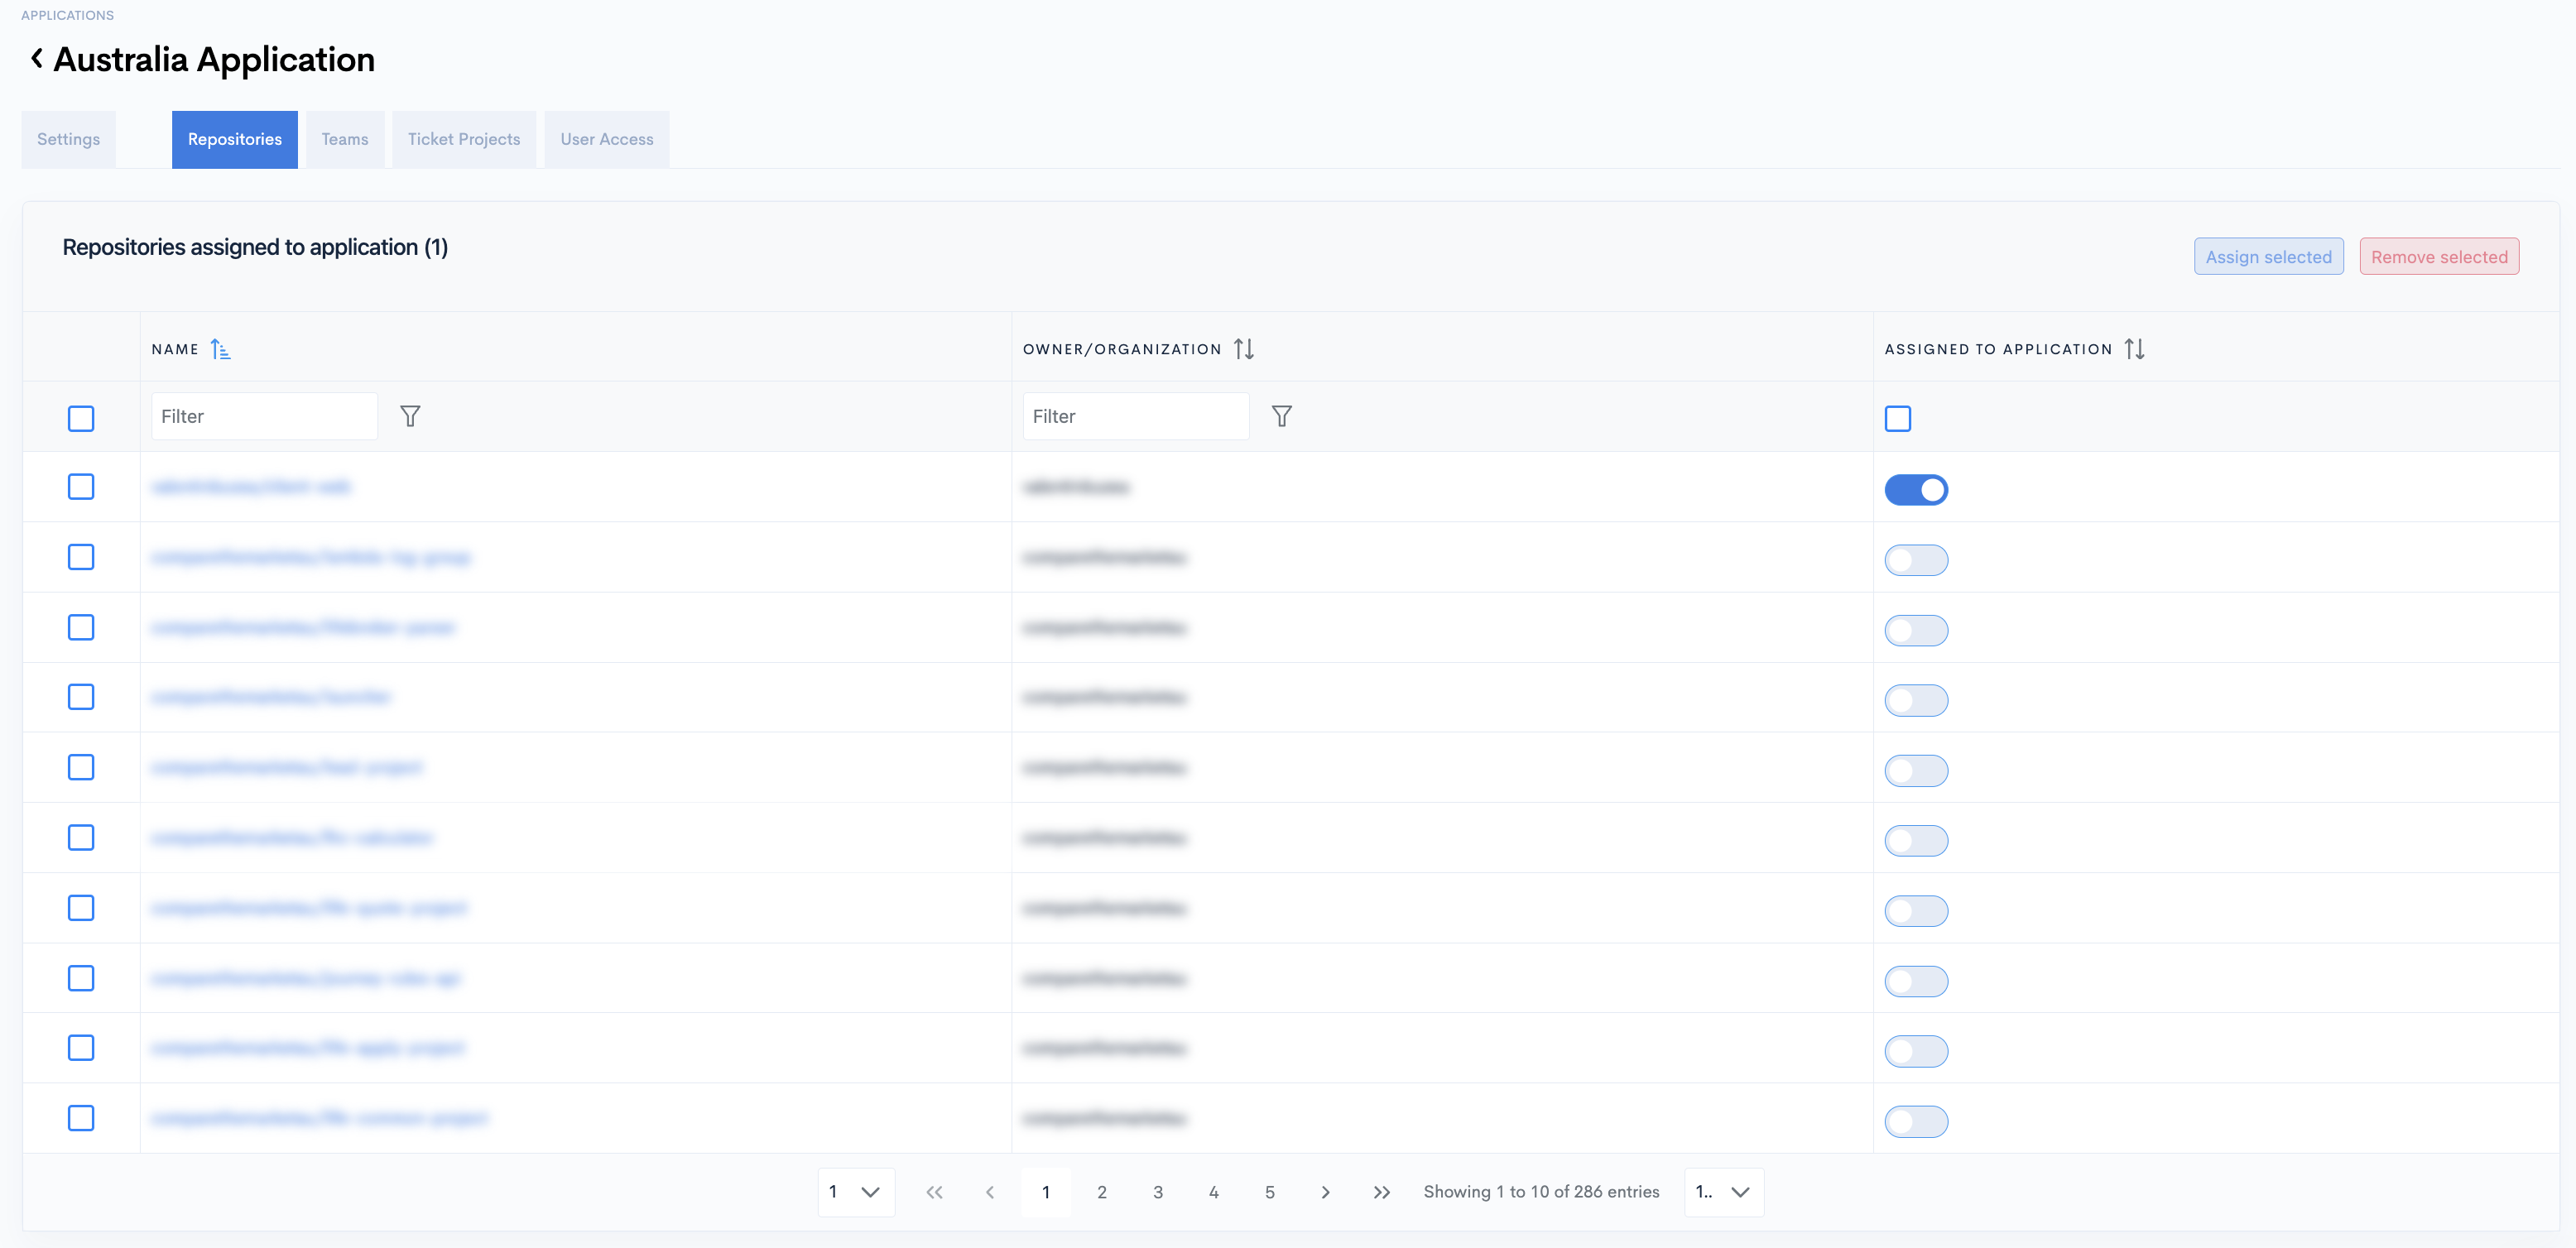
You must assign at least one repository to your project in order to see data!
- Or you can select multiple repositories and then click the "Assign selected" button in the top-right.
- You can do the same to "Remove selected" repositories.
When accessing this Project in dashboards, you will only see data from the repositories included in this project.

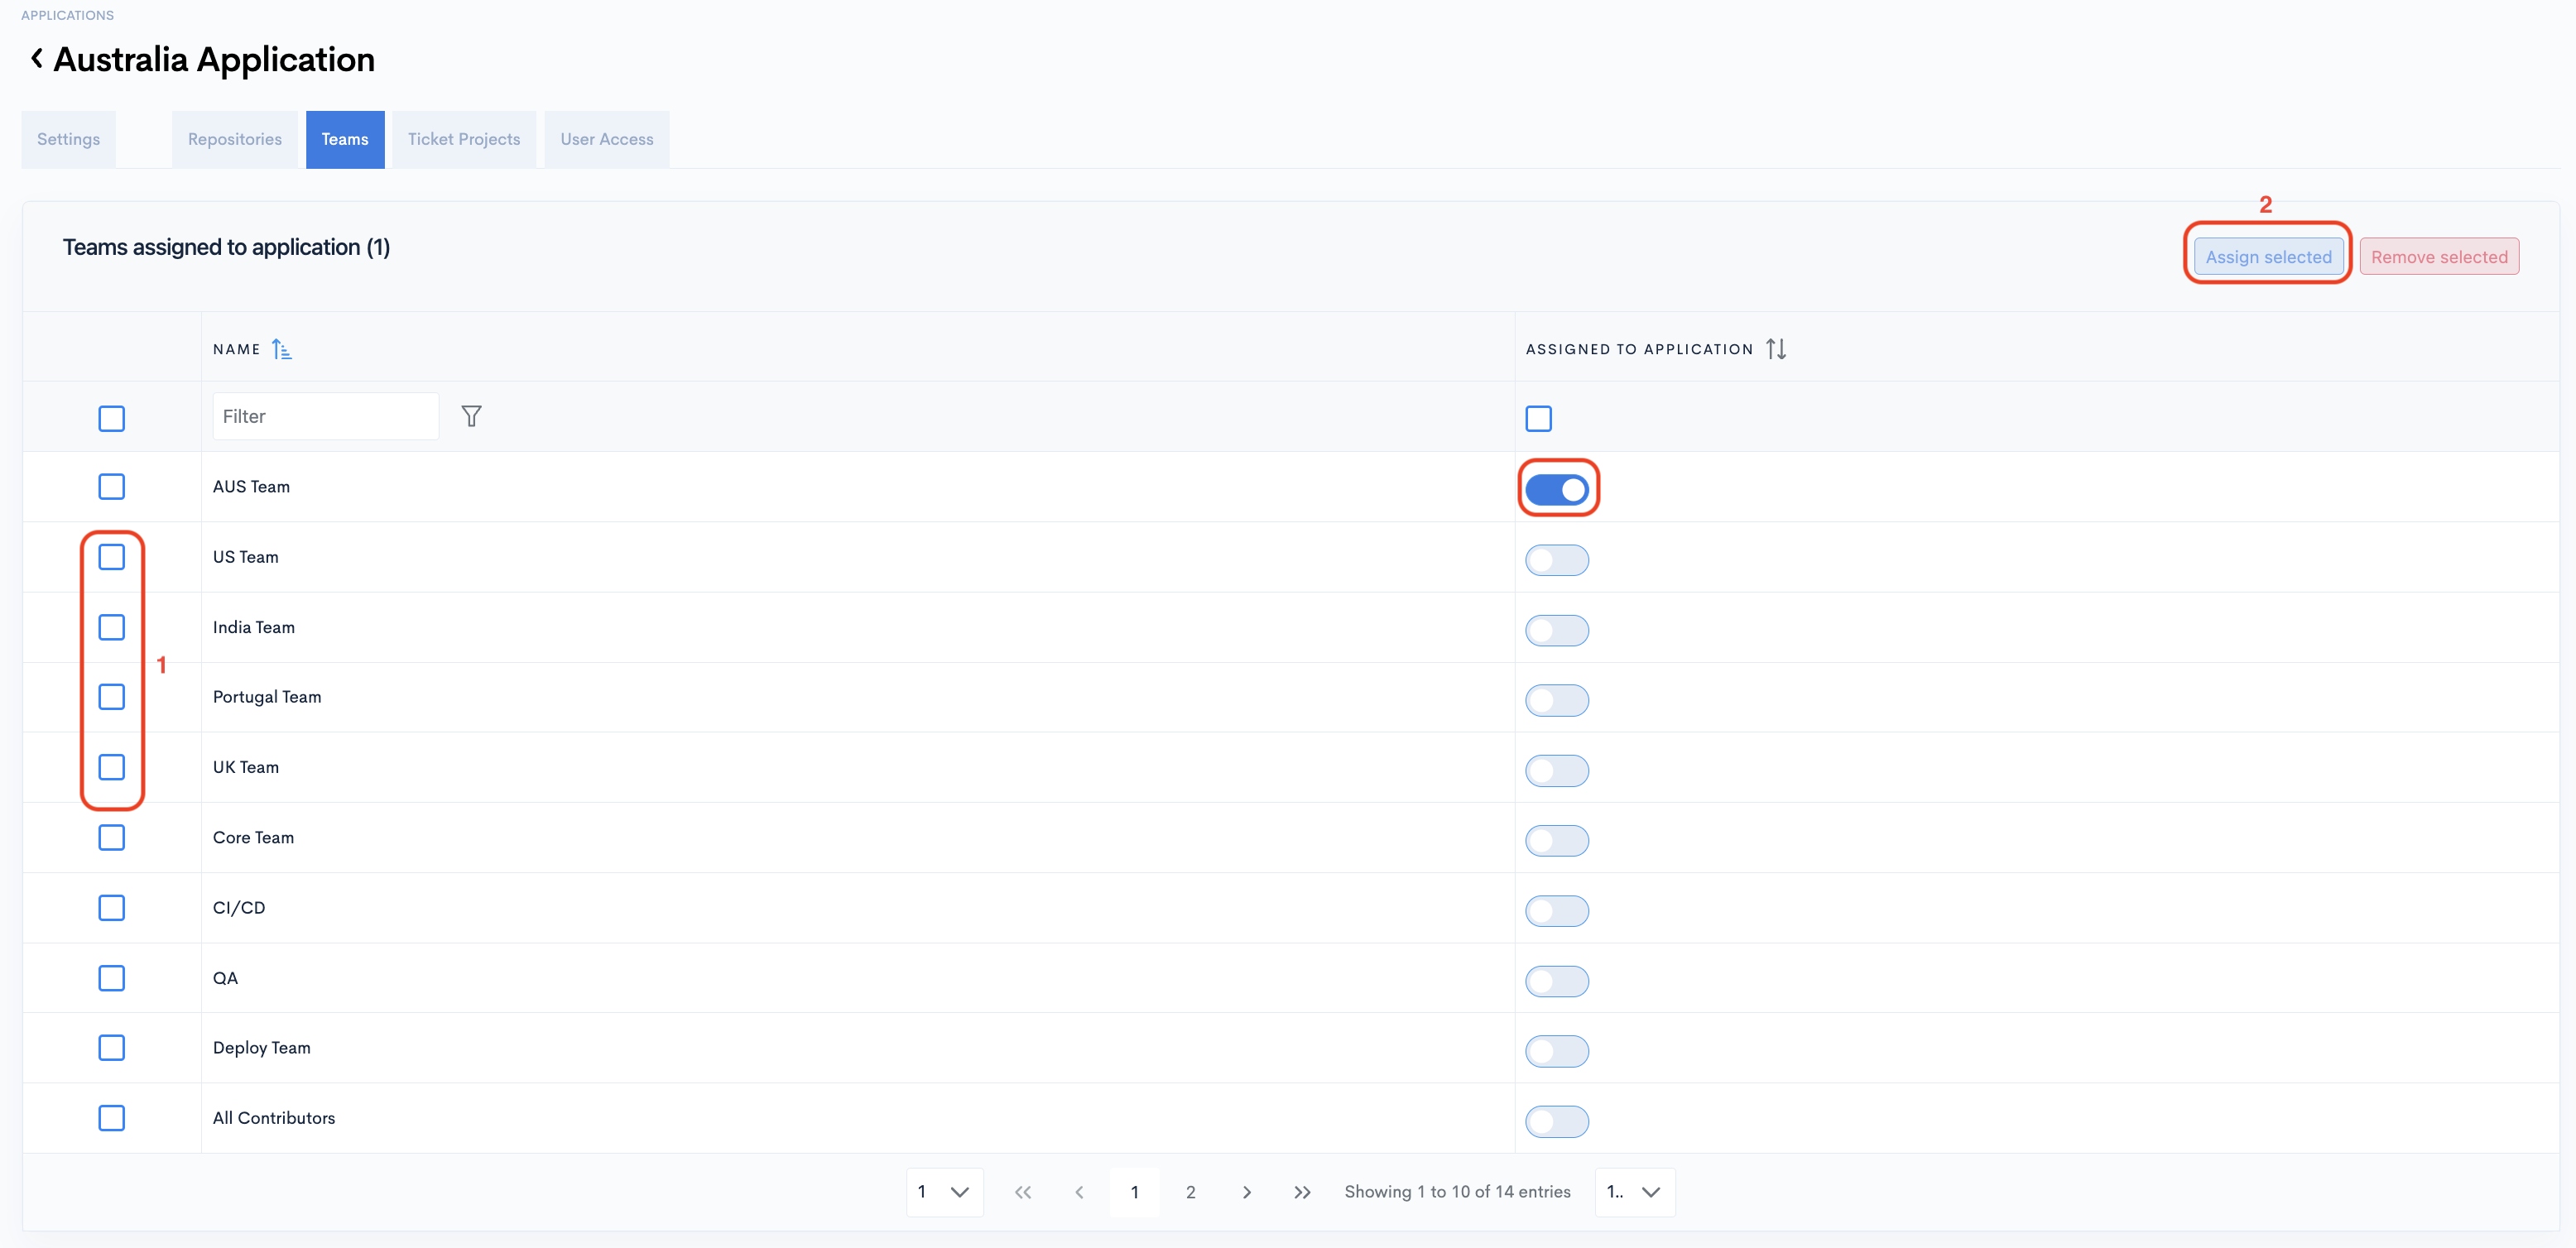
Step 6: Include Teams
- Click the Teams tab.
- Toggle on, from the right column, those you want to use in the stats of this project.
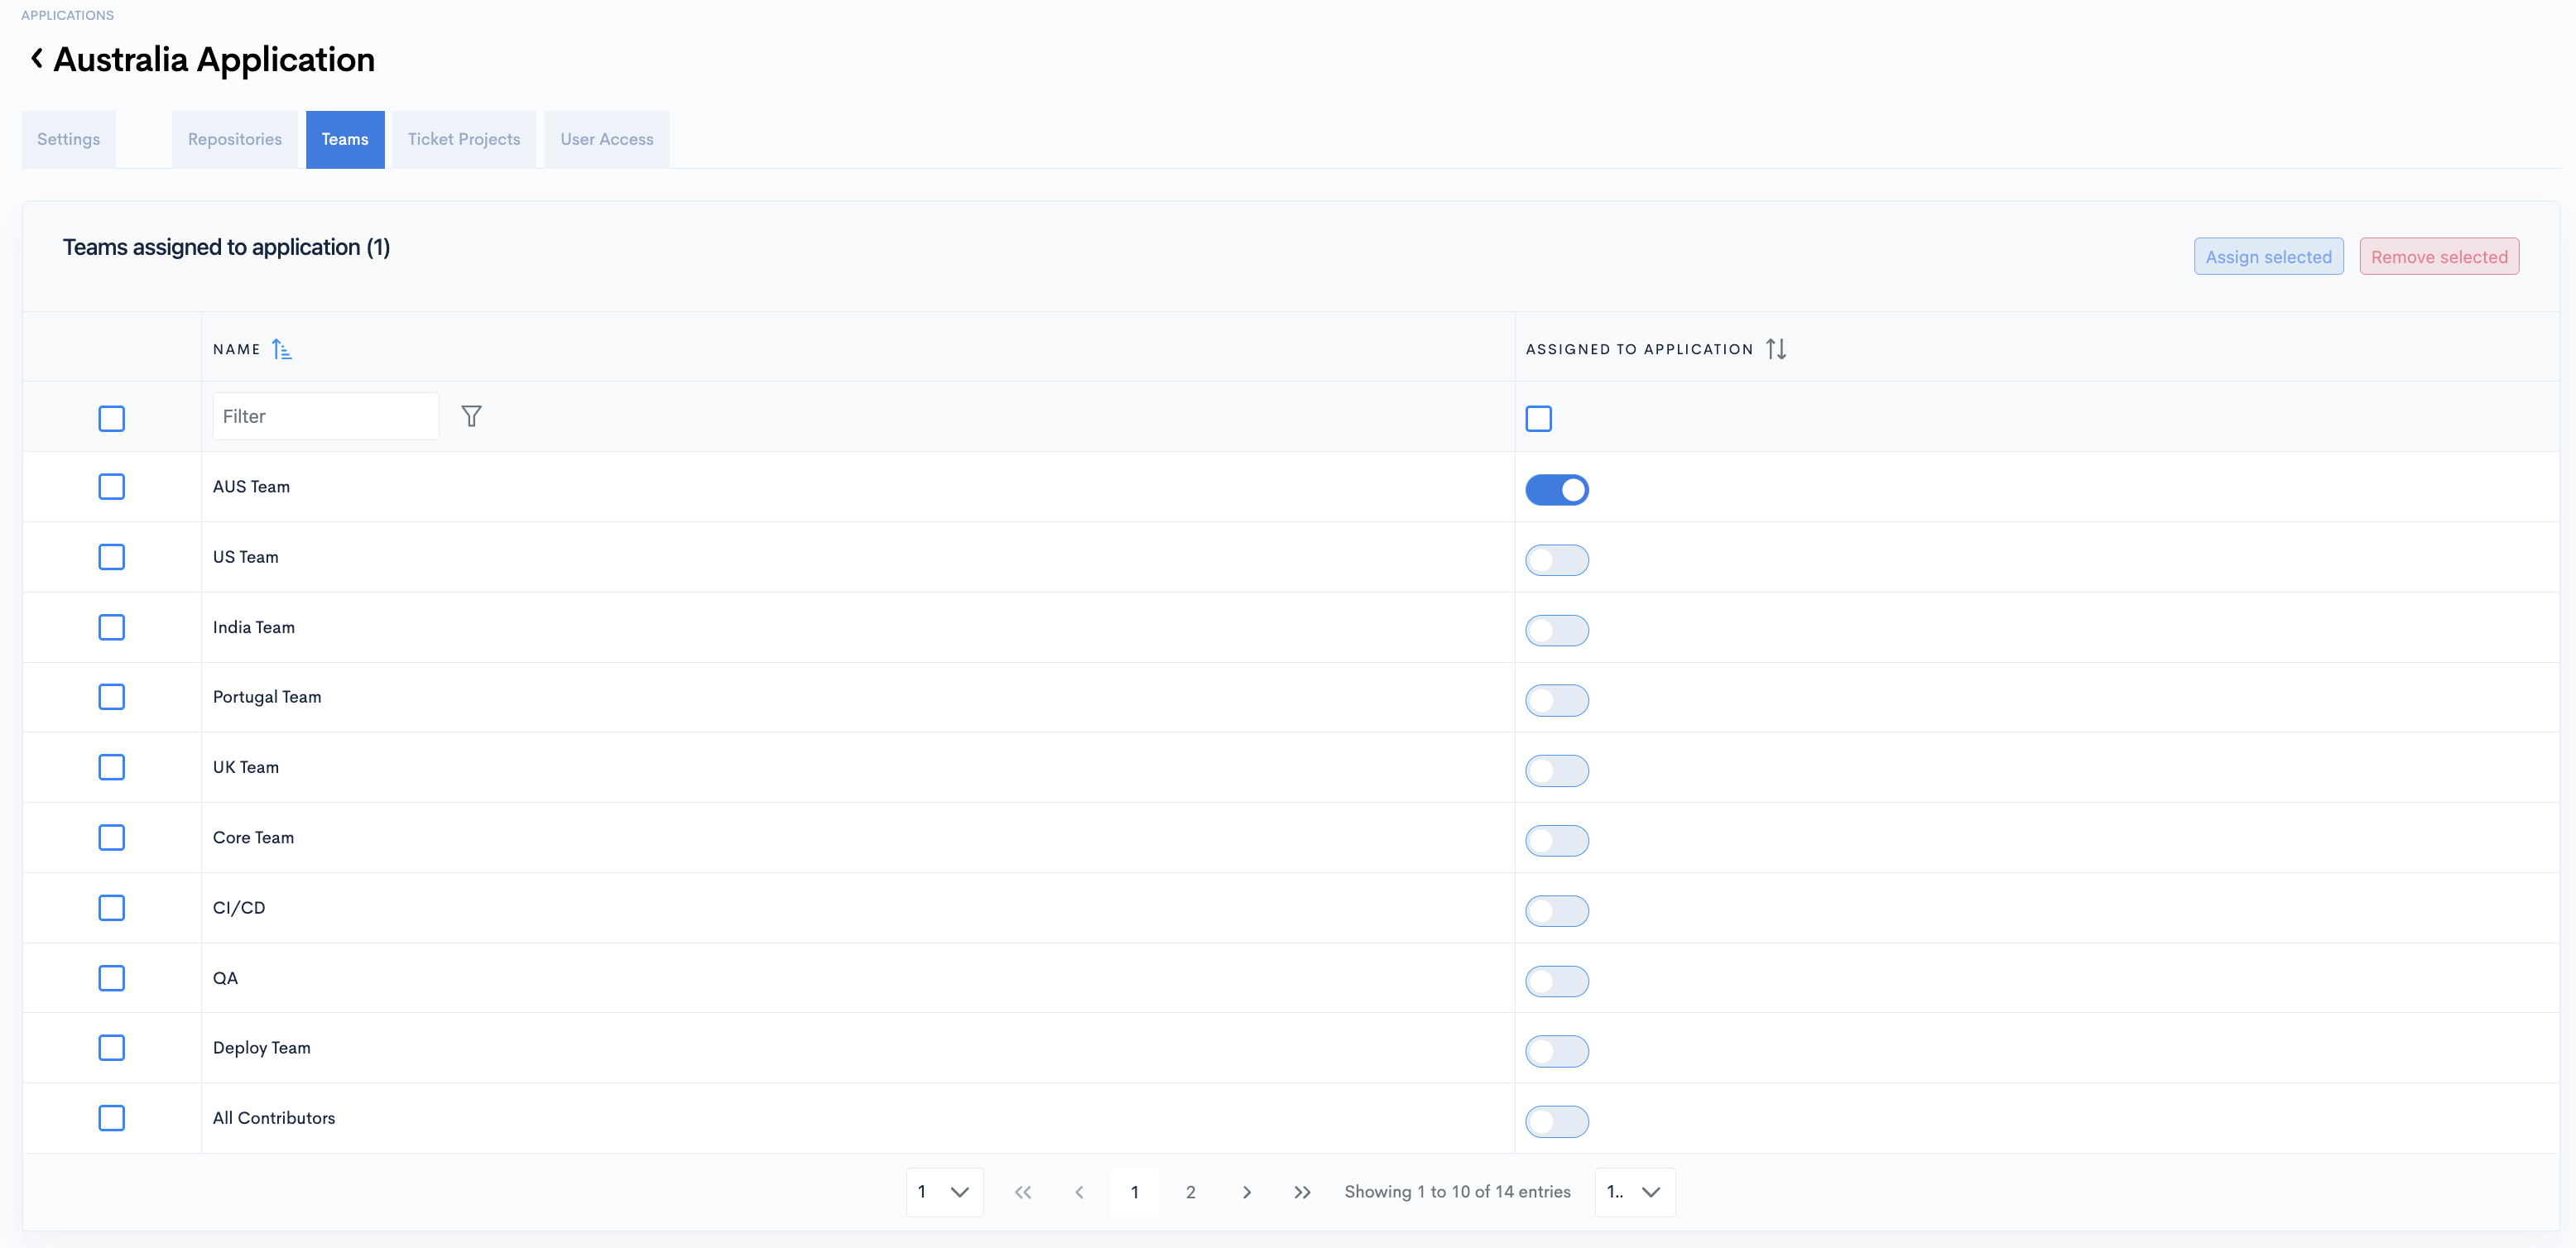
You must assign at least one team to your project in order to see data!
- Or you can select multiple teams and then click the "Assign selected" button in the top-right.
- You can do the same to "Remove selected" teams.
When accessing this Project in dashboards, you will only see data from the teams included in this project.
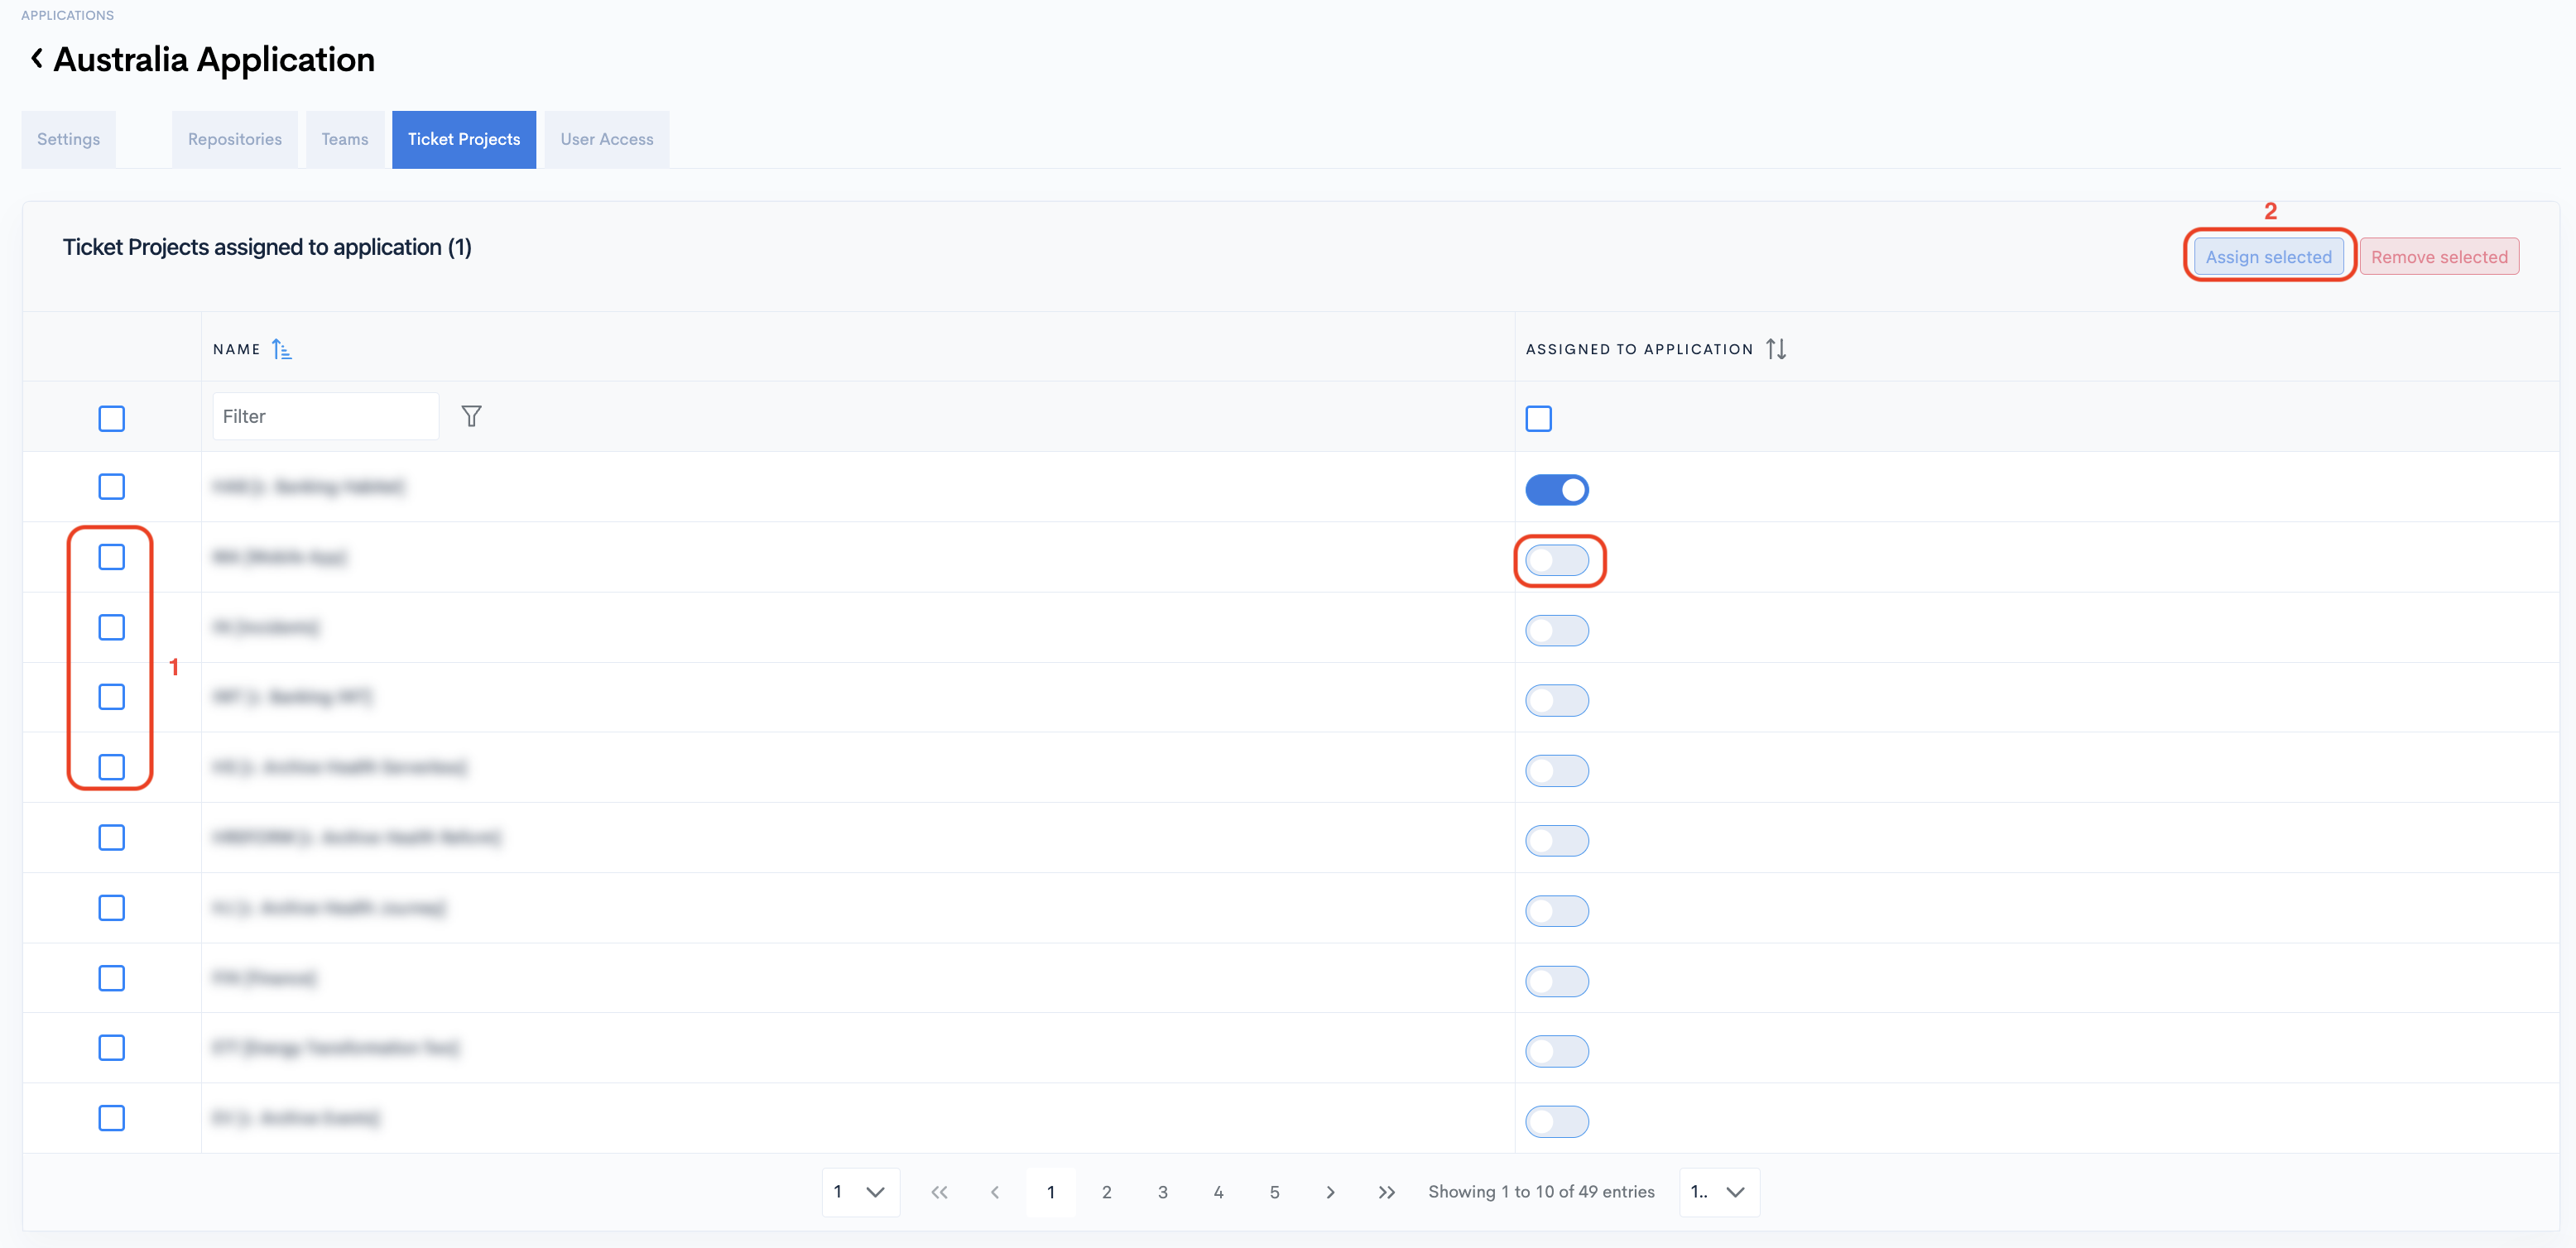
Step 7: Include Ticket Projects
- Click the Ticket Projects tab.
- Be aware that only the ticket projects marked for being processed are available on this list.
- If you need a missing ticket project, please first mark it for processing by Configuring Ticket Projects.
- Toggle on, from the right column, those you want to use in the stats of this project.
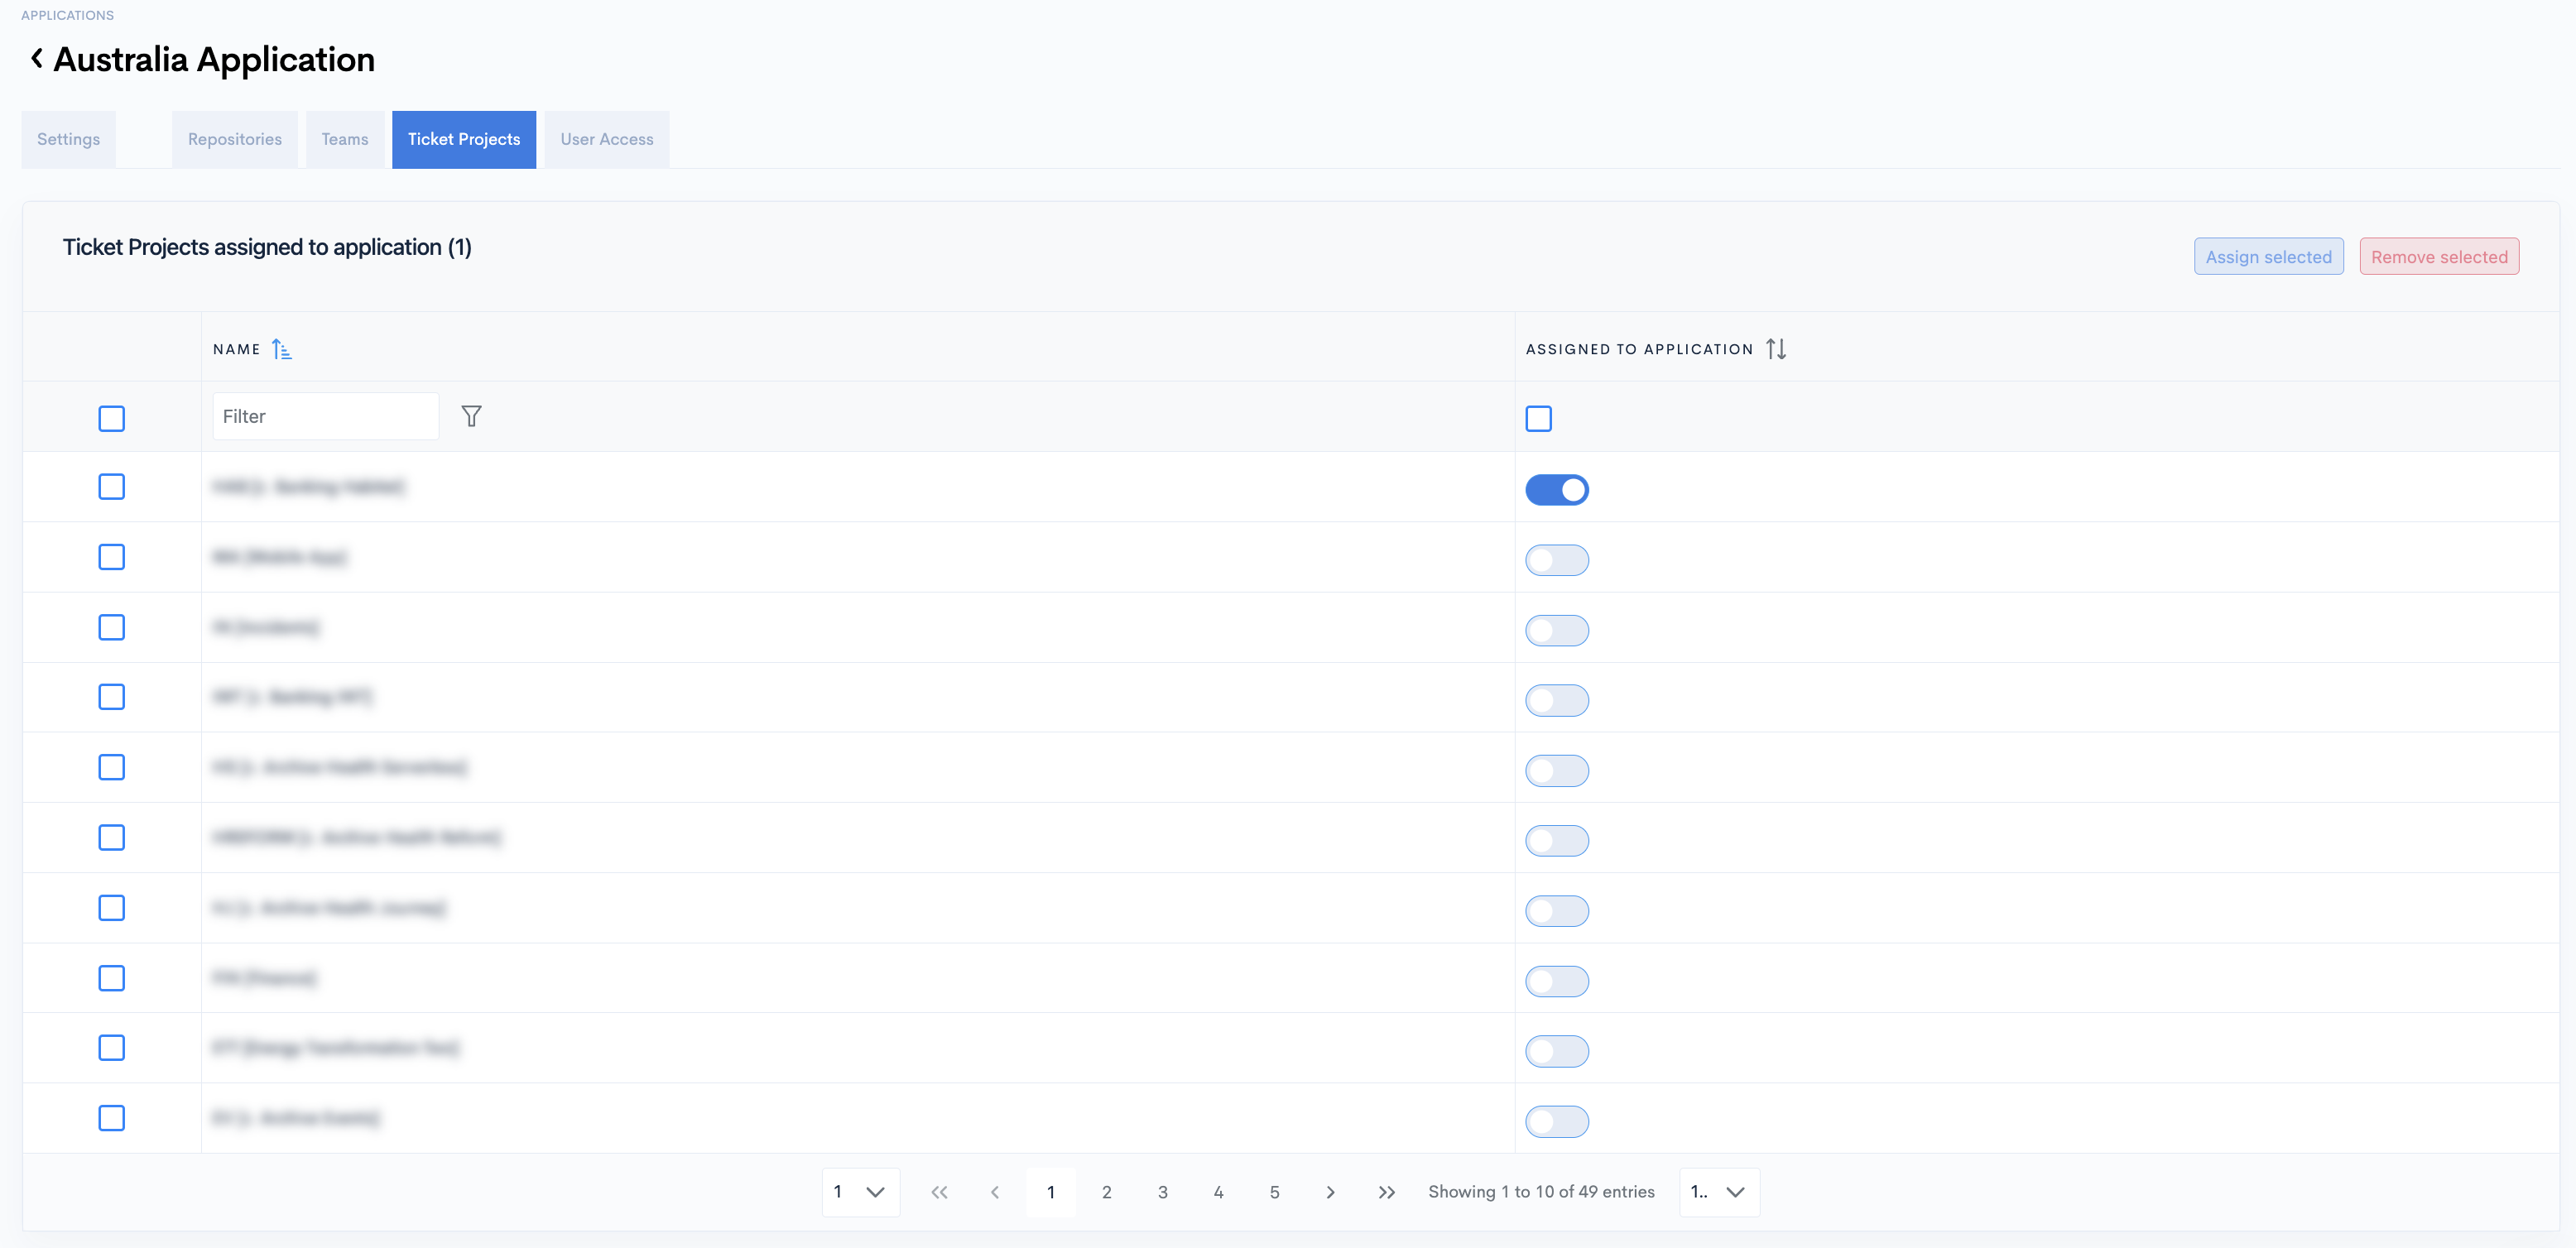
You must assign at least one team to your project in order to see data!
- Or you can select multiple ticket projects and then click the "Assign selected" button in the top-right.
- You can do the same to "Remove selected" ticket projects.
When accessing this Project in dashboards, you will only see data from the ticket projects included in this project.
Step 8: Grant access to users
- Click the User Access tab.
- Toggle on, from the right column, those users you want to have access to the stats of this project.
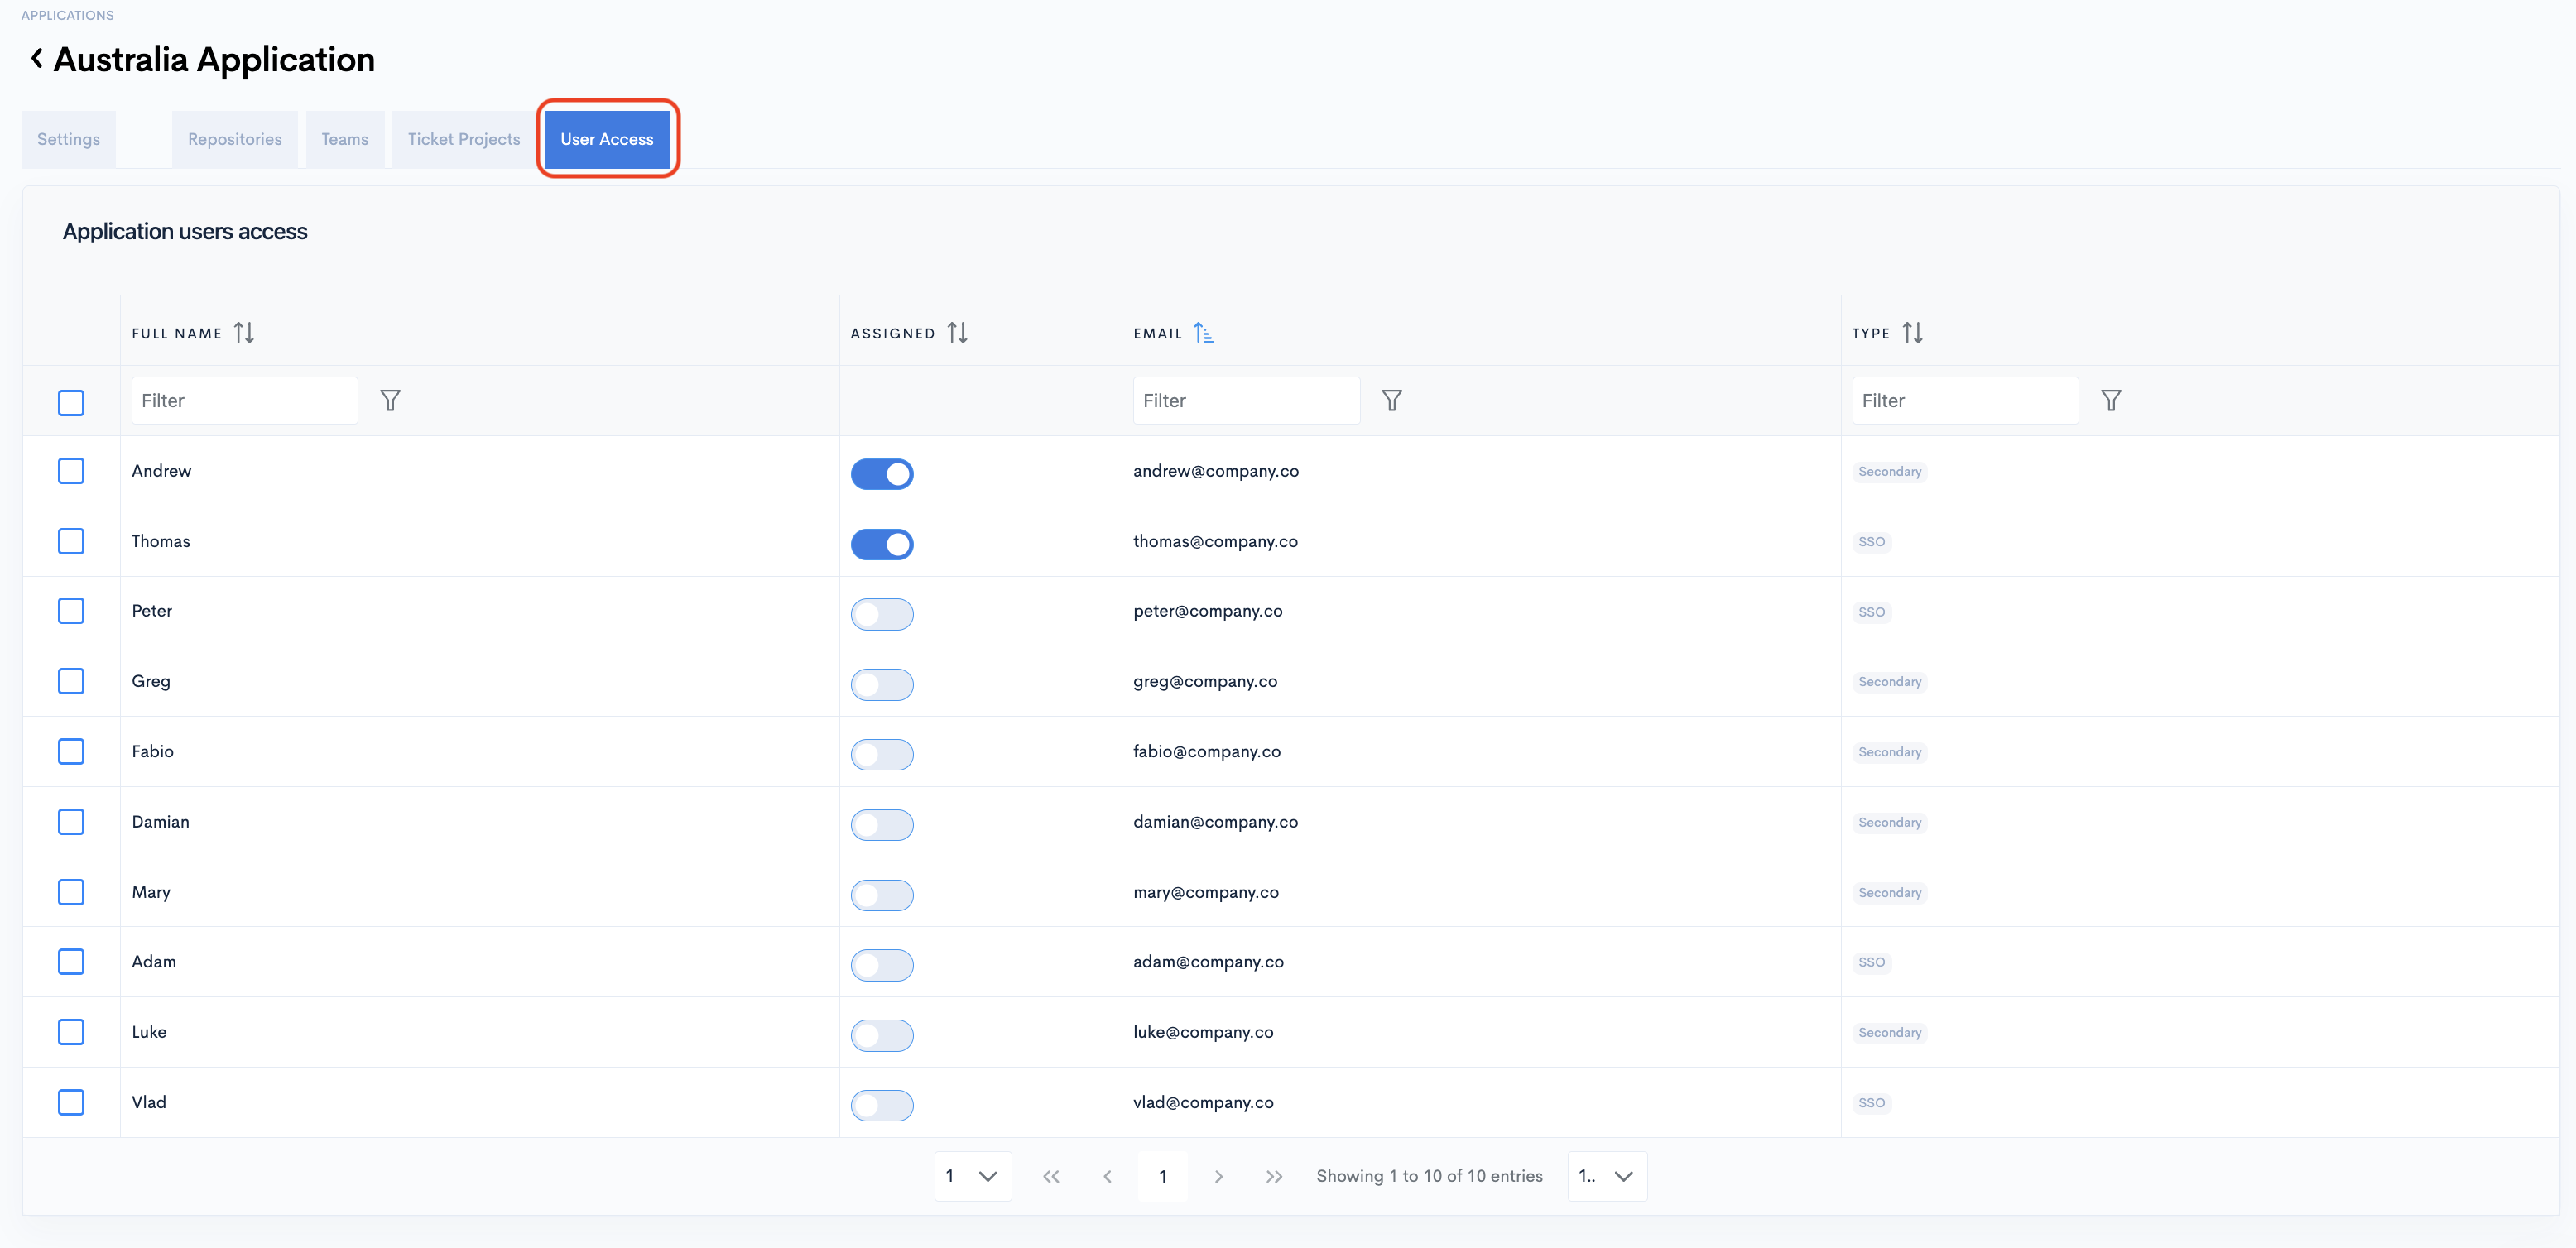
Make sure at least one user has access to this project!
- Or you can select multiple users and then click the "Assign selected" button in the top-right.
- You can do the same to "Remove selected" users.
When accessing the dashboards, this project will be available only to the users assigned to this project.
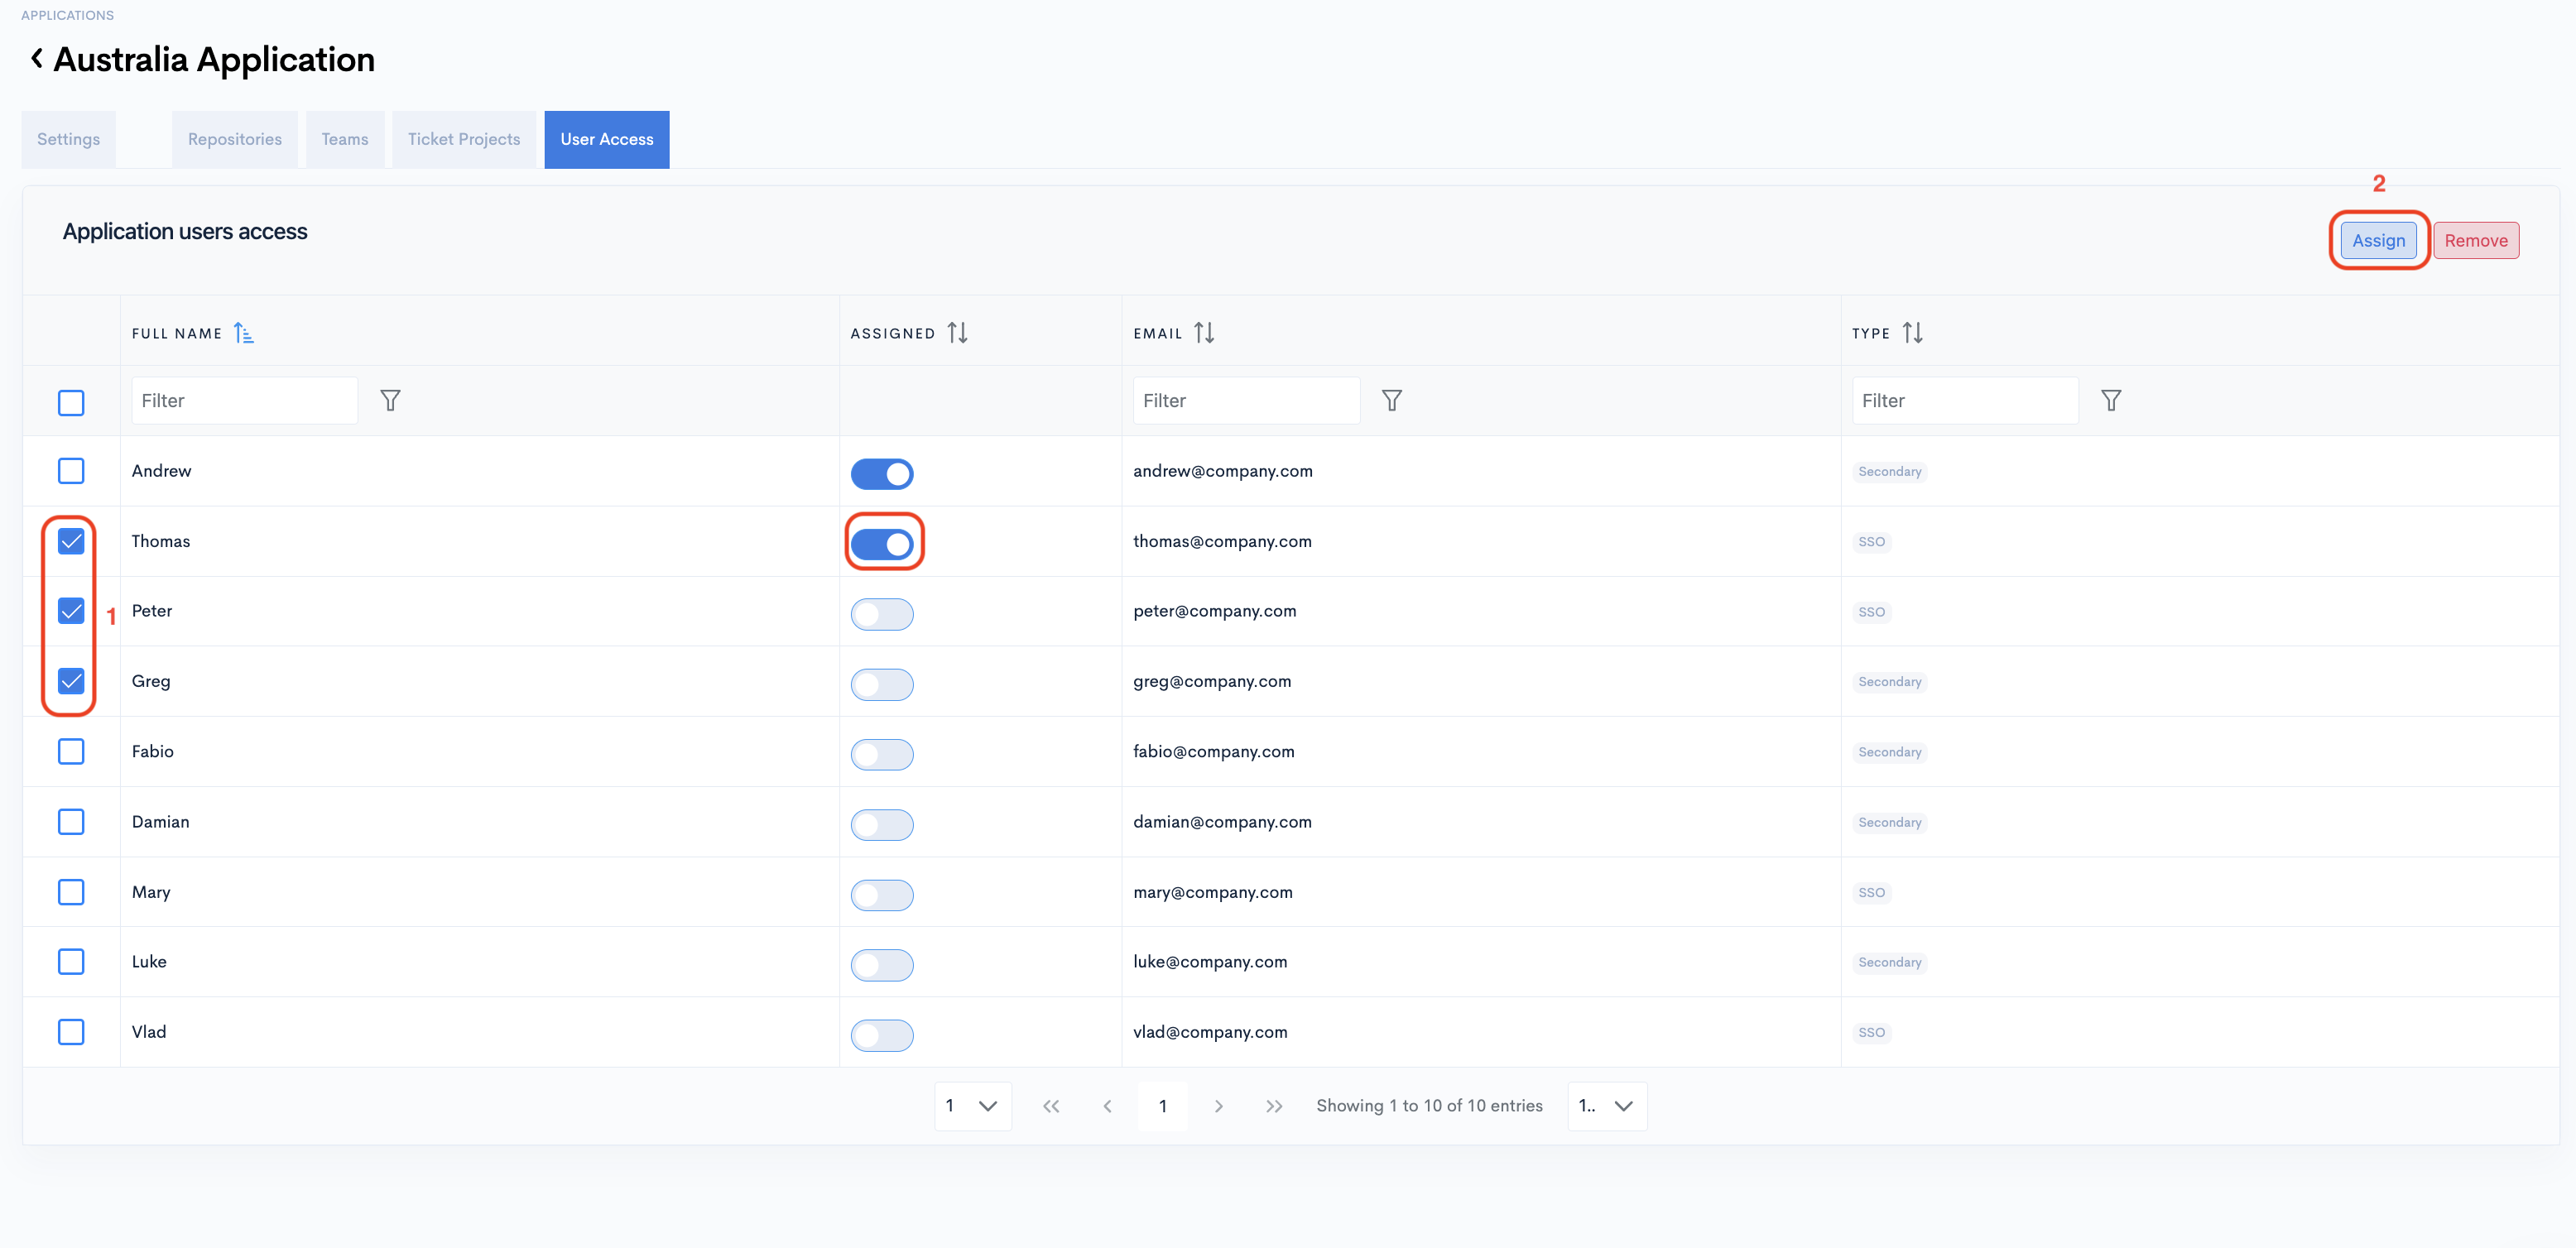
The "Assign" and "Remove" buttons will trigger only when some checkboxes that are selected.
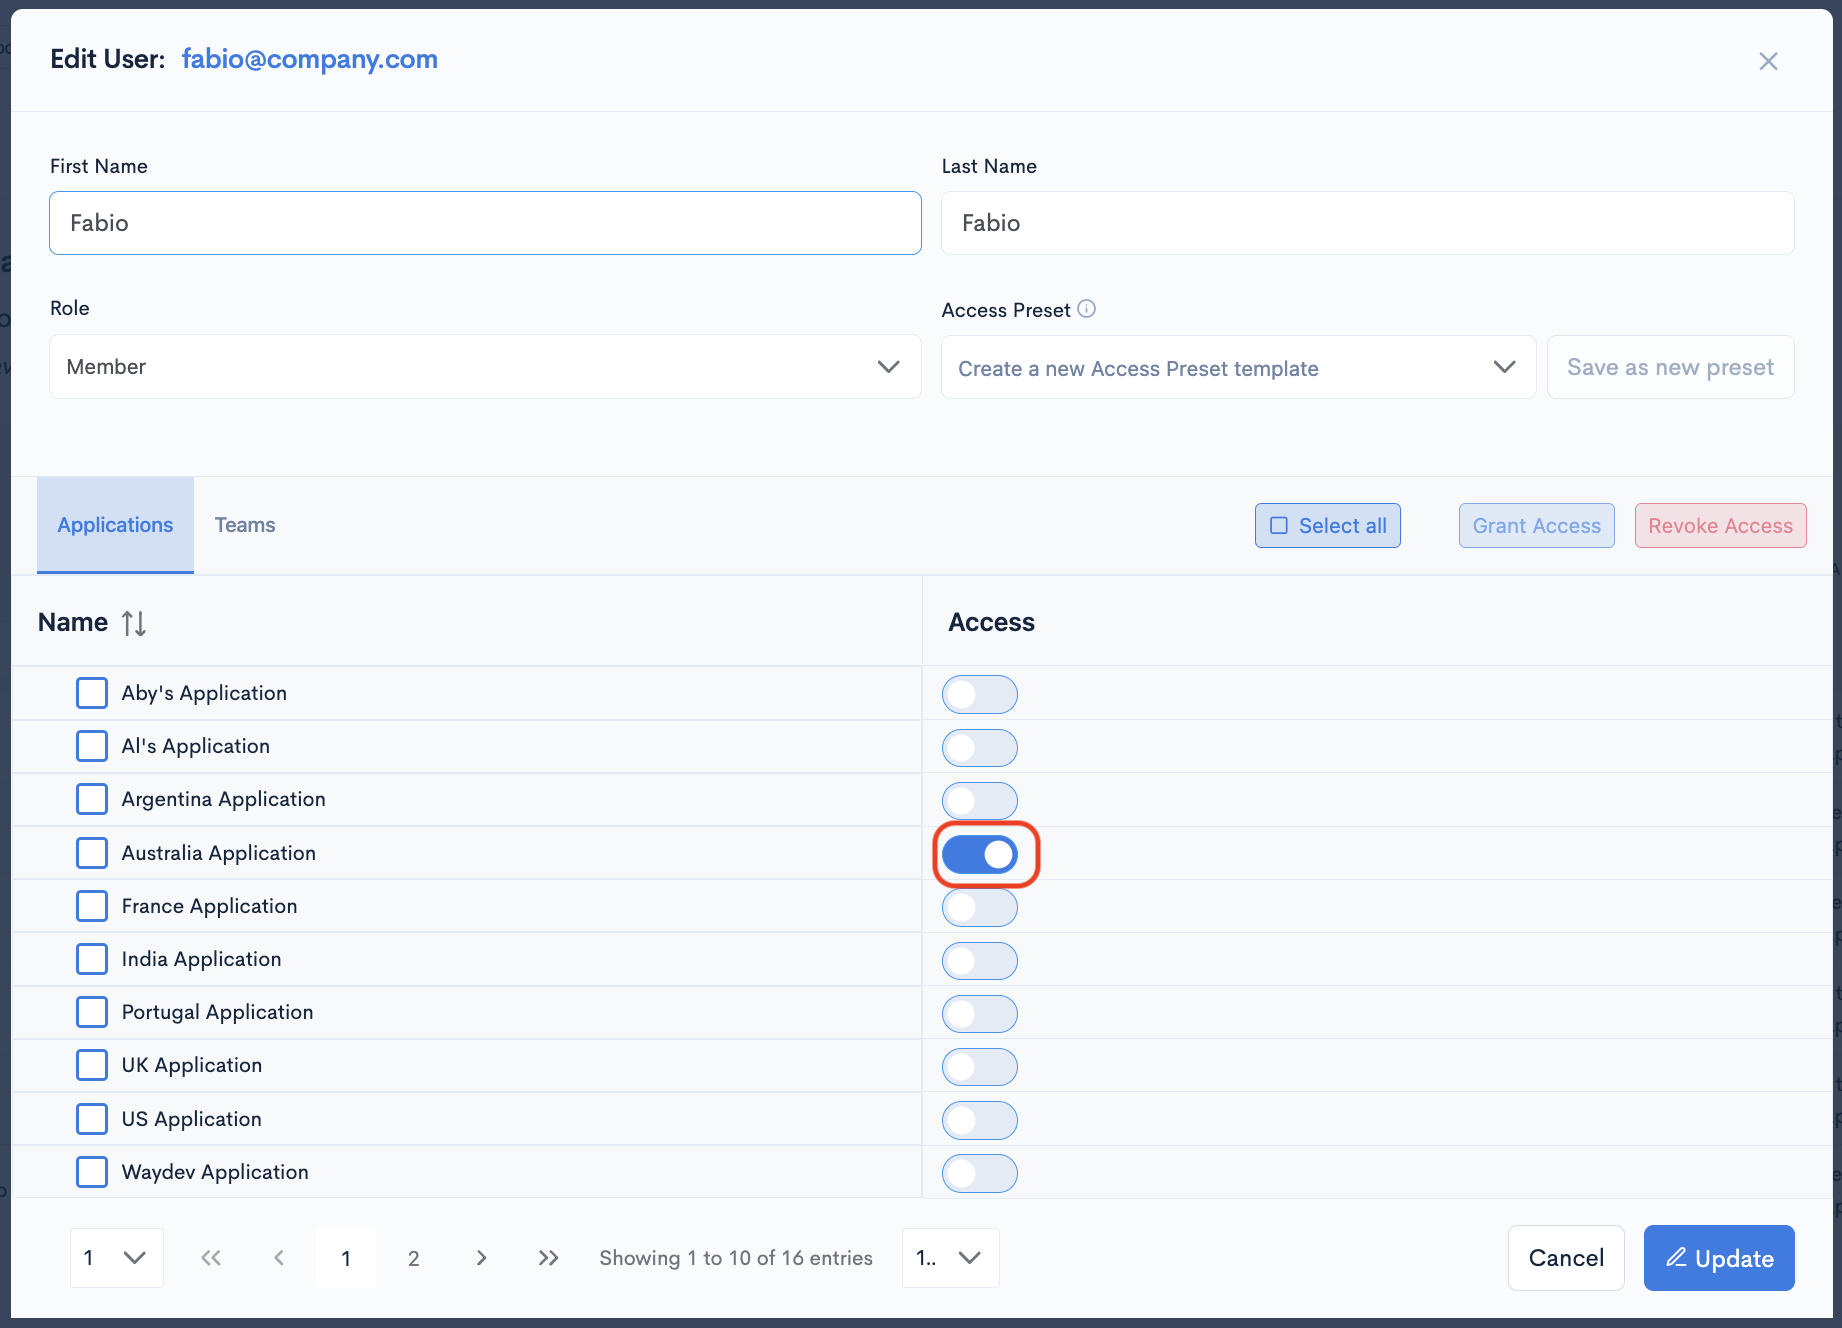
Manage all the data a user has access to
Alternatively, you can provide a user's access to different Projects.
- Navigate to Setup → Operational Users.
- Select the user you want to give access to and toggle the "Access" button.
Please refresh the page if you don't see your Project when filtering your dashboards.
Updated about 5 hours ago