Waydev Enterprise
How to get started with Waydev Enterprise Product
Follow along those links to learn how to get going with Waydev Enterprise.
Waydev Enterprise - System Requirements
About On-Premises
Installing On-Premises
Configuring On-Premises
Configuring Waydev Enterprise
Waydev Enterprise - System Requirements
Summary of Setup Requirements:
Hardware and Storage:
- Recommended: 16 CPU cores or more.
- Recommended: 64GB of RAM or more.
- A minimum of 300 GB disk space.
Database Requirements:
- An external database is required (e.g., AWS RDS).
- The database should run MySql v5.7.x.
- Recommended for the database: 4 CPU cores or more and at least 8 GB of RAM.
Email Server:
- An email server is needed for email reports (e.g., AWS SES)
- Note: The app can function without an email server.
Supported Operating Systems:
- Ubuntu 18.04
- Ubuntu 20.04
- Ubuntu 22.04
- Ubuntu 24.04
- CentOS 7.4, 7.5, 7.6, 7.7, 7.8, 7.9, 8.0, 8.1, 8.2, 8.3, 8.4
- RHEL 7.4, 7.5, 7.6, 7.7, 7.8, 7.9, 8.0, 8.1, 8.2, 8.3, 8.4, 8.5, 8.6, 8.7, 8.8, 8.9, 8.10, 9.0, 9.1, 9.2, 9.3, 9.4
- Rocky Linux 9.0, 9.1, 9.2, 9.3, 9.4
- Oracle Linux 7.4, 7.5, 7.6, 7.7, 7.8, 7.9, 8.0, 8.1, 8.2, 8.3, 8.4, 8.5, 8.6, 8.7, 8.8, 8.9, 8.10
- Amazon Linux 2
- Amazon Linux 2023
This version is deprecated since it is no longer supported by its creator. We continue to support it, but support will be removed in the future.
Differences between Non-airgap & Airgap Installation:
Waydev App Connectivity: The Waydev app doesn't require internet connectivity as long as it can connect to your integration platforms like GitHub, Jira, etc. We utilize Replicated for an enhanced installation experience, licensing, updates, log collection, and more.
1. Installation & Update Procedures:
Non-airgap:
Installation: Execute a single command to fetch all necessary files from Replicated servers.
Updating: Click "Check for updates" followed by "Deploy".
Support Bundles: This can be sent directly from the admin panel to us.
Airgap:
Installation: Requires manual downloading and uploading of files for both the admin panel and the Waydev app.
Updating: Download updates and licenses to your laptop, then upload via the admin panel.
Support Bundles: These need to be downloaded and shared with us manually.
2. Integration Connections:
GitHub:
- Commits Data: Gathered by temporarily cloning the .git folder, extracting necessary info, and then deleting the folder.
- Pull Requests Data: Acquired through API calls.
Jira: Data is sourced exclusively via API calls.
Recommendation: Create dedicated service accounts for these integrations. Ensure you grant the appropriate access levels. Documentation detailing necessary scopes for the GitHub Enterprise token is provided at https://docs.waydev.co/docs/github-enterprise.
Installer Preflights
The kURL installer runs several preflight checks to detect problems with the target environment early in the installation process.
These are system requirements for the admin processes running behind the Waydev application itself.
The system requirements for the Waydev application are listed later in this document.
Checks Run on All Nodes
The following checks run on all nodes where kURL is installed:
- The installer is running on a 64-bit platform.
- The installer is running on a supported OS.
- Swap is disabled.
- For Existing Cluster installations, Contour is required.
- Firewalld is disabled.
- SELinux is disabled.
- At least one nameserver is accessible on a non-loopback address.
- TCP ports 10248 and 10250 are available for kubelet.
- TCP port 10257 is available for the kube controller manager.
- TCP port 10259 is available for the kube scheduler.
- At least 4 GiB of memory is available. (Warn when less than 8GiB).
- /var/lib/kubelet has at least 30GiB total space and is less than 80% full. (Warn when more than 60% full).
- The server has at least 2 CPUs. (Warn when less than 4 CPUs).
- The system clock is synchronized and the time zone is set to UTC.
Initial Primary
These checks run only on new installs on primary nodes:
- TCP port 6443 is available for the Kubernetes API server.
- TCP ports 2379, 2380 and 2381 are available for etcd.
- The load balancer address is propery configured to forward TCP traffic to the node. (This check only runs on the first primary).
- 99th percentile filesystem write latency in the etcd data directory is less than 20ms. (Warn when more than 10ms). See cloud recommendations.
Join
These checks run on all primary and secondary nodes joining an existing cluster:
Can connect to the Kubernetes API server address.
Add-on preflights
OpenEBS
- Check that at least one block device is available with a minimum size of 50GiB (less than 80% full). The Local PV provisioner uses the host filesystem directory /var/openebs/local for storage. Local Volumes are accessible only from a single node in the cluster. Persistent Volumes provisioned as Local Volumes will not be relocatable to a new node if a pod gets rescheduled. Data in these Persistent Volumes will not be replicated across nodes to protect against data loss.
Prometheus
- TCP port 9100 is available for the node exporter.
Containerd
- /var/lib/containerd has at least 30GiB total space and is less than 80% full. (Warn when more than 60% full).
Supported Operating Systems
- Ubuntu 18.04
- Ubuntu 20.04
- Ubuntu 22.04
- Ubuntu 24.04
- CentOS 7.4, 7.5, 7.6, 7.7, 7.8, 7.9, 8.0, 8.1, 8.2, 8.3, 8.4
- RHEL 7.4, 7.5, 7.6, 7.7, 7.8, 7.9, 8.0, 8.1, 8.2, 8.3, 8.4, 8.5, 8.6, 8.7, 8.8, 8.9, 8.10, 9.0, 9.1, 9.2, 9.3, 9.4
- Rocky Linux 9.0, 9.1, 9.2, 9.3, 9.4
- Oracle Linux 7.4, 7.5, 7.6, 7.7, 7.8, 7.9, 8.0, 8.1, 8.2, 8.3, 8.4, 8.5, 8.6, 8.7, 8.8, 8.9, 8.10
- Amazon Linux 2
- Amazon Linux 2023
This version is deprecated since it is no longer supported by its creator. We continue to support it, but support will be removed in the future.
System Requirements
The Waydev application runs many different processes in the background that are fairly resource-intensive. Because of this, we recommend the following system requirements for a bare-metal server or virtual machine:
- A minimum of 8 CPU cores, recommended 16 CPU cores or more
- A minimum of 32 GB of RAM, with a recommended amount of 64GB or more
- TCP ports 10251 and 10252 open between cluster nodes
- UDP ports 6783 and 6784 open between cluster nodes
- A minimum of 100 GB of disk space for the main system (this is only for the root directory that contains the application data, and it is different from the storage needed for repository data)
- A directory (or mounted volume) on the host for repository data. See Calculating Required Storage below.
Trial tip:
An EC2 m5.2xlarge should provide enough CPU and RAM resources to get you started with a trial install.
Calculating Required Storage
A minimum of 300 GB of storage is recommended for the repository work directory (which is handled by OpenEBS, so the space must be allocated to the /var or /var/openebs/local directory). To truly calculate how much storage you require, you should perform the following tasks:
- For each repository you intend to analyze with Waydev, locate its current size
- Sum them all together
- Add 25% for growth
We strongly recommend that the directory used be something that can be easily exchanged or grown. However, it does not need to be "permanent" storage. It can be ephemeral.
Trial tip:
A 300 GB EBS volume should provide enough space to get you started with a trial install.
kURL Dependencies Directory
kURL will install additional dependencies in the directory /var/lib/kurl/. These dependencies include utilities as well as system packages and container images. This directory must be writeable by the kURL installer and must have sufficient disk space (5 GB).
Networking Requirements
Firewall Openings for Online Installations
The following domains need to accessible from servers performing online kURL installs. IP addresses for these services can be found in replicatedhq/ips.
| Host | Description |
|---|---|
| amazonaws.com | tar.gz packages are downloaded from Amazon S3 during embedded cluster installations. The IP ranges to allowlist for accessing these can be scraped dynamically from the AWS IP Address Ranges documentation. |
| k8s.kurl.sh | tar.gz packages are downloaded from Amazon S3 during embedded cluster installations. The IP ranges to allowlist for accessing these can be scraped dynamically from the AWS IP Address Ranges documentation. |
Kubernetes cluster installation scripts and artifacts are served from kurl.sh. Bash scripts and binary executables are served from kurl.sh. This domain is owned by Replicated, Inc which is headquartered in Los Angeles, CA.
No outbound internet access is required for airgapped installations.
Host Firewall Rules
The kURL install script will prompt to disable firewalld. Note that firewall rules can affect communications between containers on the same machine, so it is recommended to disable these rules entirely for Kubernetes. Firewall rules can be added after or preserved during an install, but because installation parameters like pod and service CIDRs can vary based on local networking conditions, there is no general guidance available on default requirements.
Ports Available
The following ports should be available on the host for components to start TCP servers accepting local connections.
| Port | Purpose |
|---|---|
| 2381 | etcd health and metrics server |
| 10248 | kubelet health server |
| 10249 | kube-proxy metrics server |
| 9100 | prometheus node-exporter metrics server |
| 10257 | kube-controller-manager health server |
| 10259 | kube-scheduler health server |
It is recommended that it be able to connect to port HTTPS/443 on external addresses for access to installer files during the install and later for updates. This, obviously, could be scheduled to coincide with your maintenance schedules.
For data analysis, your Waydev Enterprise system must have access to your Git repositories and your ticket system. The following ports should be allowed to those instances:
- HTTP/80 and HTTPS/443: These should be the standard ports where your Git repository and ticket system server data for both Git data and API information.
- SSH: Most Git vendors also allow for SSH download of the repositories they serve. This is sometimes port 22 and sometimes port 7999 or a custom port.
For access to the system itself by your users, it also requires the following ports be open to internal users:
- HTTP/80: This must be open for internal health-check pings.
- HTTPS/443: This must be open for users to use the interface.
- HTTPS/8800: This port is used to reach the administration interface with a web browser. It does not have to be open to general users, but must be available to system administrators.
- SSH/22: System administrators will need access to SSH on the server instance running Waydev Enterprise for occasional updates and maintenance.
Trial Tip:
Talk to your Network Administrator and find out where Waydev should be located on your network and how it will communicate with your repositories, ticketing system, and users.
Database Requirements
Waydev Enterprise requires a MySQL database that meets the following specifications:
- Version 5.7.19
- A minimum of 2 CPU cores, recommended 4 CPU cores or more
- A minimum of 8 GB of RAM
E-mail Server Requirements
To offer a full experience to users, Waydev Enterprise requires that an email server is provided. This e-mail server and information is required for the system to function. You must choose an e-mail server that meets the following criteria:
- It must be able to send e-mail from the e-mail you choose to use as the "From" address in system e-mails.
- It must be able to send e-mail to any users you intend to invite into the system.
- *It must be able to be reached on the given hostname and port from your chosen server.
- It must not be a one-off installation of SendMail or Postfix on the local host server running the application.
Trial Tip
Waydev can be installed even if a connection to the SMTP server is not possible during the install.
About Replicated
Waydev uses Replicated to deliver their SaaS service to you as an on-premises product. This partnership allows us to give you the analysis and insight that you rely on Waydev to provide inside your information technology department's chosen hosting and security solutions.
Replicated provides a large number of features to help us reach this goal:
- One-line Installation: Customers can install Waydev Enterprise with a one-line shell command.
- One-click Updates: Customers can check for updates, read release notes and apply reliable updates in seconds.
- Audit Logging: Customers are provided an audit log of the important events in the application.
Replicated offers many other features, and you should visit their website for more information at www.replicated.com
Installing Replicated
Waydev Enterprise runs on Replicated Kots 1.28.0 and above. Learn more about Replicated here. This version of Replicated utilizes Kubernetes and allows us to provide the best experience for our users.
Installation
The installation allows you to quickly and easily install KOTS, Replicated, and Waydev Enterprise. This method requires that the server you are installing on has access to the Replicated servers and the Kubernetes package repositories.
Replicated provides a list of IP addresses that can be white listed for outbound traffic in this repository: https://github.com/replicatedhq/ips.
To install Replicated on your system using the standard installation method, you simply need to follow the steps below.
Step One: Download the Script
In case of an installation on an Embedded Cluster, use the command:
curl -sSL https://k8s.kurl.sh/waydevonprem-beta | sudo bash
In case of an installation on an Existing Cluster, use the commands:
curl https://kots.io/install | bash
kubectl kots install waydevonprem/beta
Step Two: Finishing Up
The installer will run for some time. During the process, it will update several OS packages, install the Kubernetes framework, and Replicated's system. Once that finishes, the installer will present you with a screen similar to the image below. You will need to save the password, as it will not be displayed again, and access the link corresponding to the Kotsadm field.
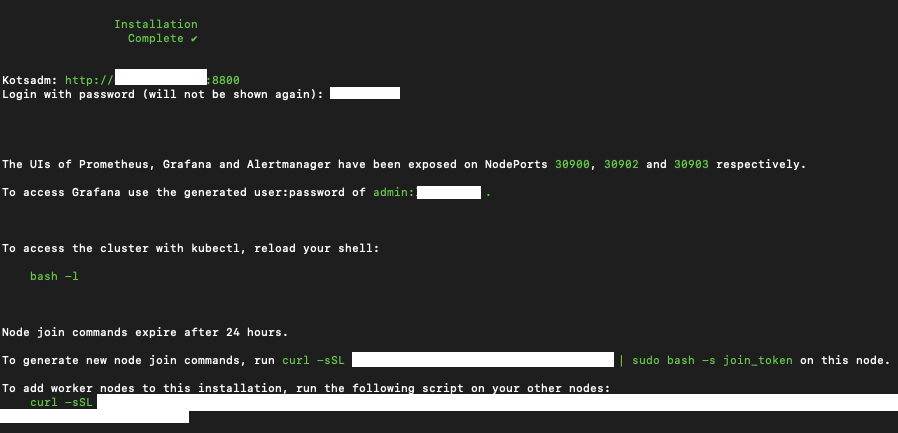
Please browse to that link in your browser, and continue on with the steps from "Configuring Replicated".
Configuring Replicated
In the section titled "Installing Replicated" we installed Replicated on a server. At the end of that process, the installer gave us a link that can be used to finish configuring the Replicated administration console. Please open a browser and go to this link. If you have forgotten the link, it is most likely https://:8800.
Step One: Configuring HTTPS for the Administration Console
You will be presented with the following screen:
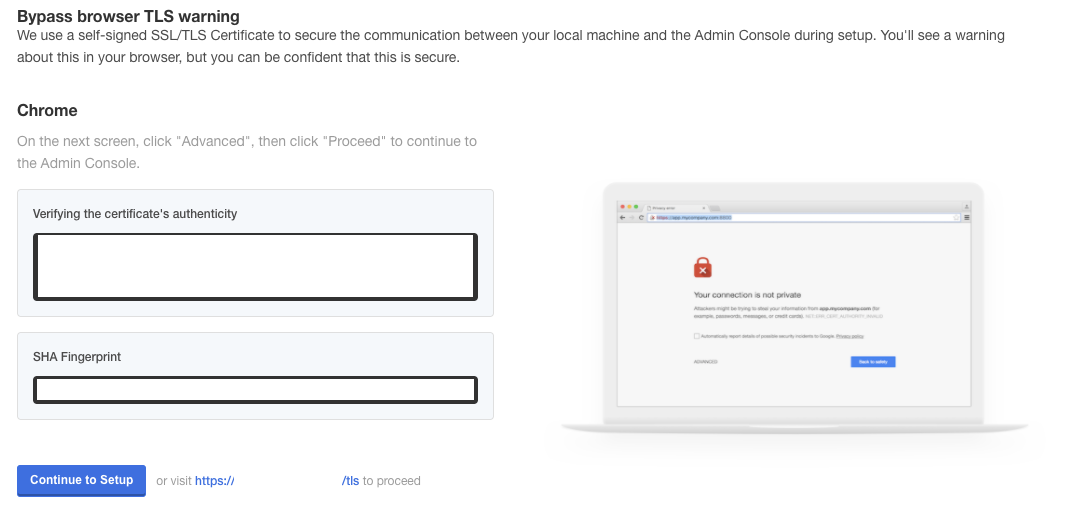
As you can see, you are being asked to provide a hostname, a private key, and a certificate. You are also provided with two options to move forward:
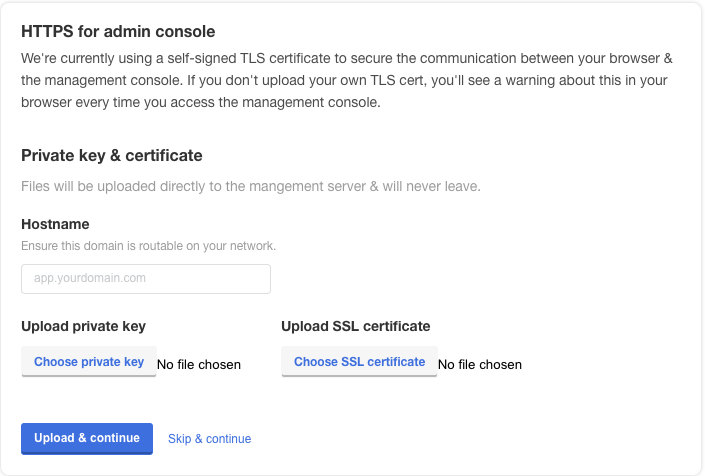
- Use Skip & Continue: Use this if you want the system to generate an SSL certificate for the hostname provided. If you choose this, users will have to accept this certificate.
- Upload & Continue: This allows you to upload the private key and certificate file you wish the web server to use for SSL.
The following values should be given:
- Hostname: This is the DNS hostname that you wish administrators and users to use to access the system. For example, if you want the system to be https://waydev.mycompany.com, you should enter waydev.mycompany.com
- Private Key: The private key of the SSL certificate to use in PEM format.
- Certificate: The certificate you wish to used, in PEM format
When prompted with the screen below, insert the password created when installing Replicated.
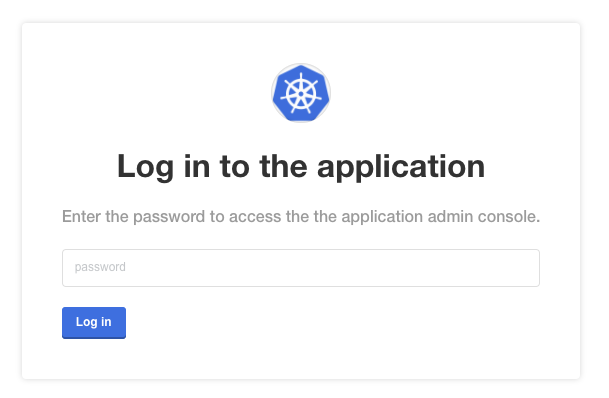
Step Two: Uploading Your License
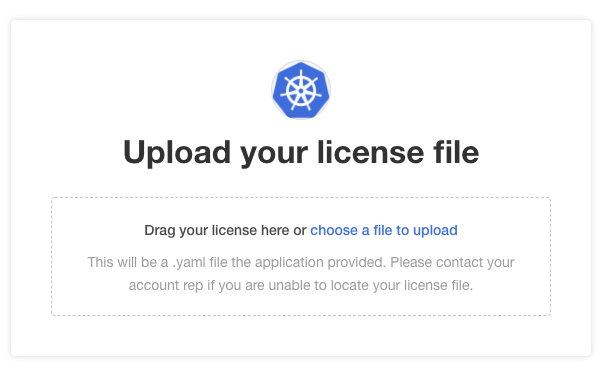
You will have been provided with a license file by your account executive or customer support. This file will end with the file extension ".yaml" and will most likely be the name of your company. You will be prompted to upload the license file.
Configuring Waydev Enterprise
Folllowing the process outlined in "Installing Replicated", you will be prompted with the configuration stage.
You will see several sections of configuration options. This document illustrates how to configure each.
Domain Configuration

This is the domain that you want the site to be available on for your users. This should be a full URL in the form of waydev.mycompany.com.
BitBucket Settings
If you use BitBucket Server, ignore this step. If you use BitBucket Cloud, complete the fields with the key and secret pair generated from BitBucket.

GitLab Settings
If you use GitLab Enterprise, ignore this step. If you use GitLab Cloud, complete the fields with the key and secret pair generated from GitLab.

Database Settings
This section controls how Waydev communicates with the required MySQL database. As mentioned in previous documents, Waydev Enterprise requires a MySQL database.
External Database Settings
- The fields available to you are as follows:
- Front Database Host: This is the hostname or IP address of the database server.
- Front Database Port: This is the port of that server.
- Front Database Name: The name of the database you created on the server.
- Front Database Username: The user that has ownership rights to the database.
- Front Database Password: The password for that user.
Embedded Database Settings
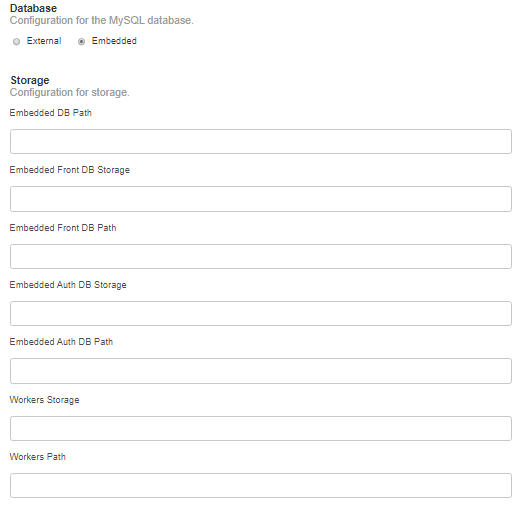
If you choose to use the embedded database method, you will be prompted to enter a directory on the server where MySQL can store data. This allows us to persist your data between system restarts. We recommend keeping all the storage-related fields as default (do not insert any value).
It must be set to file permissions mode 0725 or rwx-w-r-x. It must be owned by root:root.
The directory must be empty when you start the installation. MySQL will place its database files in this directory.
Workers Path
This section is where you define the location of temporary storage for your repository data. In the field "Workers Path", simply enter the path on the server that you prepared.
Finishing Up
Once you fill in all the fields above correctly, you can hit save. At this time, the Replicated framework will persist the data and restart all the Waydev Enterprise services so that they can take effect. If this is the first time the server has started, or the first restart after an upgrade, the database will be migrated forward to the latest schema and default data.
Preflight Checks
This screen shows all the checks that the system performs to validate that it can run. If any dependencies are not met, they will be called out in red.
Once you have validated that the checks are correct, you may choose to re-run the checks (if you've corrected them) or proceed anyway, ignoring any warnings.
Important note
You should not skip warnings and errors here. Modify the system to meet proper specifications, especially for production machines.
Once that is complete, you should see the main dashboard screen.
Please note that the initial start of the application may take quite some time the first time it is installed. The dashboard will keep you informed of the status.
Updated about 2 months ago