Executive Reports
Learn how to configure ticket types, ticket states, and how to import and configure engineer salary
How to:
Configure Ticket types
The default ticket types in Waydev are Unallocated and Unplanned. You can create more ticket types following this configuration.
Step 1. Navigate to Settings, in the Project section.

Step 2. Click the Configure button corresponding to the Ticket Type Category Configuration row.
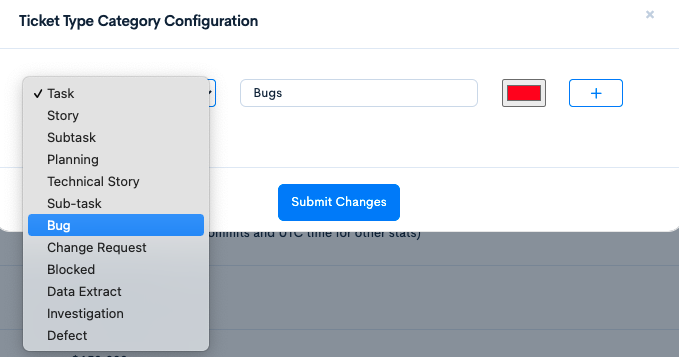
Step 3. Select the ticket type from the left dropdown menu. Then, insert a name for the ticket type in Waydev. After that, select a color for it. Lastly, click the + (plus) sign.
Step 4. You can add multiple ticket types by following this configuration. When you are done configuring the ticket types, click Submit Changes.
Configure Ticket states
Step 1: Navigate to Settings, under the Project section.
Step 2: Click the Configure button corresponding to the Ticket Active States Configuration.
Step 3: For the Start State, select the state that indicates work has started on that ticket.
Step 4: For the End State, select the state that indicates work has ended on that ticket.
Step 5: Then click Submit Changes.
Import and configure Engineer salary
The default salary for one engineer in the app is $150,000 per year. Users can change the default salary from the Settings page, in the Project section.

Assigning custom engineer salaries can be done:
Manually
Step 1. Navigate to Engineers, in the Project section.
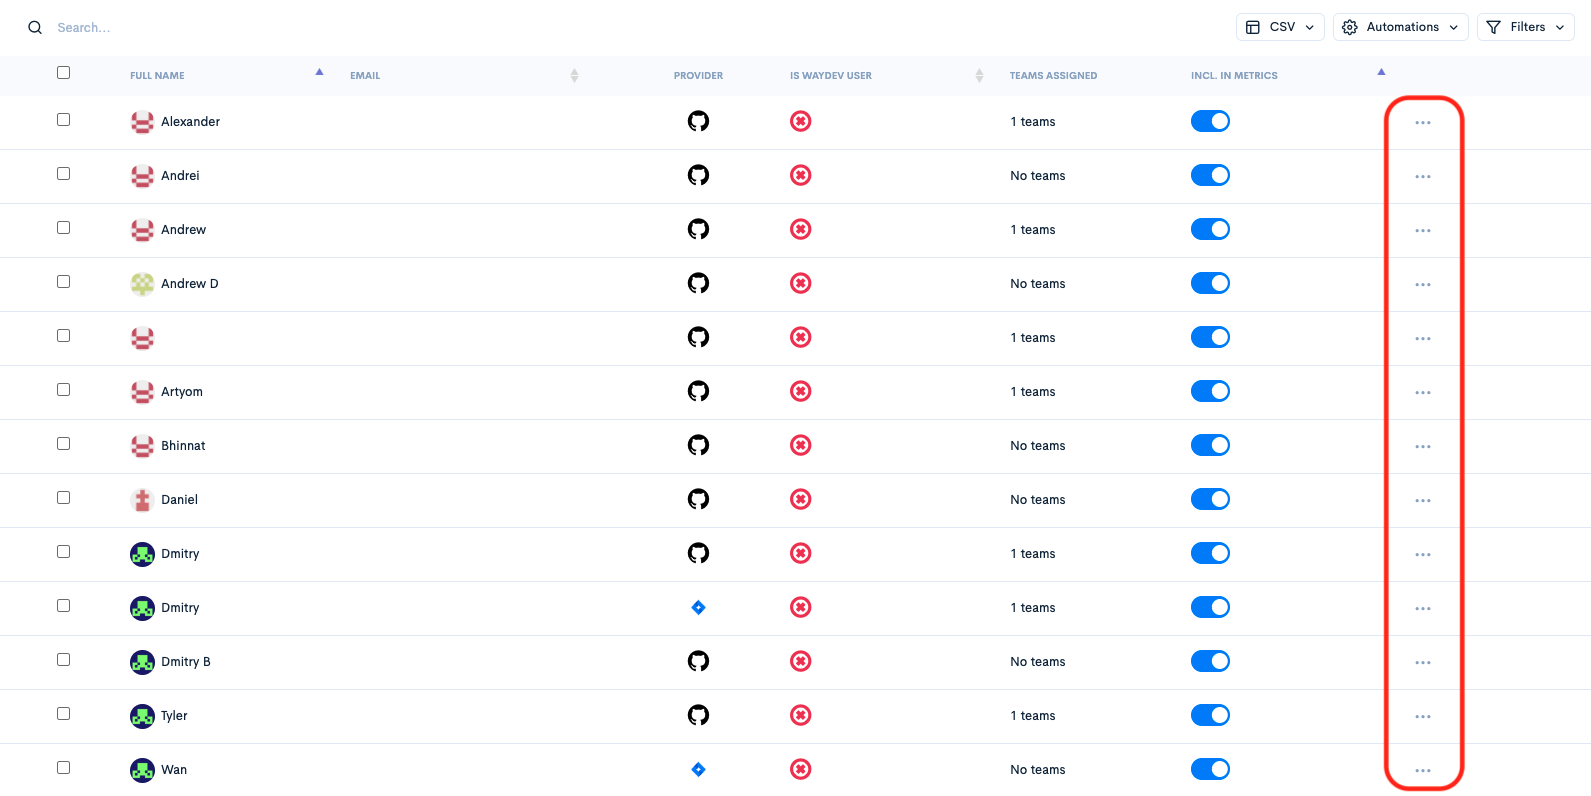
Step 2. Click the three buttons corresponding to the engineer you want to assign the custom salary to. Then, click Edit.
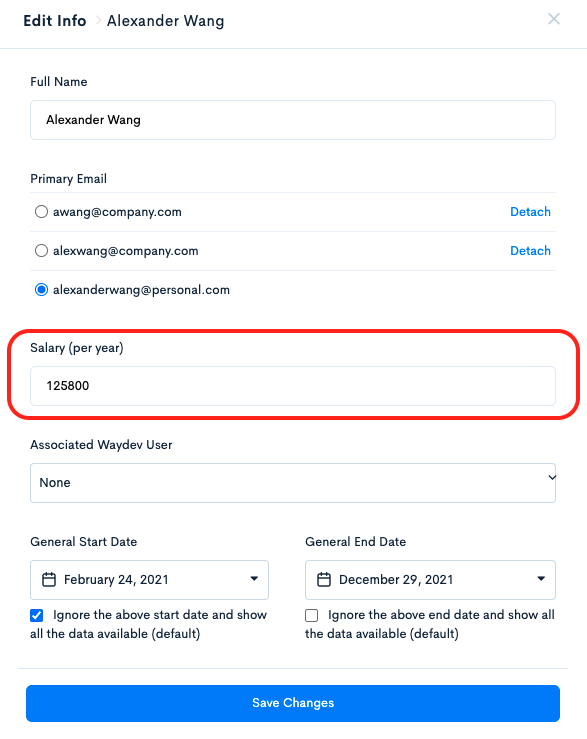
Step 3. In the Salary (per year) field, insert their yearly salary, and click Save Changes. Done!
Automatically
Step 1. Navigate to Engineers, in the Project section.
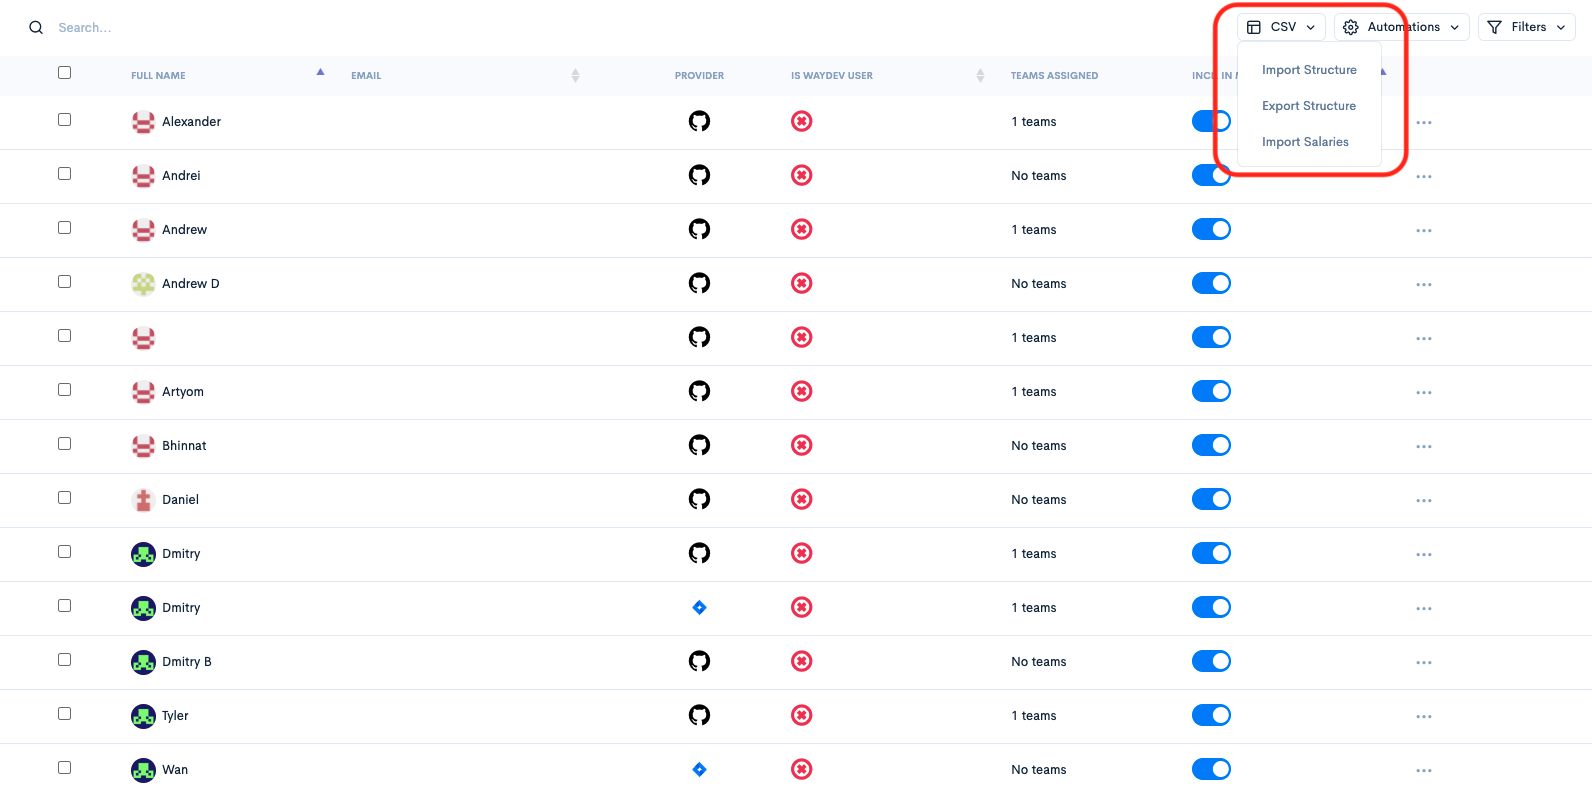
Step 2. Click the CSV button, located on the upper-right side of page. Then, click Import Salaries.
Step 3. Click Choose File, and select the .csv file containing the salaries. The .csv file must be formatted like the example below:
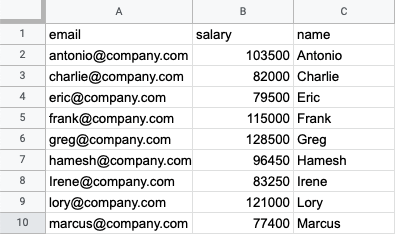
Please make sure that:
-
The spreadsheet is a .csv file.
-
The column headers in the .csv file must be named as follows: email, salary, and name.
-
No cell in the salary column includes special characters.
-
Duplicate engineer profile merges are done before importing the salaries.
Step 4. Click Start Process. Done!
Updated 10 months ago