

Users
Adding UsersUsers can be added in three ways: imported from connected integrations, imported in bulk from a CSV file, or created manually one at a time.
Users
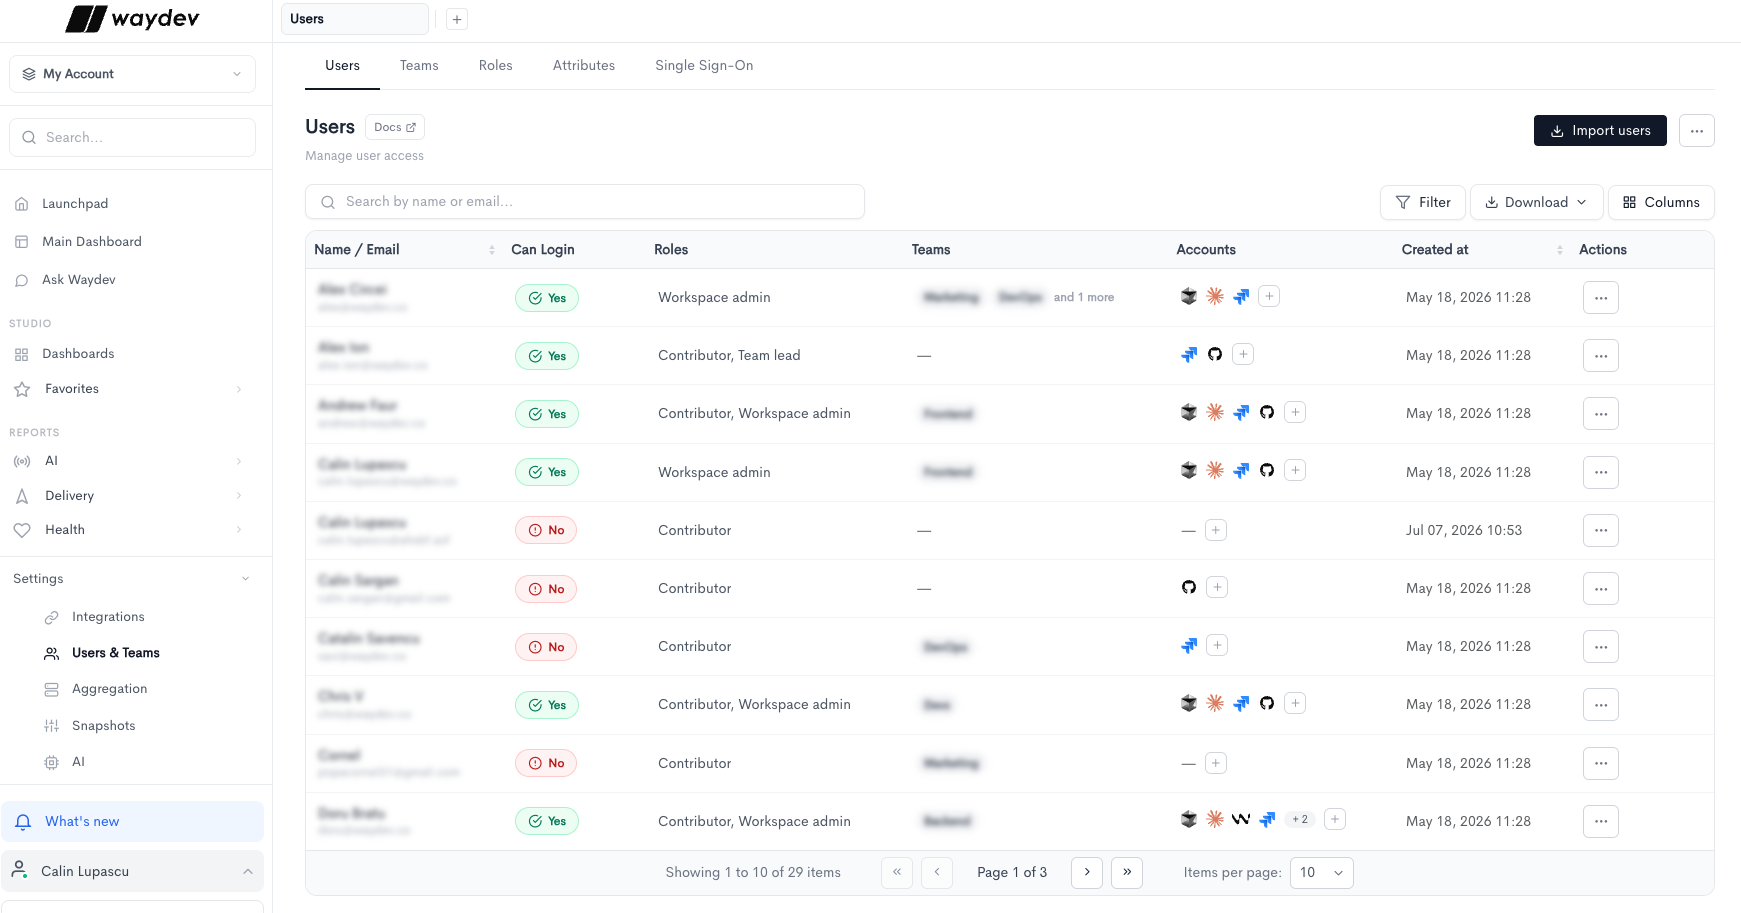
The Users page allows you to manage user access across your Waydev workspace. All existing users are listed in a table with the following columns:
- Name / Email — The full name and email address of the user.
- Logins (12 mo) — The number of times the user has logged in over the past 12 months.
- Access — Whether the user is Active or Inactive in the workspace.
- Roles — The user's role in the workspace (e.g. Workspace admin, Contributor).
- Team — The team the user belongs to.
- Accounts — The connected provider accounts linked to this user, shown as integration icons. Additional accounts beyond the visible ones are indicated by a +N label.
- Last login — The date and time of the user's most recent login.
- Created at — The date and time the user was added to the workspace.
- Actions — Options to edit or remove the user via the ··· menu.
To add a new user, click + Add user in the top-right corner. You can search for users by name or email using the search bar, filter the list using the Filter button, or adjust the visible columns using the Columns button. The table is paginated and shows 10 items per page by default.
Import users
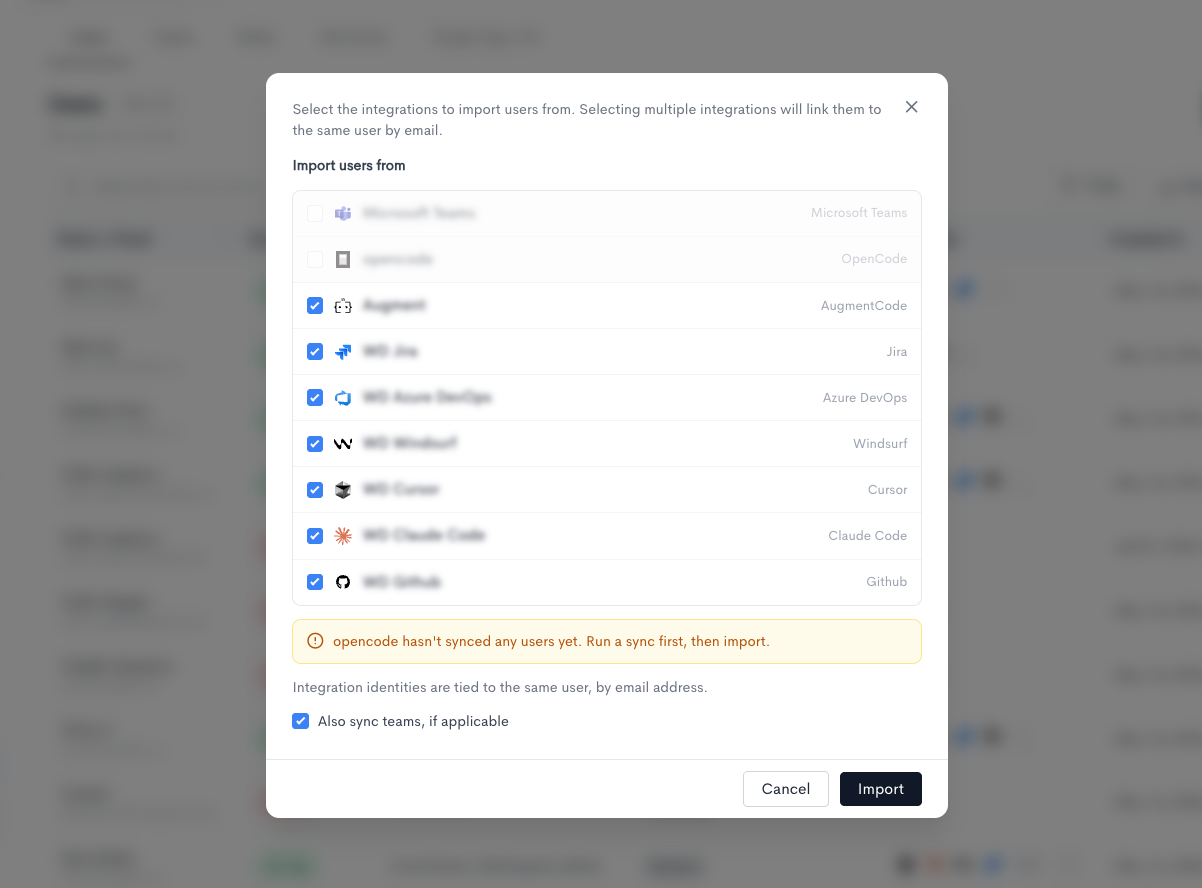
Import users opens a dialog titled around Import users from. Every connected integration is listed with its provider. Integrations that already have users are selected by default. Clear any you do not want to include, then click Import.
Selecting more than one integration links those identities to the same Waydev user when the email address matches.
An integration that cannot be imported stays unchecked and disabled. The dialog explains why:
- It has not synced any users yet. Run a sync, then import.
- It does not provide email addresses. Check the token permissions, or link identities manually after importing.
Also sync teams, if applicable is checked by default. When a selected integration has teams, Waydev creates those teams and places the imported users in them. Cancel closes the dialog without importing.
Adding a user
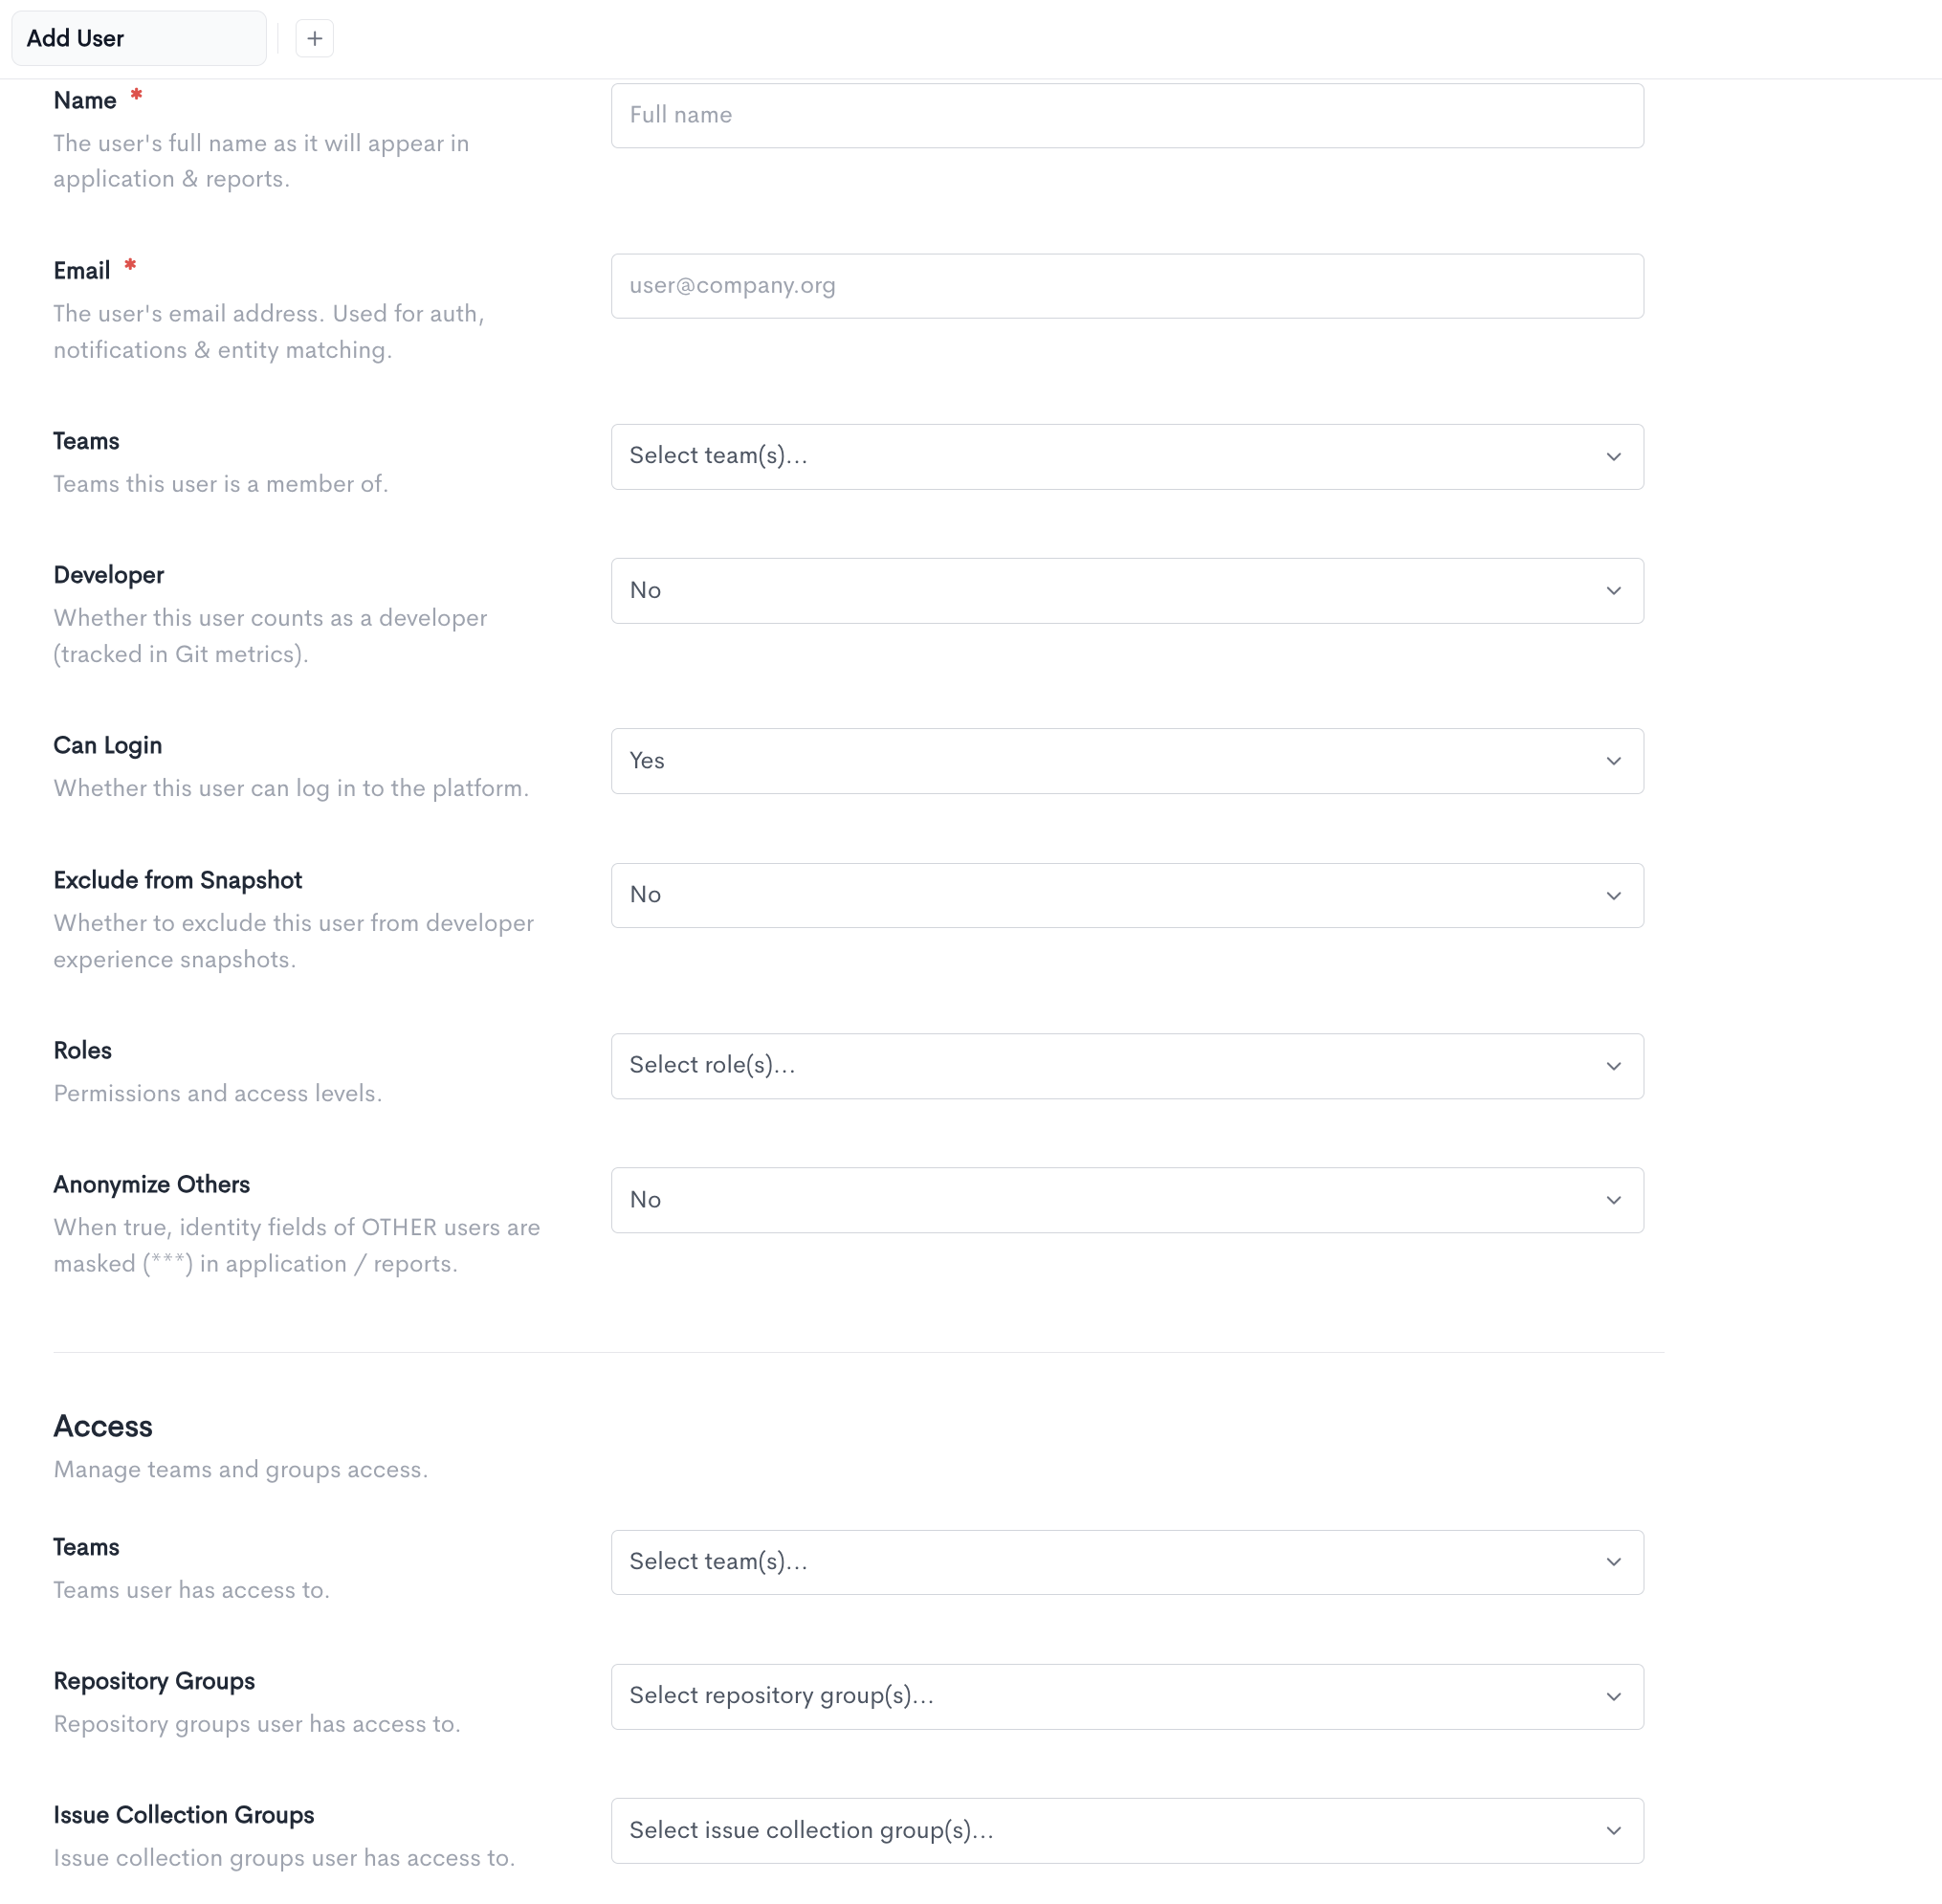
The form is split into two parts: the user's own details, and — when the user can log in — what they're allowed to see.
General
- Name (required) — The user's full name as it will appear in the application and reports.
- Email (required) — The user's email address. Used for authentication, notifications, and matching them to their accounts across integrations.
- Teams — The teams this user is a member of. Select as many as apply.
- Developer — Whether this user counts as a developer and is tracked in Git metrics.
- Can Login — Whether the user can sign in to Waydev. Set this to No for people you want to measure but not give access to; doing so hides the Roles, Anonymize Others, and Access fields, since none of them apply.
- Exclude from Snapshot — Whether to leave this user out of developer experience snapshots. Excluded users receive no survey.
- Roles — Permissions and access levels. Only roles you are allowed to grant are listed. Hover a role to see what it permits. Shown only when Can Login is Yes.
- Anonymize Others — When set to Yes, the identity fields of other users are masked with *** throughout the application and reports. The user's own identity is never masked. Shown only when Can Login is Yes.
Access
This section defines the data the user can see, and appears only when Can Login is Yes. It is hidden when the Workspace admin role is selected, as that role already grants full access.
- Teams — The teams whose data this user can access. This is separate from team membership above: membership is who they work with, access is what they're allowed to view.
- Repository Groups — The repository groups this user can access.
- Issue Collection Groups — The issue collection groups this user can access.
User Details
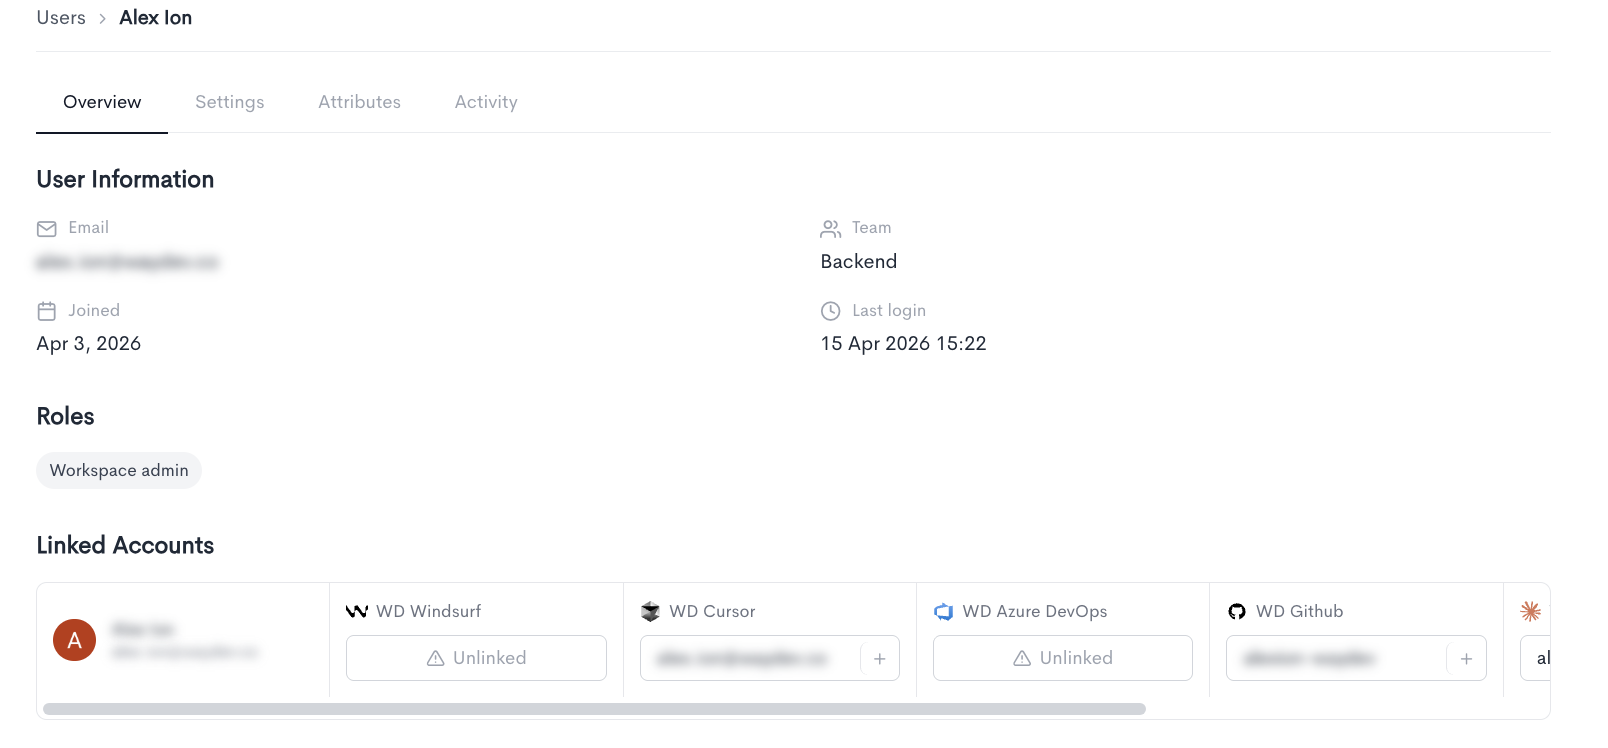
Clicking Details in the Actions menu opens the user's detail page, which is organized into four tabs: Overview, Settings, Attributes, and Activity.
Overview
The Overview tab displays the following information:
User Information — Key details about the user's account:
- Email — The email address associated with the user's account.
- Team — The primary team the user belongs to.
- Joined — The date the user was added to the workspace.
- Last login — The date and time of the user's most recent login.
Roles — The roles currently assigned to the user (e.g. Workspace admin, Contributor).
Linked Accounts — The external provider accounts linked to this user, showing the integration name and the associated account identifier for each (e.g. Claude Code, Cursor, Jira).
Settings
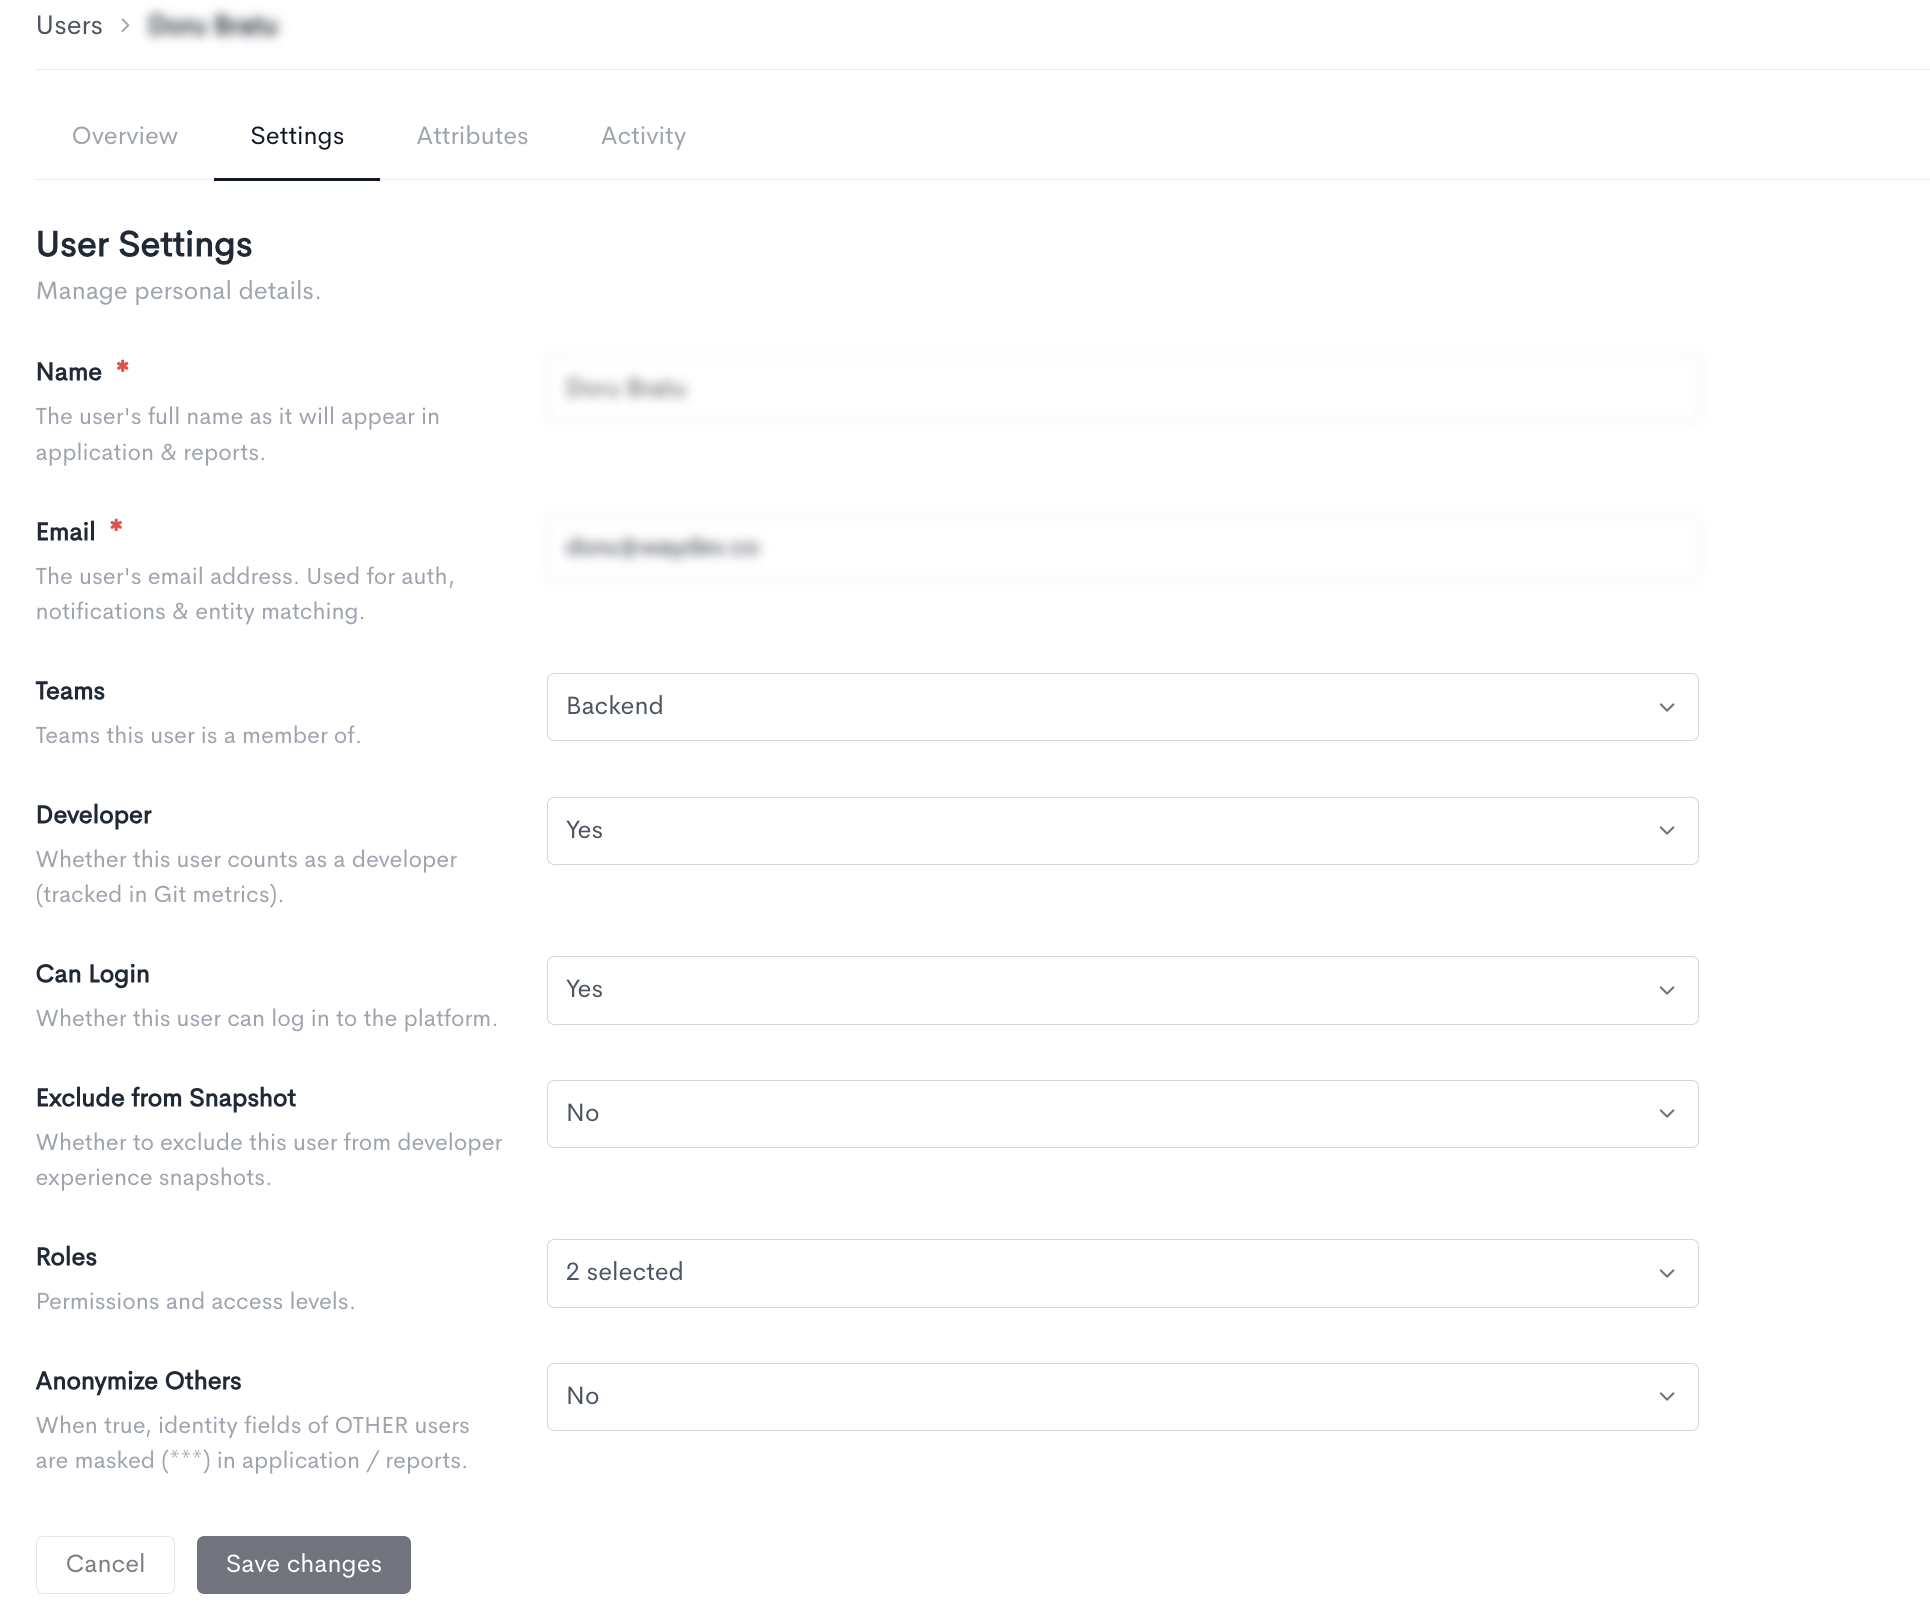
The Settings tab allows you to manage a user's personal details and access. The following fields can be updated:
- Name — The user's full name as it appears in the application and across reports.
- Email — The user's email address, used for authentication, notifications, and matching them to their accounts across integrations.
- Teams — The teams this user is a member of. Select as many as apply.
- Developer — Whether this user counts as a developer. This determines how they are included in Git-based metrics.
- Can Login — Whether the user can sign in to Waydev. Only workspace admins can change this. Turning it off hides the Roles and Anonymize Others fields, since neither applies to a user without access.
- Exclude from Snapshot — Whether to leave this user out of developer experience snapshots. Excluded users receive no survey.
- Roles — The user's permissions and access levels. Only roles you are permitted to grant are listed, and hovering a role explains what it allows. A user who can log in must have at least one role assigned. Shown only when Can Login is Yes.
- Anonymize Others — When set to Yes, identity fields of other users are masked with *** throughout the application and reports. The user's own identity is never masked. Shown only when Can Login is Yes.
- Notify user — Appears only when a workspace admin is granting login access to a user who previously had none. Tick it to send the user an email letting them know their access is active.
Attributes
To learn more about this, please go to User Attributes.
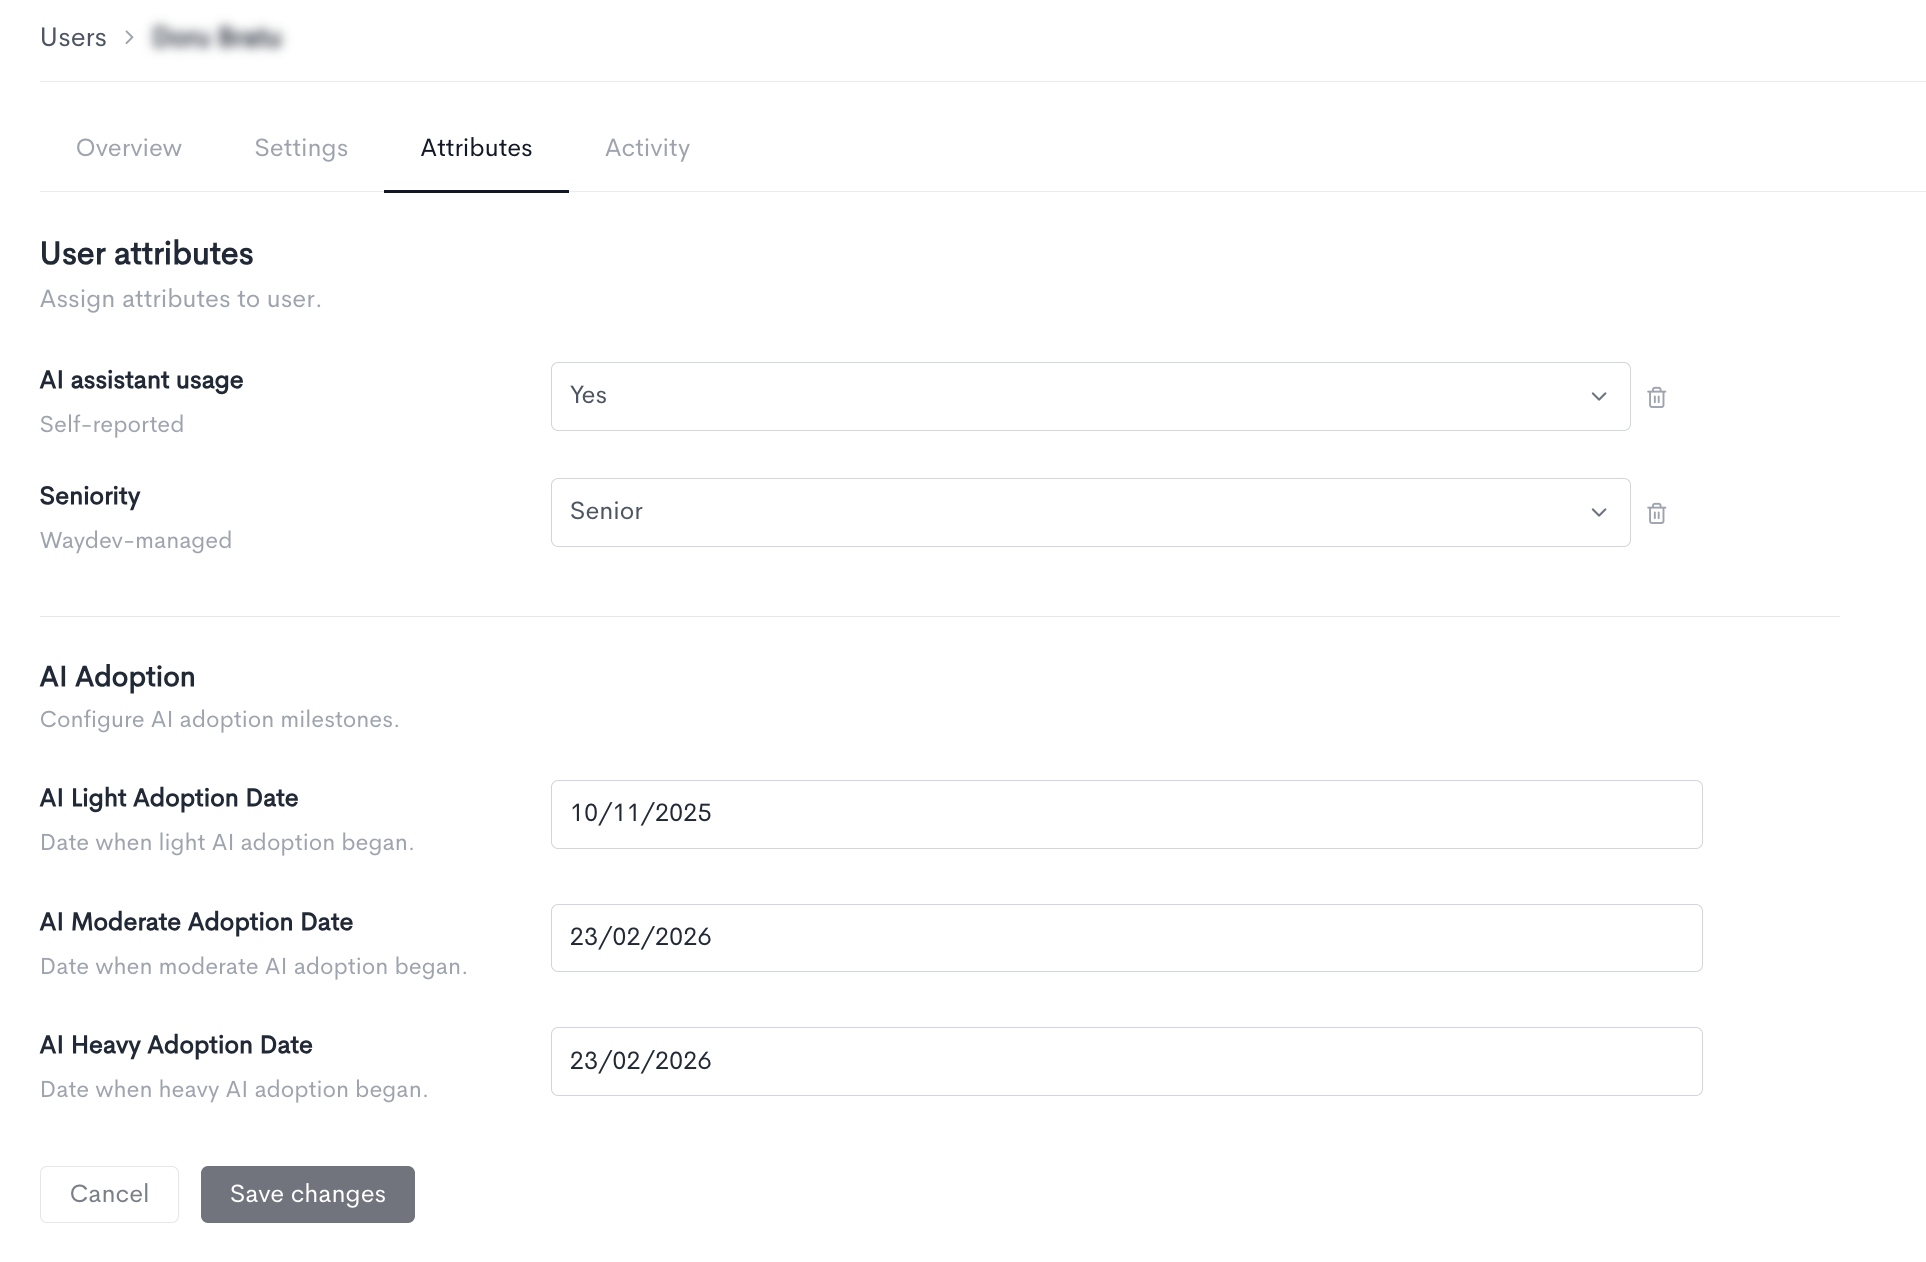
The Attributes tab allows you to assign attributes to a user. Attributes provide additional context about a user and can be used for filtering and segmentation in reports. Each attribute has a management type indicating who controls its value. Below are examples of attributes:
- AI assistant usage (Self-reported) — Indicates whether the user uses an AI coding assistant. The value is reported by the user themselves.
- QA (Admin-managed) — Indicates whether the user is part of the QA function. The value is set and managed by an admin.
- Seniority (Waydev-managed) — Indicates the seniority level of the user (e.g. Staff). The value is automatically managed by Waydev.
Attribute values can be updated using the dropdown next to each attribute, and each change is saved immediately — there is no separate save step. Attributes that are no longer relevant can be cleared using the delete icon on the right.
Only attributes that already exist in your workspace appear here. If none have been created yet, the tab links you to the Attributes section where they can be defined.
AI Adoption
For users classified as developers, this tab also records AI adoption milestones — the points at which the user's use of AI coding assistants changed level. These dates are used by the AI reports to compare a developer's output and behavior before and after adoption.
- AI Light Adoption Date — The date light AI adoption began.
- AI Moderate Adoption Date — The date moderate AI adoption began.
- AI Heavy Adoption Date — The date heavy AI adoption began.
User activity
The Activity tab displays a log of recent actions performed by the user. Each entry includes the following columns:
- Action — The type of action performed, such as Login or Request.
- Info — Additional details about the action. For logins, this includes the session and IP address information. For requests, this shows the HTTP method, endpoint, and response code (e.g.
POST /api/custom/queries/97/run (HTTP 200)). - Time — The date and timestamp of when the action occurred.
Link user accounts
The Link accounts page allows you to map each Waydev user to their corresponding accounts across all connected integrations. It is accessible from the ··· menu near the + Add Users button.
The page displays a table where each row represents a user and each column represents a connected integration. A linked account shows the user's identifier in that integration (e.g. their email address or username), while an unlinked account is indicated by an Unlinked warning, meaning Waydev cannot attribute activity from that integration to the user.
The table includes the following columns:
- Name - The user's full name and email address in Waydev.
- One column per connected integration (e.g. WD Windsurf, WD Jira, WD Azure DevOps, WD Claude Code, WD Github, WD Cursor), each showing the linked account identifier or an Unlinked status.
You can search for users by name or email using the search bar, filter the list using the Filter button, or adjust the visible columns using the Columns button. The table is paginated and shows 10 items per page by default.
Keeping accounts linked ensures that activity data from each integration is correctly attributed to the right user across all Waydev reports.
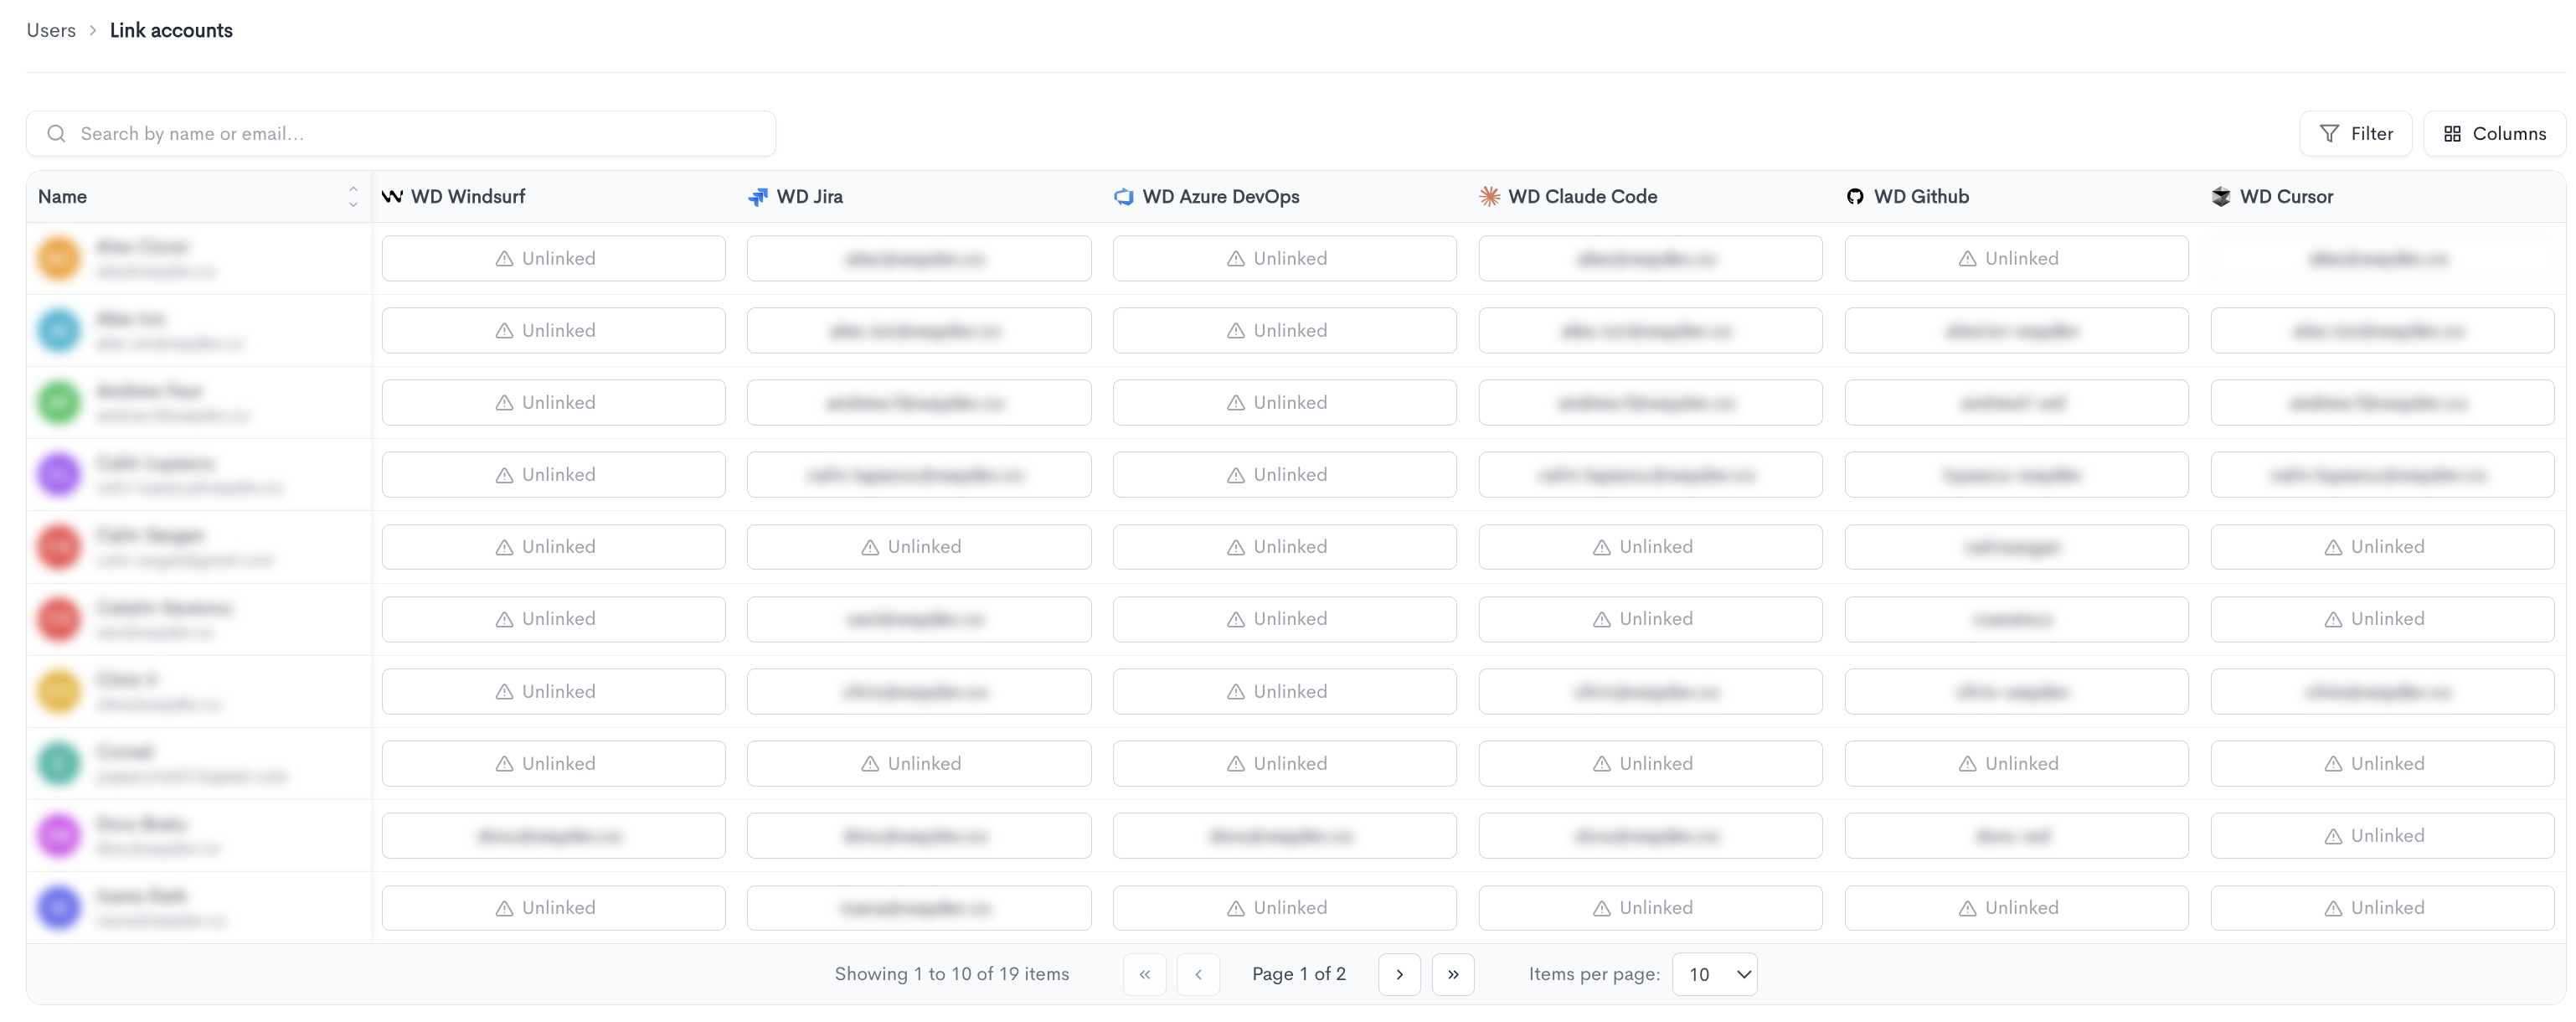
A user can have multiple provider identities under the same Waydev profile.

Import users
-
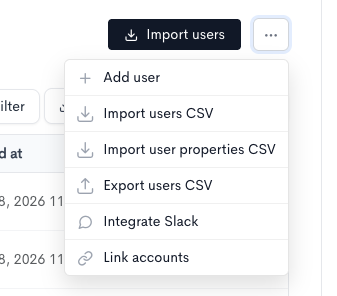
Add user — Add manually a user
-
Import users CSV — Bulk import users from a CSV file. A downloadable example file shows the expected format.
-
Import user properties CSV — Bulk import user property data (attributes such as role, location, or seniority) for users who already exist.
-
Export users CSV — Download the current user list as a CSV file.
-
Integrate Slack / Import users from Slack — Connect Slack to sync users from your workspace. The label changes to Import users from Slack once a valid Slack integration is in place.
-
Link accounts — Open the Link accounts page to map each Waydev user to their corresponding accounts across connected integrations.
Updated 9 days ago